Gulab Jamun

Gulab jamun.

Gulab jamun is a most popular dessert of India. Its a deep fried milk solid dumpling soaked in rose, cardamom and saffron flavourd sugar syrup.

No idea about why it called gulab jamun. Perhaps for rose flavour sugar syrup. Gulab is rose and jamun is round shaped Asian fruit black plum. What’s in a name. It tastes heavenly.

According to Wikipedia Gulab jamun are a milk-solid-based South Asian sweet, originating in the Indian subcontinent, notably popular in India, Nepal, Pakistan, and Bangladesh, as well as Myanmar.

Making of gulab jamun is so easy. Just mix milk solid and little cottage cheese with refined flour or semolina make small balls and deep fry. Then soak in flavoured sugar syrup. Refined flour or maida and semolina is used for binding. Sometimes it can be made without cottage cheese or with milk powder.

I am sharing the recipe of my mother. She was an excellent cook and loved to make different types of sweets. I remember those days when we kids entered the kitchen at afternoon attracted by the sweet aroma. Our house smell delicious.

Here is a very simple and easy recipe of our all time favourite gulab jamun.
Our this week’s 154 #Foodiemonday bloghop theme is #filmyFoodies.
Sharing this recipe inspired by the movie ‘Gulab Jamun’.
Read a news that entire Bachchan family to star in Anurag Kashyap’s film Gulab Jamun. But Abhishek Bachchan said that they are still in early talks regarding filmmaker Anurag Kashyap’s upcoming production. Let’s wait.
Till then enjoy the Marathi movie gulab jamun and this delicious gulab jamun 😀

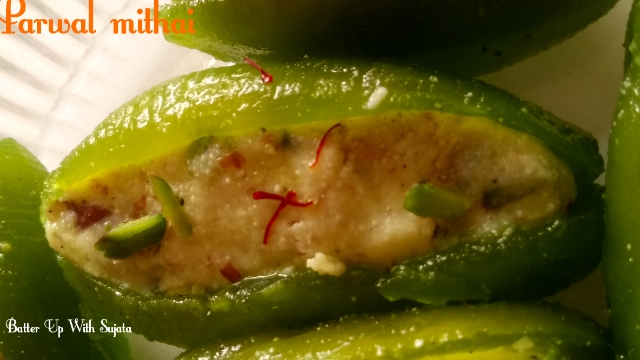
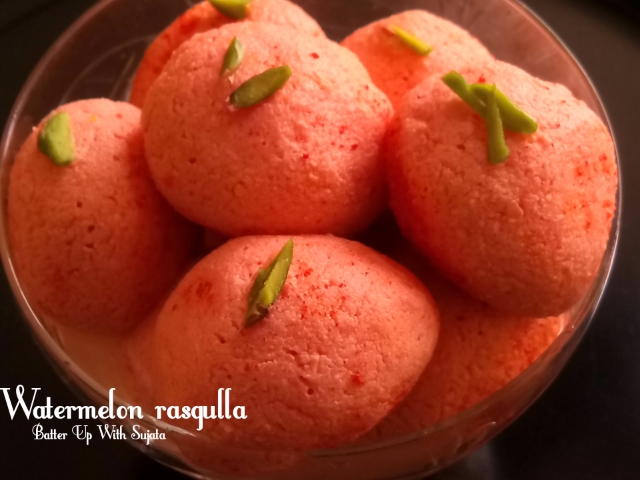
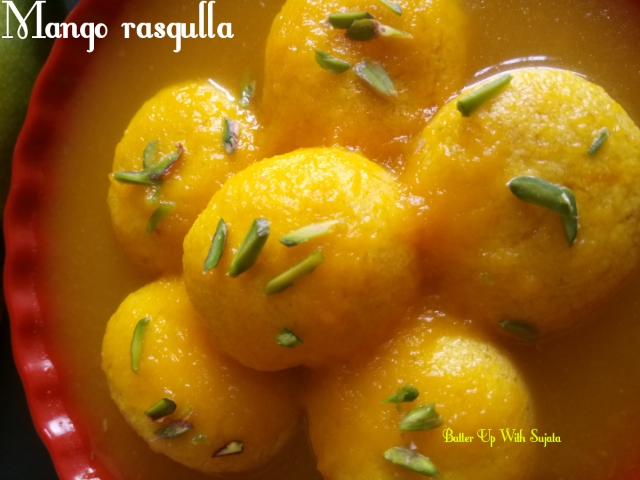
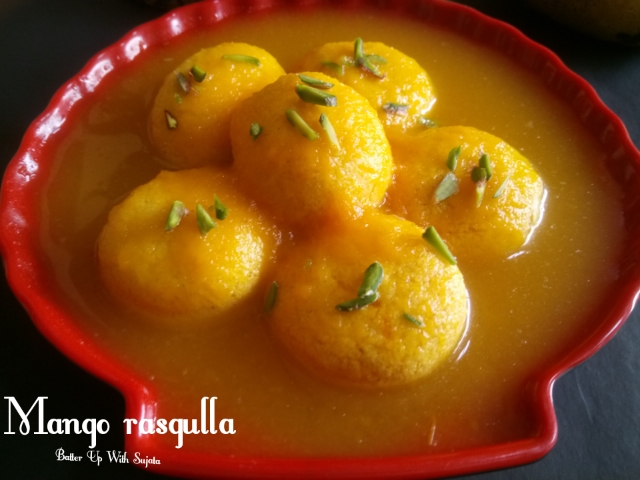
I have shared some more fried dessert here. Click on the name below to get the recipe

Pantua

Malpua

Gokul pithe

Its very easy to make. I have used homemade khoya and paneer in it. You can use store bought. If you are using store bought, grate before mixing. But homemade is always best.

Recipe

Khoya or dried milk/milk solid – 1 cup

Paneer or cottage cheese – 1/4 cup

Baking soda – 1/4 teaspoon

Cardamom powder – 1/4 teaspoon

Maida or refined flour – 2 – 3 tablespoon

Black Cardamom – 1

Mishri/rock sugar or pistachio – as require

Oil for deep frying

For sugar syrup

Sugar – 1 & 1/2 cup

Water – 1 & 1/2 cup

Cardamom powder – 1/4 teaspoon

Saffron – a pinch

Rose water or essence – 1/2 teaspoon

Method

1. In a pan heat water and sugar. Add cardamom powder and saffron.

2. Let it boil. When sugar dissolved completely, simmer for 3 – 4 minutes.

3. Remove from heat. Add rose water or essence. Mix and keep aside.

4. Take out the seeds of black cardamom. Keep aside.

5. Mix khoya or dried milk, paneer, baking soda, 1/4 teaspoon cardamom powder and 2 tablespoon maida or refined flour. Mix well and make a smooth dough. If require add 1 tablespoon more refined flour.

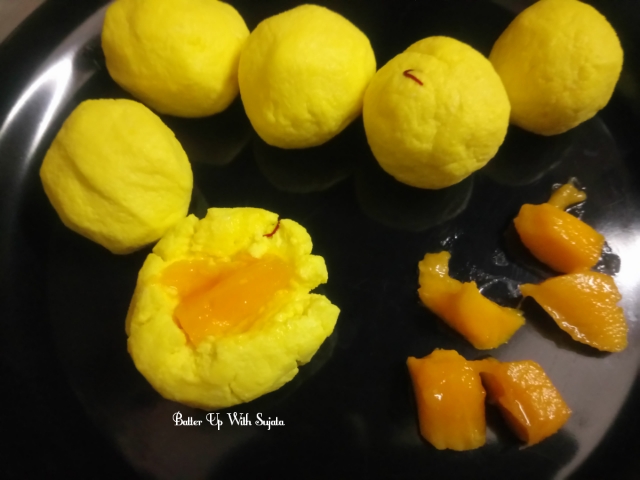
6. Make small balls. Flatten the ball with your palm. Place one black cardamom seed and one mishri/rock sugar or pistachio in the middle. Bring the edges together and make a smooth ball again. There should not be any crack. Make all the balls this way.

7. Heat sufficient oil in a pan or wok. Fry the balls on low flame. Don’t overcrowd. Stir gently to fry all the sides.

8. Don’t increase the heat. Fry on low flame to fry well from inside.

9. When the balls become golden brown, remove from oil and place on paper towel.

10. Heat the sugar syrup again. Add the fried balls in sugar syrup. When it starts to boil switch off the flame.

11. Keep the balls in sugar syrup for 3 – 4 hours.

12. Serve hot. Before serving boil again or microwave on high power for 1 minute.
Garnish with pistachio.

If you tried my recipe, you can share your food pictures with me in the social network sites by using hash tag, #batterupwithsujata
I would love to see your creations.

I would love to hear from you. Please share your thoughts and suggestions in comment.

Please visit my facebook page and hit the like button to get the latest update

Facebook page
Follow on
Twitter

Instagram

Google plus

Dairy Free Mango Pineapple Smoothie

Dairy free mango pineapple smoothie.
A delicious refreshing chilled and filling smoothie for your breakfast.
Its dairy free. Used coconut milk in it. Mixed taste of mango pineapple, coconut milk and a dash of cinnamon made this smoothie super yummy. A perfect drink for fasting days.
And its just three ingredients smoothie. If you don’t like cinnamon then you can omit it. Or you can increase the amount of cinnamon powder if you love the flavour.
Its peak mango season. You can get so many varieties juicy Mangoes or king of the fruit in this season. Yes its called king of the fruit because of its lip smacking taste.

Not only delicious Mangoes are packed with vitamins like A, C, and K. While, good levels of vitamin K are beneficial for our bone health and vitamin A promotes good eye health. … Mango is one of the highest food sources of vitamin C. This vitamin is essential for your immune system.
Source

Pineapples are delicious tropical fruits, which have been celebrated for centuries not only for their unique taste but also for their miraculous health benefits. The health and medicinal benefits of pineapple include boosting the immune system, and respiratory health, aiding digestion and strengthening bones. They also help in reducing inflammation, curing coughs and colds, and accelerating weight loss.
Source

Instead of milk or yoghurt I have used coconut milk in it for a dairy free version. It has also numerous health benefits.
Coconut milk improves Heart Health by Lowering Blood Pressure and Cholesterol. Builds Muscle and Helps Lose Fat. Provides Electrolytes and Prevents Fatigue. Helps Lose Weight. Improves Digestion and Relieves Constipation. Manages Blood Sugar and Controls Diabetes. Helps Prevent Anemia.
Source

So this smoothie is not only delicious, refreshing and filling but its healthy too. You don’t need ice if you are using frozen fruits. But if you have fresh fruits add some ice cubes to make it chilled.

Recipe

Mango – 1 cup, chopped

Pineapple – 1 cup, chopped

Coconut milk – 1 cup

Cinnamon powder – 1/4 to 1/2 teaspoon, optional

Honey or sugar to taste

Sliced almond to garnish

1. Blend mango and pineapple pieces in a mixer grinder.

2. Add coconut milk and blend again.

3. Taste and add honey or sugar to taste. My fruits are too sweet so I didn’t add any sweetener.

4. Add cinnamon powder if using. Blend again.

5. Place some ice cubes in your favorite glass. Pour the mixture over it.

6. Garnish with sliced almond and serve chilled.

Notes

1. You can use any fruit of your choice instead of mango and pineapple.

2. If you don’t like cinnamon then you can omit it and use cardamom or any flavour of your choice.

If you tried my recipe, you can share your food pictures with me in the social network sites by using hash tag, #batterupwithsujata
I would love to see your creations.

I would love to hear from you. Please share your thoughts and suggestions in comment.
Please visit my facebook page and hit the like button to get the latest update
Facebook page

Follow on
Twitter

Instagram

Google plus

Cottage Cheese Or Paneer Stuffed Parwal Mithai Or Pointed Gourd Sweet

Cottage cheese or paneer stuffed parwal mithai or pointed gourd sweet.
Yes sweet again. My last post was a sugar free sweet.
But no its not sugar free. Sugar syrup soaked parwal or pointed gourd stuffed with cardamom flavored paneer/cottage cheese, almond and pistachio mixture. You can imagine the heavenly taste.
I have shared some savoury pointed gourd recipes in this blog.

Pointed gourd with poppy seeds

Stuffed pointed gourd or potol dolma

Pointed gourd with poppy seeds and coconut

And now a sweet one. Contributing this post to 154 #Foodiemonday bloghop #Stuffedveggies theme.

Normally this parwal mithai is stuffed with dried milk or khoya/mawa. But I have used paneer or cottage cheese for stuffing. And taste is better than khoya stuffed parwal mithai. Paneer is easy to digest than khoya.
And this high protein paneer or cottage cheese is a richest source of healthy nutrients.

This sweet is very easy to make. I have used homemade paneer or cottage cheese for stuffing. You can use store bought, just grate or crumble the paneer before cooking. Food colour is optional. I have used it to get bright green colour.

Recipe

Pointed gourd or parwal – 6

Paneer or cottage cheese – 1 cup, crumbled

Milk powder – 3 tablespoon

Sugar – 1 cup + 1/4 cup

Cardamom powder – 1 teaspoon

Rose water or essence – 1/4 teaspoon

Baking soda – a small pinch

Almond – 2 tablespoon

Pistachios – 2 tablespoon, sliced

Little green food colour, optional

Saffron and pistachio to garnish

Method

1. Wash the parwal or pointed gourd well. Peel and cut off the tips from both ends.

2. Cut lengthwise from one side. Parwal should be intact from other side.
Scoop out the pulp and seeds.

3. Grind the almonds into a coarse powder.

4. Heat a nonstick pan. Add Paneer or cottage cheese and 1/4 cup sugar.
Cook on low flame till it dried up.

5. Add 1/2 teaspoon cardamom powder and remove it from heat.
Let it cool down.

6. Mash with hand or blend in mixer grinder to make smooth. I have use my grinder to make it smooth.

7. Add milk powder, ground almond and sliced pistachios. Mix well. Stuffing is ready. Keep it aside.

8. Heat sufficient water in a pan with a small pinch of soda. When it starts to rolling boil add peeled parwal or pointed gourd. Let it boil for 3 – 4 minutes.

9. Switch off the flame.
After 5 minutes drain the water.

10. Heat 1 cup sugar and 1 cup water in a wok or pan. Add green food colour if using. I have used colour to get bright green colour but you can skip it.

11. Stir and when sugar dissolved add the parwal, 1/2 teaspoon cardamom powder and rose water or essence. Cook for 10 – 15 minutes or until the parwal changes it’s colour and becomes soft.

12. Let it cool down completely.
If you want more sweet soak the parwal in sugar syrup for 1 hour.

13. Take out the parwal from sugar syrup and place on a plate.
Be careful, parwal shouldn’t be break.

14. Stuff cottage cheese mixture in the sugar syrup soaked parwal.

15. Garnish with saffron and sliced pistachio.

16. Keep in refrigerator to serve chilled. Or you can serve it immediately.
You can keep in refrigerator for 7 – 8 days.
Enjoy….

Note 

If you want you can make the stuffing with khoya/mawa or dried milk. Just replace khoya with paneer. And follow the same method.

If you tried my recipe, you can share your food pictures with me in the social network sites by using hash tag, #batterupwithsujata
I would love to see your creations.

I would love to hear from you. Please share your thoughts and suggestions in comment.

Please visit my facebook page and hit the like button to get the latest update.

Facebook page

Follow on
Twitter

Instagram

Google plus

Sugar Free Mango Coconut Laddu

Sugar free mango coconut laddu.
Another guilt free treat for you. Its sweetened with dates and mango. You will love the mixed flavors of dates, mango and coconut. Taste and flavour is heavenly so I didn’t add any flavour in it. If you like you can add little cardamom powder or any flavour of your choice.

Its mango season in India. This juicy delicious mango called king of fruits for its taste.
Not only taste mango has numerous health benefits.
1. Prevents Cancer. Research has shown antioxidant compounds in mango fruit have been found to protect against colon, breast, leukemia and prostate cancers.
2. Lowers Cholesterol. …
3. Clears the Skin. …
4.Improves Eye Health. …
5.Alkalizes the Whole Body. …
6.May Help with Diabetes. ..
7.Improves Digestion.
8.Helps Fight Heat Stroke
9. Boosts the Immune System
Mango fruit also has a relatively low glycemic index so moderate quantities will not spike your sugar levels.
Source – TheGuardian

So date, coconut and mango not only makes these laddu delicious but healthy too. Its also a perfect treat for weight watchers.
You can get some more sugar free recipes here.

Sugar free date Sandesh

Sugar free sheer khurma

Coconut raisin almond laddu

Sugar free mawa nariyal peda

Sugar free pineapple Sandesh

Sugar free carrot bottle gourd fudge or barfi

Sugar free carrot cake

Recipe is very easy and simple. Make it and enjoy with your family and friends. Dates and mango gives enough sweetness so you don’t need to add any artificial sweetener. Enjoy the soft and yummy guilt free laddu.

Video recipe of delectable laddu

Recipe

Paneer or cottage cheese -3/4 cup

Khoya or dried milk – 3/4 cup

Mango – 1 cup, chopped

Desiccated coconut – 1/2 cup

Date – 1/2 cup, chopped

Hot water – 3 tablespoon

Desiccated coconut for rolling

Method

1. Soak the dates in 3 tablespoon hot water for 15 – 20 minutes.

2. Blend the soaked dates in mixer grinder. Don’t discard the water, add it to grind easily.

3. Add chopped mango and desiccated coconut. Blend again into a smooth mixture.

4. Now add paneer or cottage cheese and khoya or dried milk. Blend again until smooth.

5. Taste the sweetness. If your mango is not enough sweet then you can add some more soaked dates.

6. Heat a nonstick or heavy bottom pan. Add the mixture and cook on low flame till it dried up completely. Stir continuously to avoid sticking at the bottom.

7. Remove from heat and let it cool down. Mash it with your hand to make smooth.

8. Make small round balls.

9. In a plate spread desiccated coconut. Roll the balls over it.

10. Serve immediately or keep in refrigerator for later.

Enjoy the heavenly taste of guilt free delicious laddu.
Happy cooking!!

Notes

1. If your mongo is not enough sweet then you can add some more soaked dates.

2. If you want you can add little cardamom powder.

If you tried my recipe, you can share your food pictures with me in the social network sites by using hash tag, #batterupwithsujata
I would love to see your creations.

I would love to hear from you. Please share your thoughts and suggestions in comment.

Please visit my facebook page and hit the like button to get the latest update

Facebook page
Follow on
Twitter

Instagram

Google plus

Chutney Idli

Chutney idli.
A delicious soft steamed breakfast dish made with semolina or suji and coriander or cilantro chutney ingredients. You can serve it with any chutney or dip. But its taste great without anything. So it can be serve as snack.

Normally idli batter need to be fermented.
According to Wikipedia Idli or idly are a type of savoury rice cake, popular as breakfast foods throughout India and northern Sri Lanka. The cakes are made by steaming a batter consisting of fermented black lentils (de-husked) and rice. The fermentation process breaks down the starches so that they are more readily metabolized by the body.
But you don’t have to soak, grind and ferment to make these idli.

A quick and easy to make idli. Just mix roasted semolina and chutney ingredients. Wait for only 10 – 15 minutes and steam. Delicious, soft and fluffy idli will be ready in few minutes.
And because of semolina its healthy too. Have a look on the health benefits of semolina or suji.
Helps Diabetics: …
Helps In Weight Loss: …
Provides Energy: …
Provides Balance To Diets: …
Boosts Body Functions: …
Prevents Iron Deficiency: …
Provides Antioxidants: …
Prevents High Cholesterol.
Source

Now coming to the recipe. I don’t like garlic much so I didn’t use it. But if you love garlic flavour then you can add 1 – 2 cloves garlic while grinding the cilantro and mint leaves.
You can use more lemon juice if you want your idli tangy.

Recipe

Semolina or suji – 1 cup

Curd – 1/2 cup

Salt to taste

Cumin powder – 1 teaspoon

Chaat masala powder – 1 teaspoon

Lemon juice – 2 teaspoon

Ginger – 1/2 inch piece

Green chilli – 1 – 2

Cilantro or coriander leaves – 1 cup

Mint leaves – 1/2 cup

Rai or mustard seeds – 1 teaspoon

Curry leaves – 10 – 12, chopped

Oil – 1 tablespoon

Eno – 1 teaspoon

Method

1. Heat oil in a pan. Add rai or mustard seeds and let it splutter. Add curry leaves, stir and add semolina or suji. Fry for 2 – 3 minutes. Don’t make the semolina brown. Semolina shouldn’t change it’s colour.

2. Remove from heat and let it cool down.

3. Whisk the curd and keep aside.

4. Grind cilantro or coriander leaves, mint leaves, ginger and green chilli altogether. Make a smooth paste with little water.

5. In a large bowl mix roasted semolina, curd, salt, cumin powder, chaat masala powder and ground mixture. Add water as require to make a semi thick mixture. Make a pouring consistency. Cover and keep aside for 10 – 15 minutes.

6. After 10 – 15 minutes check the consistency if it too thick add little more water to get the required consistency.

7. Grease the idli mould.
Heat water in a steamer.

8. Just before steam add eno and give a good stir.

9. Pour the batter in greased idli moulds.

10. Steam for 12 – 15 minutes or until the toothpick comes out clean.

11. I have made these in microwave. If you are using microwave steam it on full power for 6 minutes.

12. Serve hot idli with peanut chutney, onion tomato chutney or dip.
You can get the recipe of peanut chutney here.

And get the recipe of onion tomato chutney here.

Notes

1. You can add 1 – 2 garlic cloves while grinding coriander mint leaves if you want.

2. You can use more lemon juice if you like your idli tangy.

3. Use chillies according to your taste. You can add 1 – 2 chilli more if you like your idli spicy. Or you can omit chilli if you are making it for kids.

I would love to hear from you. Please share your thoughts and suggestions in comment.
Please visit my facebook page and hit the like button to get the latest update.

Facebook page

Follow on
Twitter

Instagram

Google plus

Iced Green Tea With Orange And Mint

Iced green tea with orange and mint.
Weather is too hot these days. We want some refreshing drink to stay hydrated and feel energized. So here is a delicious refreshing chilled drink . Make and keep it in refrigerator and enjoy whenever you feel low.

I have used orange juice but you can use watermelon, grape juice, pomegranate juice, mixed fruit juice or any other fruit juice of your choice. If you are using sugar use sugar syrup. Because sugar takes more time to dissolve. Or you can use honey or any artificial sweetener.

Our this week’s 153 #Foodiemonday bloghop theme is tea. And my humble contribution is this chilled refreshing iced green tea with orange mint and cinnamon.

I don’t like milk tea. Love black or green tea without milk and very little sugar. But in this hot weather refreshing and chilled iced tea is a good option to cool us down. So get ready to beat the heat.
Flavour of orange, lemon and cinnamon made this drink super yummy. Just add lots of ice cube and enjoy.

Recipe

Orange juice – 1 cup

Green tea – 2 bags

Mint leaves – a fistful, Finley chopped

Cinnamon powder – 1/2 teaspoon

Water – 2 cup

Lemon juice – 1 & 1/2 tablespoon

Sugar syrup or honey to taste, optional

Ice cubes – as require

Few mint leaves and lemon wedges to garnish

Method

1. Boil 2 cup water. Remove from heat and tea bags and cover for 10 minutes.

2. Now add chopped mint leaves and cinnamon powder.
Stir and let it cool down completely.

3. Keep it in refrigerator for at least least 2 hours or until chilled. Squeeze and discard the tea bags.

4. Strain the mint mixed tea with a sieve.

5. Add orange juice and lemon juice. Add sugar syrup or honey to taste.
If you like light sweetness omit sugar.

6. In a glass place some ice cubes and few mint leaves.
Pour iced tea over it.

7. Garnish with lemon wedge.
Serve chilled.

Notes

1. If you don’t like cinnamon then you can omit it.

2. You can also make it with black tea instead of green tea.

3. You can use watermelon, grape juice, pomegranate juice, mixed fruit juice or any fruit juice of your choice instead of orange juice.

4. You can use artificial sweetener instead of sugar syrup or honey.

If you tried my recipe, you can share your food pictures with me in the social network sites by using hash tag, #batterupwithsujata
I would love to see your creations.

I would love to hear from you. Please share your thoughts and suggestions in comment.

Please visit my facebook page and hit the like button to get the latest update

Facebook page

Follow on
Twitter

Instagram

Google plus

Soya Chunks Or Soya Nugget Korma

Soya chunks or soya nugget korma.
Gravy is smooth and finger licking taste. Enjoy the delicious,and protein rich korma with any bread, paratha, puri, naan, pulao or steamed rice.

I have used mini soya chunks but you can use any nuggets or chunks.

Soya nugget or chunks are full of protein. So Its a perfect protein source for vegetarian people.
You can get some more soya recipes here.

Soya egg shami kabab

Soya loaf

Soya paneer lollipop

Protein rich soya nugget or chunks

Soya kofta balls in gravy

Oats soya green gram toast

Soya chunks are meat substitute i.e. even vegetarians can have them for consuming a good amount of protein.
Apart from a large amount of protein content, they are also high in carbohydrates. A 100-gram serving of soya chunks contains 52g of protein and 33g of carbohydrate. It also contains iron and calcium along with little fat. A 100g serving of soya chunk has approximately about 336 calories. They are rich in Omega-3 fatty acids and Vitamin B. Soya Chunks are heart-healthy food because they are low in cholesterol.
Source

Soya chunks or soya nugget are cooked in spicy aromatic gravy. cashew and almond made the gravy creamy and thick. You will love the smooth texture of gravy. And taste is too good.

Recipe

Soya chunks – 1 cup, soaked in 3 cup hot water

Onion – 2, sliced

Ginger – 1 inch piece, grated or chopped

Garlic – 4 – 5

Tomato – 2, chopped

Green chilli – 2 – 3, chopped

Green cardamom – 3

Cloves – 3 – 4

Cinnamon – 1 inch piece

Mace – 1 strand

Bay leaf – 1

Cumin powder – 1 teaspoon

Coriander powder – 1 teaspoon

Turmeric powder – 1/4 teaspoon

Garam masala powder – 1/2 teaspoon

Kashmiri red chilli powder – 2 teaspoon

Almond – 2 tablespoon

Cashew nuts – 2 tablespoon

Coconut milk – 1 cup

Water – 1 cup

Oil – 4 tablespoon

Method

1. Soak soya chunks in 3 cup hot Water for 15 – 30 minutes.

2. Squeeze well and wash .squeeze again and set aside.

3. Soak almond and cashew nuts in warm water. Peel the almond.

4. Heat 2 tablespoon oil in a pan. Add green cardamom, cloves, cinnamon, bay leaf and mace.
Fry till fragrant.

5. Add sliced onion, garlic, ginger and green chilli.

6. When the onion becomes light brown add tomatoes, soaked cashew nuts and almond. Saute until tomatoes becomes mushy.

7. Let it cool down and grind into a smooth paste.

8. Heat remaining 2 tablespoon oil in a pan. Add the ground mixture and cumin powder, coriander powder, turmeric powder garam masala powder and kashmiri red chilli powder.

9. Saute till oil leaves the side.
Add soya chunks and salt. Mix well and saute till it dried up.

10. Add coconut water and water. Let it boil.

11. Cover and cook on simmer for 10 – 15 minutes.

12. Taste and adjust the seasoning. Cook on high flame till you get your desired consistency. You can add little more water if require.

13. Remove from heat.
Garnish with cilantro or coriander leaves and peeled almond.

14. Serve with roti or Indian flat bread, paratha, puri, naan, pulao or steamed rice.
Happy cooking!!

NOTES

1. You can use chilli according to your taste. You can add more green chilli or hot variety red chilli powder to make it more spicy.

2. I have used mini soya chunks but you can use any soya chunks or nugget.

If you tried my recipe, you can share your food pictures with me in the social network sites by using hash tag, #batterupwithsujata
I would love to see your creations.

I would love to hear from you. Please share your thoughts and suggestions in comment.
Please hit the like button to get latest update

Facebook page

Twitter

Instagram

Google plus

Beetroot Shot With Mint Lemon And Black Salt

Beetroot shot with mint, lemon and black salt.
Chilled beetroot shot is a perfect drink to beat the heat. And we all know that beetroot is a very nutritious vegetable.

Beetroot is low in fat, full of vitamins and minerals and packed with powerful antioxidants. And it contains potassium, magnesium, iron, vitamins A, B6 and C, folic acid, carbohydrates, protein, antioxidants and soluble fibre. Not only that beetroot nutrition can also make your skin glow.

I recently joined a facebook group A to Z recipe challenge. Created by Jolly and Vidya. Every alternate month we have to make a post. I have missed first theme challenge. Alphabet of this month is B. And I am sharing this chilled beetroot shot for this theme.

I have used raw beetroot to make it. Because I love the sweetness of raw beetroot. Not only that.
Beet juice is known as a blood purifier due to its antioxidant and detoxification properties. Consuming beets increase your body’s production of glutathione, which
helps your body detoxify by grabbing numerous toxins and pulling them into the colon, where they are evacuated. Beet juice might also improve the composition of blood by stimulating red blood cell production, improve stamina, dissolve kidney stones and reduce blood pressure, according to “Superfoods: The Healthiest Foods on the Planet.”
Betalains and some other nutrients are reduced in cooked beets because they are sensitive to heat, according to “Nutritional Sciences for Human Health.” As cooking time and temperature increase, betalains and vitamin C content steadily decreases.
Source

I have used mint, ginger, lemon, black salt and pepper in it. These ingredients made this juice delicious. Add some ice cubes and enjoy the healthy and delicious beetroot shot chilled.

Recipe

Beetroot – 1 medium

Grated ginger – 1/2 teaspoon

Mint leaves – 8 – 10

Lemon zest – 1/4 teaspoon

Black salt – 1/2 teaspoon

Black pepper powder – 1/4 teaspoon or to taste

Water – 1/2 cup

Lemon juice – 1 & 1/2 tablespoon

Ice cube – as require

Method

1. Blend grated or finely chopped beetroot with water, mint leaves, lemon zest and ginger in a mixer grinder or food processor.

2. Strain the juice with a strainer or sieve.

3. Add lemon juice, black salt and pepper.

4. Mix well. Taste and adjust the seasoning.

5. Place some ice cube in the shot glass. Pour the juice over it.

6. Garnish with lemon wedges and serve chilled.

Enjoy….
Stay healthy stay happy 😊

Notes

1. Use black pepper powder according to your taste. If you don’t like pepper you can omit it.

2. If you don’t have black salt then you can use rock salt or any other salt but black salt tastes better.

3. If you don’t like raw beetroot then you can boil the beetroot with skin and then peel chop and blend as mentioned above.

If you tried my recipe, you can share your food pictures with me in the social network sites by using hash tag, #batterupwithsujata
I would love to see your creations.

I would love to hear from you. Please share your thoughts and suggestions in comment.

Please visit my facebook page and hit the like button to get the latest update
Facebook page

Follow on
Twitter

Instagram

Google plus

Korean Rice Or Korean Egg Fried Rice

Korean rice or Korean egg fried rice.
Quick and easy to make one pot meal. If you have cooked rice ready then you can make it in a jiffy. You can use your leftover rice. Just fry the rice with egg, soya sauce, salt and pepper. And your delicious egg fried rice is ready.

Tasted it in a restaurant and loved the taste. It was a simple rice dish, no vegetable added but taste is awesome.

When our this week’s 152 #Foodiemonday bloghop members decided the theme Asian cuisine this Korean rice came first in my mind.
Browsed for the recipe and found the recipe of breakfast egg fried rice from My Korean Kitchen.
Loved the recipe. Very few ingredients, simple and easy recipe. So no more search, adapted the recipe. Tried and really happy with the taste.

You can add any vegetables like scallions, bell pepper, garlic etc.
But I love it simple only with eggs and soya sauce.

Recipe credit – My Korean Kitchen

Recipe

Cooked short grain rice – 2 cup

Egg – 2 +1

Soya sauce – 2 tablespoon

Salt to taste

Black pepper powder to taste

Oil – 1 tablespoon +1 teaspoon

Salt and red chilli flakes to sprinkle

Method

1. Heat 1 teaspoon oil in a wok or pan. Break an egg in the middle.

2. Cover and cook on low flame till set. Take out the egg on a plate. Sprinkle little salt and red chilli flakes and keep aside.

3. In the same wok heat remaining oil and break 2 eggs in it. Stir and add the cooked rice and soya sauce.

4. Mix well. Stir it for 1 – 2 minutes.

5. Top with the egg we fried and sprinkled with salt and red chilli flakes.
Serve hot.


Note

You can use 1 – 2 more eggs if you like

If you tried my recipe, you can share your food pictures with me in the social network sites by using hash tag, #batterupwithsujata
I would love to see your creations.

I would love to hear from you. Please share your thoughts and suggestions in comment.
Please visit my facebook page and hit the like button to get the latest update
Facebook page

Follow on
Twitter

Instagram

Google plus

Mango Rasgulla Or Aam Rosogolla

Aam rosogolla or mango rasgulla.
Rasgulla is a popular dessert made with ball shaped paneer/chhena or cottage cheese dumplings cooked in light sugar syrup. And I flavoured it with mango. Mango flavour made these rasgulla more delicious.

I have already shared watermelon rasgulla. Click on the picture to get the recipe of watermelon rasgulla.

You can also get some more mango flavoured sweets here.

Mango sandesh

Mango kalakand

Mango cheesecake

Mango litchi fudge or barfi

Mango steamed sandesh or aam bhapa sondesh

Recipe is same as we make rasgulla just add mango puree with sugar syrup. And I stuffed the rasgulla with small pieces of mango. I have used saffron and little yellow food colour in the rasgulla. You can omit the colour and add a fat pinch of saffron to add colour in the rasgulla.

Recipe

Milk – 1 litre

Lemon juice or vinegar -3 – 4 tablespoon or as require

Sugar – 1 cup

Water – 4 cup

Finely chopped mango – 1 cup

Small mango pieces – 6

Saffron – a pinch

Yellow food colour – 1 – 2 drop, optional

Method

Please read all the tips and tricks to make perfect rasgulla here.

1. Place a cheesecloth on a strainer.

2. Heat milk in a heavy bottom pan. When it starts to rolling boil remove from heat. Add lemon juice or vinegar.
Add 1 tablespoon at a time. Stir and add 1 tablespoon more or as require to curdle the milk completely.

3. When greenish whey and cottage cheese separates immediately pour into the strainer. If you boil further after curdling your cottage cheese and rasgulla will be hard.

4. Wash the paneer under running water or dip the cheesecloth in a bowl filled with cold water. Wash the cottage cheese well to remove the smell of vinegar or lemon.

5. You can make cottage cheese with curd in same method. First add 1/4 cup curd then add as require. It will depends on the milk. You need 1/4 to 1/2 cup curd to make cottage cheese.

6. If you are making cottage cheese with curd then no need to wash much. Just deep in cold water to stop further cooking.

7. Squeeze the cloth well to drain all the water from cottage cheese.
Remove the cottage cheese on a large dry cloth. Wrap well and put a heavy weight on it for 2 hours.

8. Take out the cottage cheese or paneer on a large plate. Add saffron and food colour if using.

9. Mash with your finger tips and heel of your palm. Mash till your palm becomes greasy. Its for spungy rasgulla but if you like soft rasgulla, then you don’t need to mash or knead much. Just mash till the cottage cheese becomes smooth.

10. Make small balls. These will become double. I have made 6 rasgulla out of this cottage cheese. Flatten the balls and place a mango piece in the middle.

11. Close the edges and make smooth ball again.

12. There shouldn’t be any crack on the balls.
Press the balls between your fingers and palm tightly to make crack free balls.

13. Make round ball using your both palm. Make all the balls.

14. In a large and broad pan heat 1 cup sugar and 3 cup water.
Blend the mango pieces with 1 cup water and add in the sugar syrup.

15. When sugar dissolved and it starts to rolling boil add the cottage cheese balls one by one. Let it boil on full flame from 2 – 3 minutes.

16. Cover and cook on medium high heat for 20 minutes.

17. After 20 minutes switch off the heat. Keep it covered for 3 – 4 hours or until completely cool down.

18. You can keep these in refrigerator for 5 – 6 days.
Serve chilled or at room temperature.

Notes

1. You can also add a pinch of saffron in the sugar syrup.

2. Read all the tips and tricks to make perfect rasgulla.

Enjoy the delicious mango flavoured rasgulla.
Happy cooking and have a wonderful weekend 😊

If you tried my recipe, you can share your food pictures with me in the social network sites by using hash tag, #batterupwithsujata
I would love to see your creations.

I would love to hear from you. Please share your thoughts and suggestions in comment.
Please visit my facebook page and hit the like button to get the latest update
Facebook page
Follow on
Twitter

Instagram

Google plus