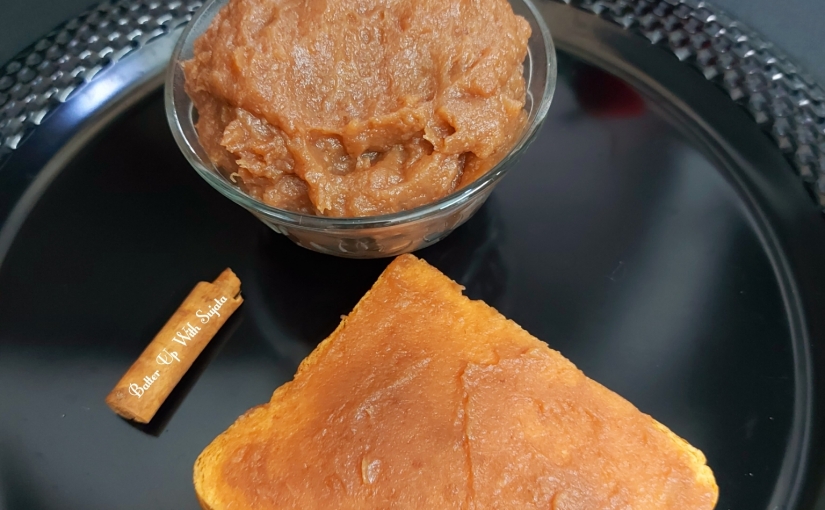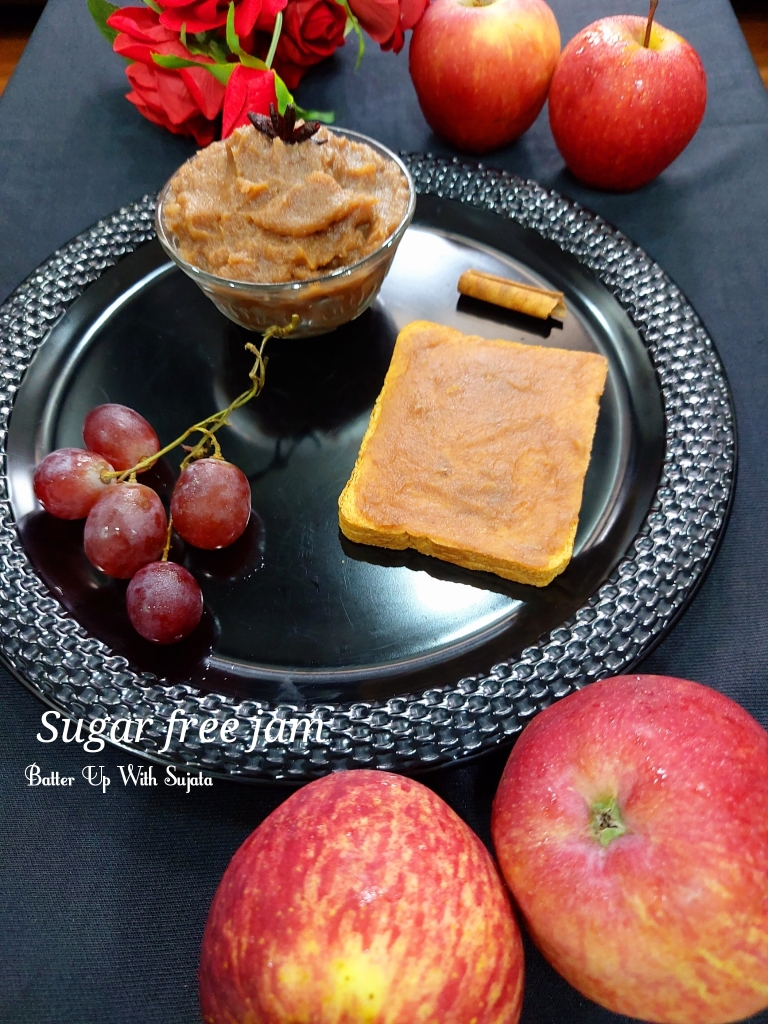
Healthy Apple And Grape Jam/Sugar free Jam

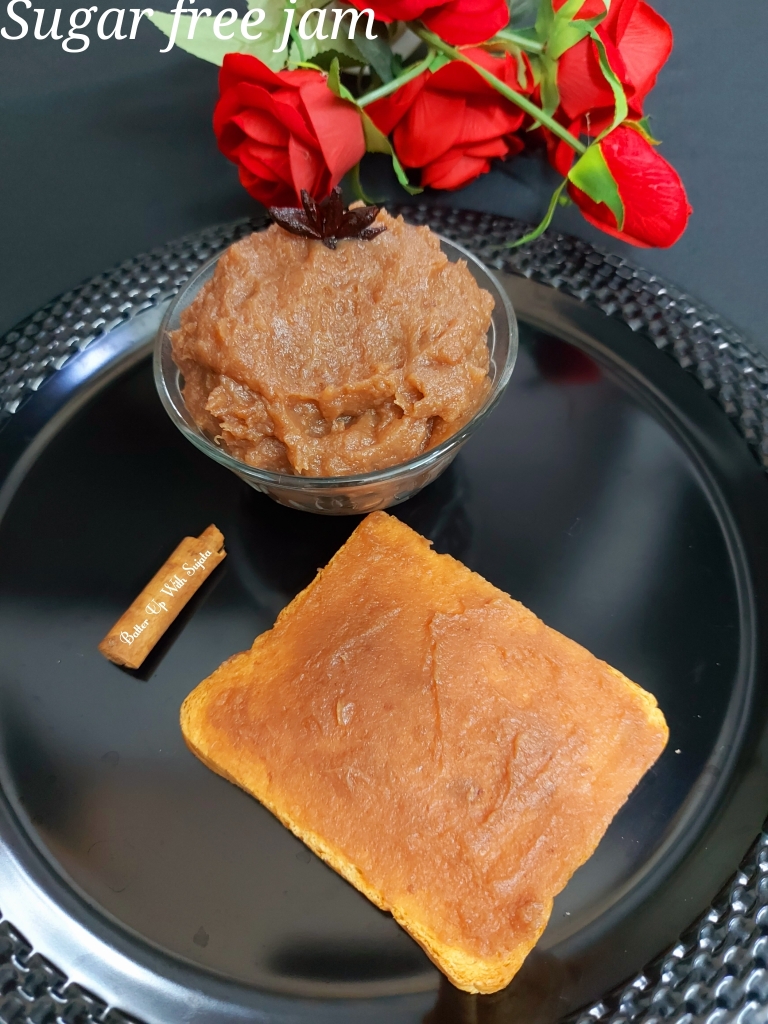
Sugar free jam. Surprised right? Yes this delicious apple and grape jam is absolutely sugar free. But taste is scrumptious. Spread this guilt free jam on your toast or enjoy with any bread. I am sure you will love the taste and flavour. 

This apple and grape jam is sweetened with dry date powder. As we all know that dates are highly nutritious. And aroma of star anise and cinnamon gives a lovely flavour to the jam. So its a perfect treat for kids and adults both. Health conscious people can enjoy this delicious fruit jam without any guilt. But remember enjoy the delectable taste of this jam but everything should eat in moderation. 
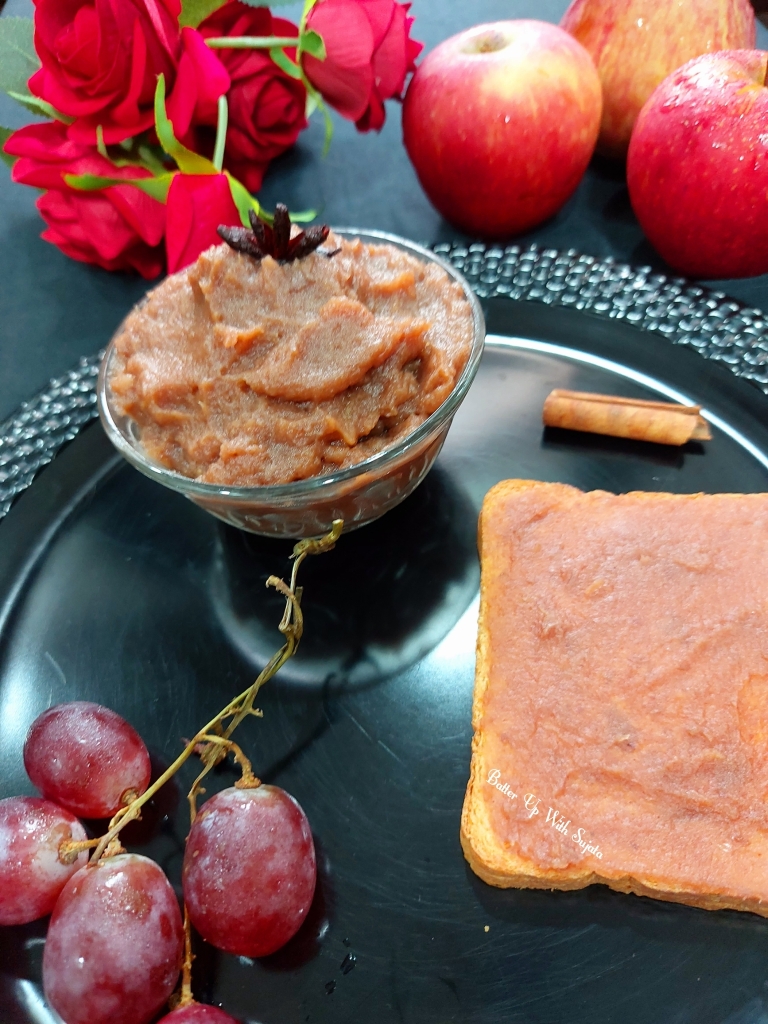
We need only apple, red grape, cinnamon, star anise, lemon juice and dry date powder to make this delicious and healthy jam. Not only elders but let your children enjoy this healthy treat. 

Dates are a very healthy fruit to include in your diet. They are high in several nutrients, fiber and antioxidants, all of which may provide health benefits ranging from improved digestion to a reduced risk of disease. It’s easiest to find dates in their dried form, though these are higher in calories than fresh fruit so it is important to eat them in moderation. Dates are definitely worth adding to your diet, as they are both nutritious and delicious.

8 Proven Health Benefits of Dates

• Very Nutritious. Share on Pinterest

• High in Fiber. Getting enough fiber is important for your overall health.

• High in Disease-Fighting Antioxidants.

• May Promote Brain Health.

• May Promote Natural Labor.

• Excellent Natural Sweetener.

• Other Potential Health Benefits.

• Easy to Add to Your Diet.

Source – Healthline

I am a member of a blogger group Shhhhh Cooking Secretly Challenge. Every month we share recipes using two secret ingredients given by our partners. This month theme is jam and jelly suggested by Preeti Tandon Shridhar. Preeti who blog at Cakes and curries shared this delicious recipe..

This month my partner is Mayuri Patel who blog at Mayuris Jikoni gave me cinnamon and date powder as secret ingredients. And I gave her lemon juice and cardamom. Mayuri shared this nutritious and tasty Watermelon rind jam with these ingredients.

As I mentioned above diet conscious people can enjoy this delicious jam with breakfast but everything we should eat in moderation. 1-2 spoon jam is okay in breakfast to satisfy your sweet craving.  You can use lemon juice according to your taste. And use any grape if you don’t have red grape. We are using dry date powder so textures will be little different from jam made with sugar. You can also use any fruit of your choice.

Subscribe with your mail address to get all the recipes straight to your mailbox immediately after publishing.

Video recipe of this healthy and delicious jam

Recipe

Apple – 3 

Grapes – 1 cup 

Star anise – 1

Cinnamon – 1 stick 

Dry date powder – 1/3 cup 

Lemon juice – 1 tablespoon 

Water – 1 cup 
Method

1. Wash the apples and grapes well. Peel deseed and chop the apples into small pieces. 

2. Chop the grapes into 4 pieces. Discard the seeds. 

3. Heat a pan and add add chopped apples and grapes, star anise, cinnamon and 1 cup water.

4. When it starts to rolling boil reduce the heat. Cover and cook on simmer for 5 minutes.  Remove the cover and stir well.

5. Cook on high heat for 5 minutes uncovered. Keep stirring to avoid spilling. You can reduce the flame in-between. Watch video recipe for detailed method. 

6. After 5 minutes switch off the heat. Let it cool down.  Remove the star anise and cinnamon when cool.

7. Now blend into a smooth paste.  Heat a pan and add the paste. Add cinnamon and star anise again. Add dry date powder and mix everything well.

8. Taste the mixture when it starts to become thick. Add more dry date powder if required. It depends on the sweetness of grapes and apples. Mine was perfectly sweet with 1/3 cup date powder. 

9. Cook till mixture becomes thick and starts to leaving the sides of the pan.  When mixture thickened switch off the heat and let it cool down. 

10. Add lemon juice and mix. Add half lemon juice if you don’t want your jam tangy. I have used 1 tablespoon for a lovely sweet and tangy taste.  Now finally remove the star anise and cinnamon. Store the jam in a sterilized jar.

Notes

1. You can use any fruit of your choice.

2. Cinnamon powder can be used instead of cinnamon stick.

  If you tried my recipe, you can share your food pictures with me in the social network sites by using hashtag, #batterupwithsujata.

I would love to hear from you. Please share your thoughts and suggestions in comment. 

Please visit my facebook page and hit the like button to get the latest update 

Facebook

Follow on 

Twitter

Instagram

Pinterest

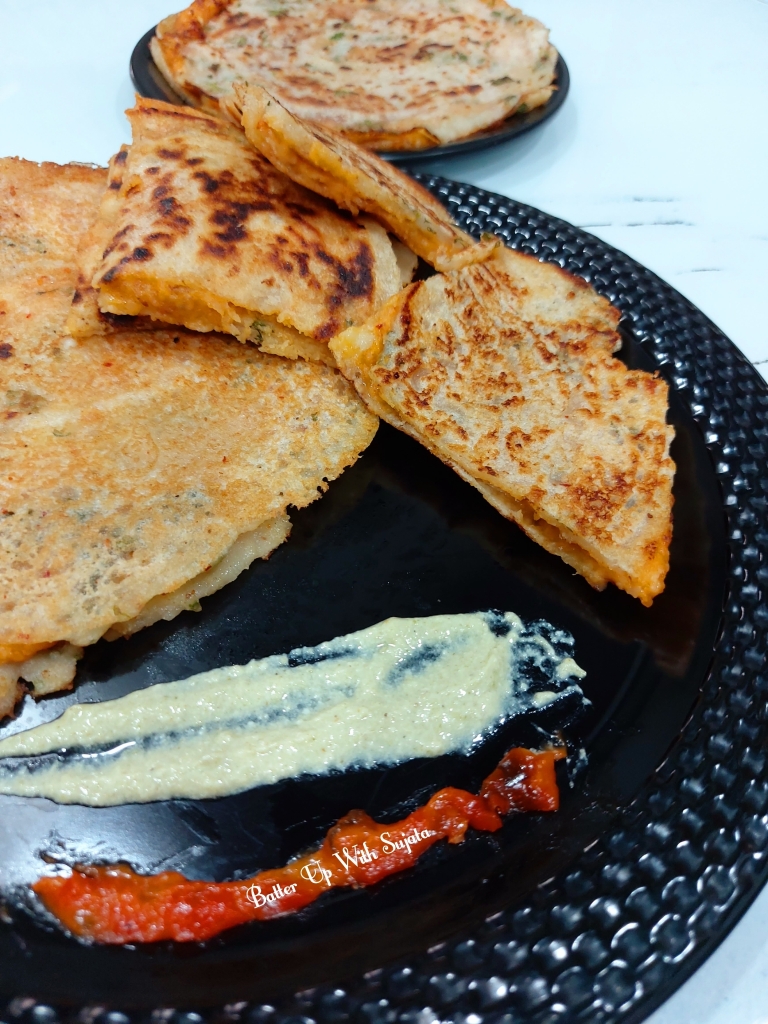
Semolina Or Suji Quesadilla

Semolina or suji quesadilla. You can name it Indian style quesadilla. Quesadilla is a Mexican dish made of tortilla. But here is a breakfast Quesadilla made with suji pancake or our humble suji chilla. A perfect kids friendly breakfast dish. You can make any veg or non veg stuffing instead of potatoes with lots of cheese. Kids will love the taste. 

A quesadilla is a Mexican dish consisting of a tortilla that is filled primarily with cheese, and sometimes meats, spices, and other fillings, and then cooked on a griddle or stove. Traditionally, a corn tortilla is used, but it can also be made with a flour tortilla. A full quesadilla is made with two tortillas that hold a layer of cheese between them. A half is a single tortilla that has been filled with cheese and folded into a half-moon shape. Wikipedia

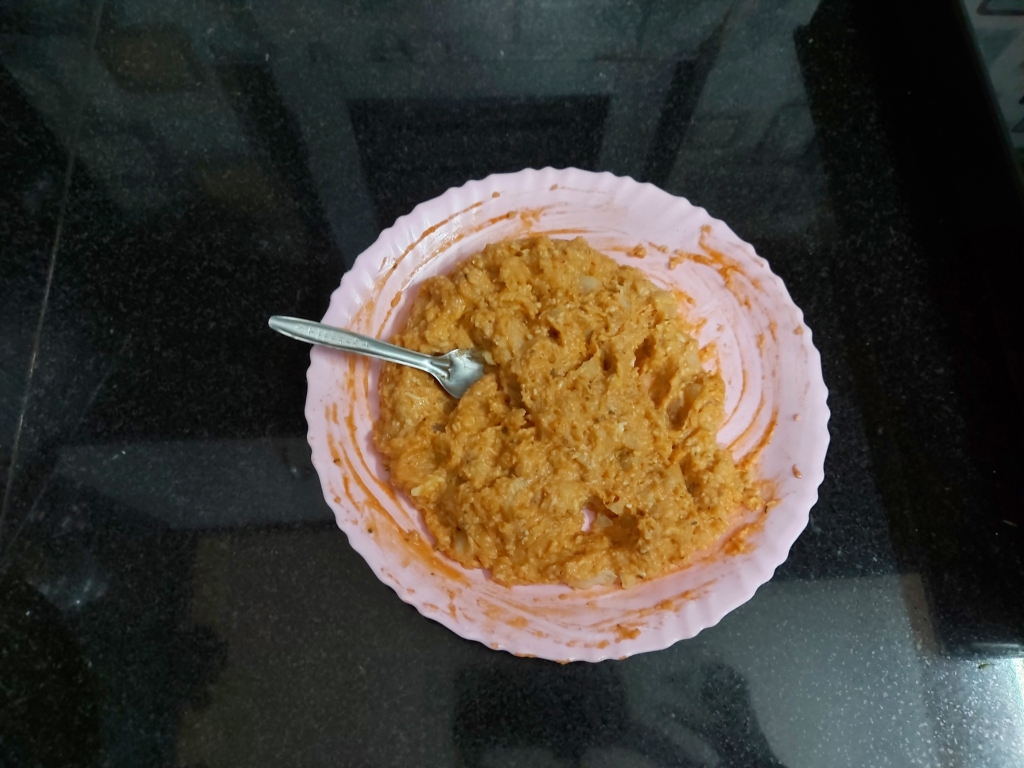
As I mentioned above you can make any filling of your choice. I have made a creamy stuffing with boiled potatoes, mayonnaise, some sauce, oregano and cheese. You can use any herbs and lots of mozzarella cheese. Your kids will love the taste. You can also use grated vegetables or paneer in the stuffing. You can also use any sauce of your choice instead of pizza sauce.

I like the taste of sriracha sauce but if you don’t have sriracha sauce then you can use any chilli garlic sauce. You can also use leftover roti instead of suji chilla. See the video recipe below of this roti quesadilla. 

Subscribe with your mail address to get all the recipes straight to your mailbox immediately after publishing.

Watch the video recipe below

Recipe

For stuffing

Potato- 4 medium, boiled 

Mayonnaise – 1/3 cup 

Pizza sauce – 3 tablespoon 

Oregano – 1 teaspoon 

Tomato sauce – 2 tablespoon 

Sriracha sauce – 1 tablespoon 

Cheese cube – 2

Salt – 1/4 teaspoon or to taste 

For chila or pancake 

Semolina or suji – 1 cup

Rice flour – 1/2 cup

Curd or yogurt – 1/2 cup 

Salt to taste 

Chilli flakes – 1/2 teaspoon 

Cilantro or coriander leaves – 2-3 tablespoon, chopped 

Water – 1 cup 

Oil as required 

Cheese slices or mozzarella cheese as required 

Method

1. In a large bowl mix suji or semolina, rice flour and curd or yogurt. Add water slowly and mix well. Don’t add entire water in one go. Add 1/4 cup at a time. Mix everything well and make a lump free smooth batter.

2. Now add salt, chilli flakes and chopped cilantro or coriander leaves. Mix well. Cover the bowl and keep aside. 

3. Peel and grate the potatoes. Grate the cheese cubes and mix with potatoes. You can use more cheese cubes if you want.

4. Add salt, oregano, sriracha sauce, mayonnaise, tomato ketchup and pizza sauce. Mix well. Your stuffing is ready.  Taste and adjust the seasoning. Add little more sauce and mayonnaise if required. Add less or more sauce according to your taste.

5. You can use any chilli garlic sauce if you don’t have sriracha sauce. You can add finely chopped onion in potato mixture if you want. You can also make sandwiches with this potato mixture. 

6. Heat a pan or skillet. Brush with little oil. Pour a ladle full of batter in the middle. Spread with the back of the ladle by rotating. Reduce the heat and cook on low heat.  Drizzle little oil on the sides.

7. When the edges becomes brown flip the chila upside down and fry the other side too. Remove the chilla or pancake on a plate. Make one more pancake like this.

8. Spread potato mixture all over the pancake.   Spread small pieces of cheese slice over the potato mixture. You can also use grated mozzarella cheese. Use as much cheese as you like.

9. Place another pancake over it and flip carefully. Drizzle little oil on the sides. Press gently with a spatula. Fry both the sides till golden brown.  Remove on a plate and cut into four pieces with a knife or pizza cutter.  Serve hot with any sauce.

10..You can also use leftover roti instead of chilla or pancake to make this delicious Indian style quesadilla.  Do you have any leftover stuffing? Make sandwiches with it. It will be a delicious sandwich filling.

Notes

1. You can use any flour in chilla or pancake. But don’t skip rice flour. Rice flour will make your quesadilla crisp.

2. You can use any sauce of your choice in stuffing.

3. Grated carrot, capsicum, bell peppers, boiled sweet corn or any vegetable or paneer can be used in stuffing.

4. If your kids love cheesy stuffing then add more cheese. Use as much cheese as you like.

If you tried my recipe, you can share your food pictures with me in the social network sites by using hashtag, #batterupwithsujata I would love to see your creations.

I would love to hear from you. Please share your thoughts and suggestions in comment.

Please visit my facebook page and hit the like button to get the latest update

Facebook page

Follow on
Twitter

Instagram

Pinterest

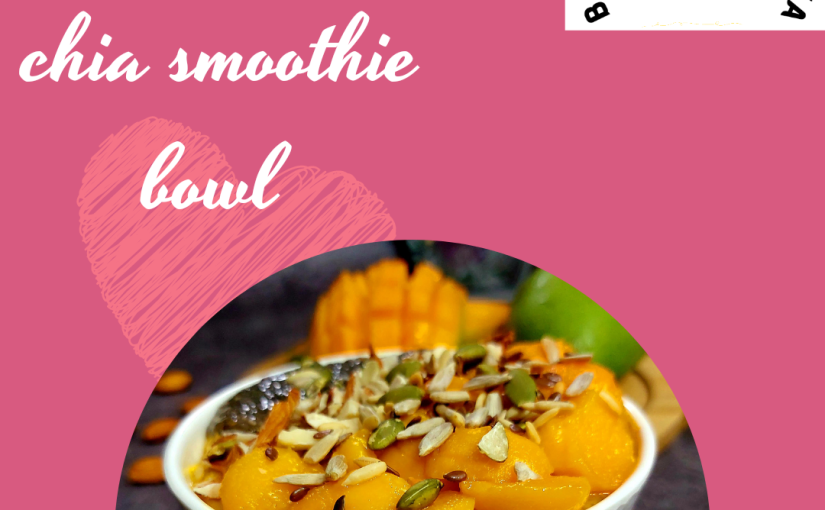
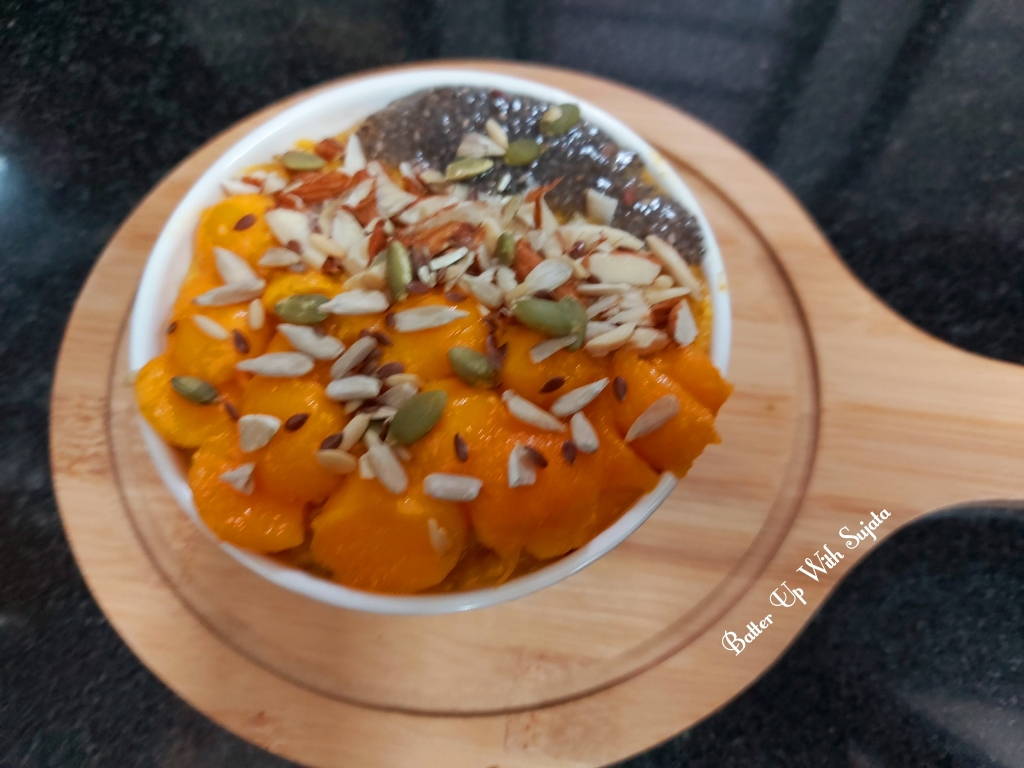
Vegan Oats Mango Chia Smoothie Bowl

Vegan oats mango smoothie bowl with chia seeds. A very delicious, filling and nutritious breakfast smoothie. You don’t need any sweetener to make this smoothie. If you like mango then its a perfect breakfast smoothie for you. You can satisfy your sweet tooth without any guilt.

Earlier shared one more Vegan smoothie bowl on this blog. For 27 more different types of Smoothie recipes click here. You may also like to try Mango almond shake from the blog of my friend Preethi Prasad.

Ingredients used to make this delicious and healthy smoothie bowl.

Oats – Used rolled oats to make this smoothie. We often use oats to make different breakfast dishes. And we all know that fiber rich oats have many health benefits. You can get many other Oats recipes here.

Mango – Used sweet variety dasheri mango. These mangoes are very sweet so I didn’t use any sweetener. You can use any type of ripe mango. To get some Recipes with mango click here.

Almond – Used almond or badam to make this smoothie more nutritious. You can use almond in many other recipes. You can get some recipes here.

Chia seeds – I used overnight soaked chia seeds. You can soak the chia seeds for 2 hours only if you want. Chia seeds are very nutritious.

The antioxidants, minerals, fiber, and omega-3 fatty acids in chia seeds may promote heart health, support strong bones, and improve blood sugar management. To read more about Chia seeds click here.

For garnishing used mango cubes, shredded almond, soaked chia seeds and roasted mixed seeds. Mixed seeds are optional but I like the crunch of the seeds.

Roasted mixed seeds – I have a mixture of roasted pumpkin seeds, sunflower seeds, muskmelon seeds and flax seeds. You can use any mixed seeds. You can get some different recipes With mixed seeds here.

Seeds are great sources of fiber. They also contain healthy monounsaturated fats, polyunsaturated fats and many important vitamins, minerals and antioxidants.

When consumed as part of a healthy diet, seeds can help reduce blood sugar, cholesterol and blood pressure. Source

This smoothie bowl is very filling and nutritious. You will also love it’s delectable taste. And you can enjoy it without adding any sweetener. Or if you like your smoothie sweeter or your mango is not enough sweet then you can add little honey, coconut sugar, stevia or any sweetener of your choice. See notes for more options.

Subscribe with your mail address to get all the recipes straight to your mailbox immediately after publishing.

Recipe video of this healthy and delicious smoothie bowl

Recipe

Oats – 1/4 cup

Ripe mango – 1 cup, chopped

Almond – 8-10

Chia seeds – 1 tablespoon

Water – 5 tablespoon

Mango cubes, chopped almond and mixed seeds to garnish

Method

1. Soak chia seeds in 5 tablespoon water for 2 hours or overnight. I soaked overnight. It will look like gel when soaked.

2. Soak the almond in hot water and let it cool down. Drain the water and peel the almond.

3. Grind the oats into fine powder. Add mango pieces, peeled almond and soaked chia seeds. Reserve some soaked chia seeds for garnishing.

4. Blend everything well to make smooth. Taste and add little honey, coconut sugar, stevia or any sweetener as require. My mango is enough sweet so I didn’t use any sweetener. See notes for more options.

5. Transfer the smoothie to the bowl. Garnish with mango pieces, chopped almond and soaked chia seeds. Sprinkle some roasted mixed seeds over the smoothie. This step is optional. You can skip but I like the crunch of roasted mixed seeds.

6. Serve immediately or keep in refrigerator for an hour or more to serve chilled.

Notes

1. You can use any fruit instead of mango.

2. You can also use banana or any other fruits with mango.

3. Add 1 teaspoon honey, stevia or any sweetener of your choice if you want your smoothie more sweet.

4. If you are using stevia powder, add 1/4 teaspoon only at first. Mix, taste and add more if required. Because stevia powder is more sweet than sugar. A pinch of stevia powder is equal to one teaspoon table sugar. 

If you tried my recipe, you can share your food pictures with me in the social network sites by using hashtag, #batterupwithsujata I would love to see your creations.

I would love to hear from you. Please share your thoughts and suggestions in comment.

Please visit my facebook page and hit the like button to get the latest update

Facebook page

Follow on

Twitter

Instagram

Pinterest

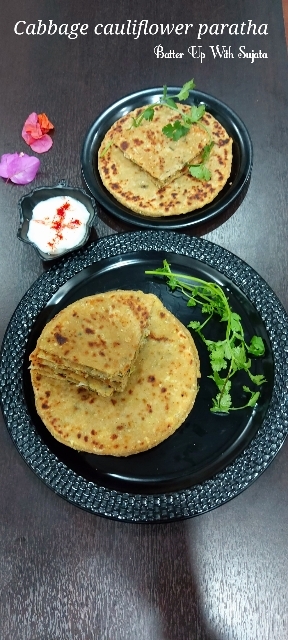
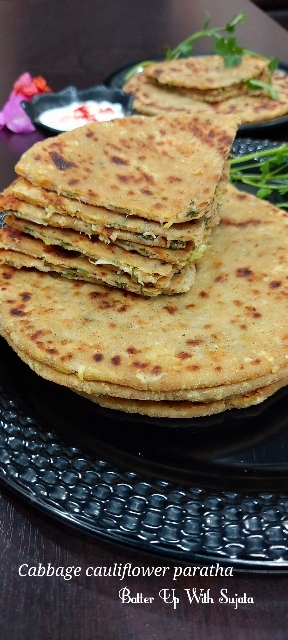
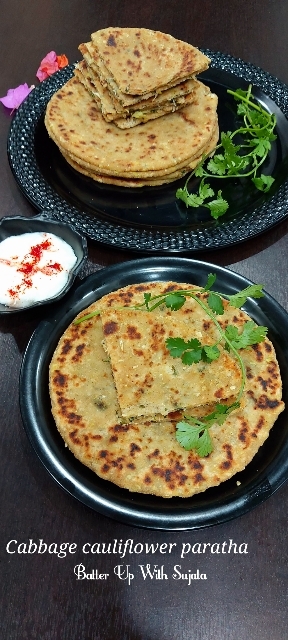
Cabbage Cauliflower Paratha

Cabbage cauliflower paratha. Outer layer of this paratha is made with cabbage and flour dough and stuffud with spicy delicious cauliflower. We often make gobhi paratha or cauliflower paratha or with a cauliflower cabbage mixed stuffing. But this paratha is totally different. You don’t need any sides to serve this paratha. This spicy soft paratha taste scrumptious. 

You may like to try four different types of paratha from this blog. Click on the name below to get the recipe.

1. Double layered aloo paneer cheese paratha

2. Sabudana or tapioca paratha

3. Mix veg stuffed paratha

4. Peanut stuffed paratha

Ingredients used to make this paratha 

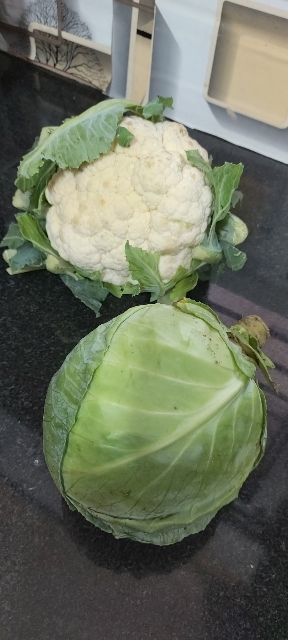
Cabbage – Cabbage used to make the dough. Grated cabbage kneaded with whole wheat flour. 

Cabbage is an exceptionally healthy food. It has an outstanding nutrient profile and is especially high in vitamins C and K. In addition, eating cabbage may even help lower the risk of certain diseases, improve digestion and combat inflammation. Plus, cabbage makes a tasty and inexpensive addition to a number of recipes. Source

Cauliflower – Grated cauliflower with some spices used to make stuffing. 

Cauliflower is an extremely healthy vegetable that’s a significant source of nutrients. It also contains unique plant compounds that may reduce the risk of several diseases, including heart disease and cancer. Additionally, it’s weight loss friendly and incredibly easy to add to your diet. To read more health benefits of cauliflower   click here.

Salt – Salt used to enhance the taste. 

Cumin powder – Cumin powder used for a lovely aroma. 

Garam masala powder – Garam masala powder used to give a lovely aroma to the stuffing. Garam masala powder is a blend of different aromatic spices like cardamom, cloves, cinnamon, mace, nutmeg etc. 

Green chilli – Used Green chilli to make the stuffing spicy. 

Cilantro or coriander leaves – Chopped cilantro or coriander leaves used for flavour. 

Whole wheat flour or atta – I used atta or whole wheat flour to make the dough. You can use maida or all purpose flour or half whole wheat flour and half all purpose flour.

Oil or ghee/clarified butter – I used peanut oil to shallow fry the paratha. You can use olive oil or any flavorless oil or ghee/ clarified butter to fry. 

Blogger group 

This post is going to be featured on Facebook gourmet group Shhhhh Cooking Secretly Challenge. In this group every month one of the members decide the theme. And members paired to give two secret ingredients each other. Best part is we paired every month with different bloggers so that we can interact with each other. And after preparing the dish members share a picture of the dish and other members have to guess the ingredients.

This month’s theme is Flatbread suggested by Anu Kollon who blog at Ente Thattukada. I have bookmarked her Neer dosa to try.

This month my partner is Kalyani Sri. You may like to try Quinoa dosa from her space.  Kalyani gave me ginger and cabbage as secret ingredients and I made this delicious cabbage cauliflower paratha.  I gave watermelon and coconut and Kalyani shared an amazing recipe of Watermelon rind dosa with these ingredients.

We have to make the dough with cabbage. Grate the cabbage,add salt and mix well. After 15-20 minutes cabbage will release enough water. Squeeze out the water completely. We will knead the dough with this water so reserve it in a bowl. In a large bowl mix flour with squeezed cabbage and knead dough with the help of it’s reserved water.  Add all the spices, grated ginger, finely chopped green chilli and cilantro or coriander. Add salt just before rolling and stuffing the paratha. Roll into a small roti, place cauliflower in the middle and close the edges. Roll again and fry all paratha on a skillet/griddle/tawa or nonstick pan with the help of little oil or ghee. Easy isn’t it? If you have grated cabbage and cauliflower ready then you can make it in short notice or whenever you want to enjoy these delicious paratha. 

Subscribe with your mail address to get all the recipes straight to your mailbox immediately after publishing.

Recipe

Cabbage – 1 

Cauliflower – 1

Salt to taste 

Ginger – 1&1/2 inch piece, grated 

Cumin powder – 1 teaspoon 

Garam masala powder – 1/2 teaspoon 

Green chilli – 2-3 or to taste, finely chopped

Cilantro or coriander leaves – handful  chopped 

Whole wheat flour or atta – 2 cup 

Oil or ghee/clarified butter for shallow fry

Method

1. Rinse the cauliflower well. Drain the water completely.  Wash the cabbage. Discard the outer layer.

2. Grate the cabbage and add salt. Mix well and keep aside for 15-20 minutes. Cabbage will release water. 

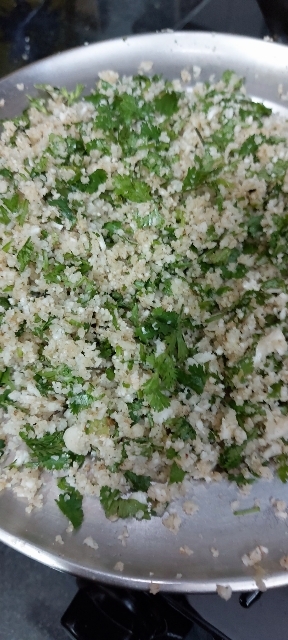
3. Now wipe the cauliflower with a kitchen napkin. Grate the cauliflower with a box grater. Or you can use your food processor. Add grated ginger, finely chopped Green chilli, cilantro or coriander leaves, cumin powder and garam masala powder. Use green chilli according to your taste. Mix everything with a spoon. Don’t add salt. We will add salt just before stuffing the paratha to avoid the cauliflower becomes soggy. 

4. Squeeze out all the water from grated cabbage. Don’t discard the water. We will use it to knead the dough. 

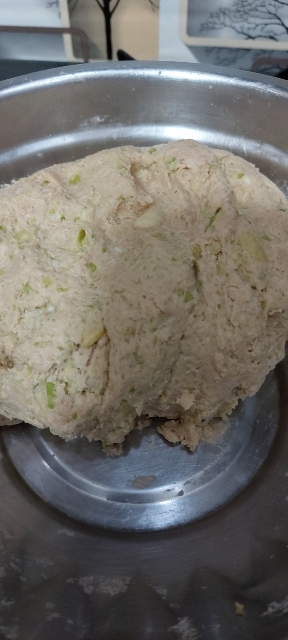
5. Place the squeezed cabbage in a large bowl. Add whole wheat flour or atta. Knead the dough with the water of squeezed cabbage. Already added salt in cabbage so don’t add salt. Add water slowly to knead a soft dough.

6. Make equal size balls.  Add salt in the grated cauliflower mixture and mix. 

7. Roll the kneaded flour balls with the help of wheat flour. Dip the ball in flour and start to roll. Roll into 4 inch diameter. Place some cauliflower stuffing in the middle.

8. Gather the edges and pinch to close. Make a ball again. Dip the ball in wheat flour from both sides. Roll again carefully with the help of some flour. Dust some flour and roll gently, don’t press much. Stuffing shouldn’t be comes out. 

9. Heat a tawa or skillet/griddle. Place the paratha on hot tawa. Let it cook till bubbles appear on the paratha.  Flip and cook other side till light brown. 

10. Brush little oil or ghee/clarified butter and fry from both sides. Make all the paratha like this. Serve hot with yogurt, pickle or chutney.

11. If you have some leftover cabbage mixed dough then you can make roti or paratha with it. Your roti or paratha will be super soft even after a few hours.

If you tried my recipe, you can share your food pictures with me in the social network sites by using hashtag, #batterupwithsujata I would love to see your creations.

I would love to hear from you. Please share your thoughts and suggestions in comment.

Please visit my facebook page and hit the like button to get the latest update

Facebook page

Follow on

Twitter

Instagram

Pinterest

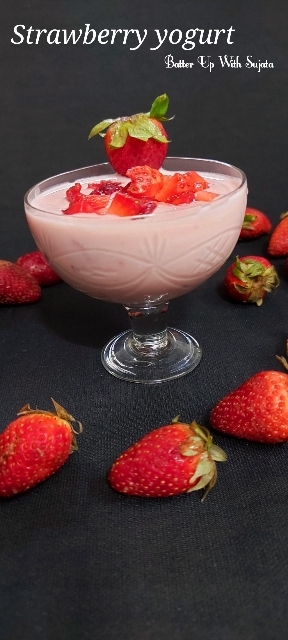
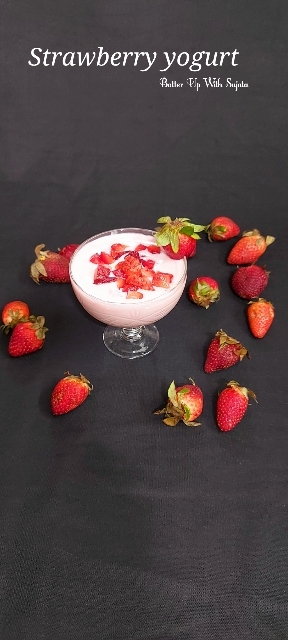
Strawberry Yogurt

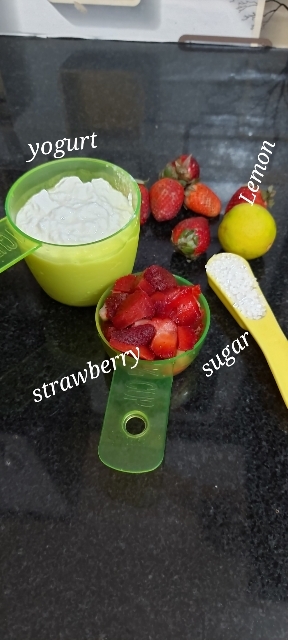
Strawberry yogurt. Thick yogurt with cooked strawberries and a hint of lemon taste divine. This delectable strawberry yogurt is also perfect for fasting days. So try this strawberry flavoured yogurt on upcoming Navaratri.

You need only a few ingredients to make this heavenly dessert.

Strawberry – Strawberry cooked with little sugar made this yogurt smooth and delectable.

Sugar – My strawberry is tangy so I had to use 2 tablespoon sugar but if you have sweet strawberries use less sugar. Taste the strawberry before using.

Lemon juice – Hint of lemon enhance the taste and flavour.

Lemon zest – Little lemon zest also enhance the flavour. But you can skip if you want.

You can get many savoury recipes with yogurt on this blog. Type yogurt on the search bar to get the recipes. Here are some sweet recipes with yogurt. Click on the name below to get the recipe.

1. Bhapa doi or steamed yogurt

2. Mint orange lassi

3. Mango pomegranate overnight oats parfait

4. Misti doi

5. Banana almond mint smoothie

6. Misti doi parfait

7. Guava banana smoothie

As I mentioned above that you need only a few ingredients to make this delicious strawberry flavoured yogurt. And recipe is also very easy. You have to cook the strawberry with sugar only for a few minutes on low flame. Let it cool down. Whisk the yogurt or curd well and add cooked strawberries and whisk again. Refrigerate for 30 minutes if you want your strawberry yogurt chilled. If you have sweet variety strawberries add less sugar. Use sugar according to your taste. My strawberries are sour so two tablespoon is perfect for me.

Subscribe with your mail address to get all the recipes straight to your mailbox immediately after publishing.

Recipe

Thick yogurt or hung curd – 3/4 cup

Strawberry – 1/3 cup, chopped

Sugar – 2 tablespoon

Lemon juice – 1/2 teaspoon

Lemon zest – 1/8 teaspoon

Method

1. Rinse and chop the strawberries. In a pan heat chopped strawberries and sugar. You can chop the strawberries into small pieces. My strawberries are little tangy so used 2 tablespoon sugar. If your strawberries are too sweet use 1 to 1&1/ tablespoon sugar or add sugar according to your taste.

2. Cook the strawberries on low heat till strawberries becomes mushy. Keep stirring. Add lemon juice and lemon zest and mix. Remove from heat and let it cool down.

3. In the meantime whisk the thick or hung curd with a wire whisker. Don’t use watery curd or yogurt. Whisk till thick curd or yogurt becomes smooth. Add strawberry, sugar and lemon mixture and whisk again. Strawberry mixture should be cool down completely.

4. Transfer the strawberry yogurt in your favourite bowl. Garnish with chopped strawberries and serve chilled. Refrigerate for 30 minutes before serving. Enjoy……

If you tried my recipe, you can share your food pictures with me in the social network sites by using hashtag, #batterupwithsujata I would love to see your creations.

I would love to hear from you. Please share your thoughts and suggestions in comment.

Please visit my facebook page and hit the like button to get the latest update

Facebook page

Follow on
Twitter

Instagram

Pinterest

Moong Dal Chilla/Gluten Free Savoury Pancake

Split green moong dal chilla/cheela or savoury pancake. A very easy to make and delicious filling breakfast dish. You need only a few ingredients to make these chilla/chila/cheela or savoury pancakes. Ginger green chilli and all the spices made these gluten free cheela absolutely mouthwatering.

Not only delicious but these green gram pancakes are nutritious too. So here is a super healthy breakfast to start your day. You can also add any vegetable in the batter to make it more nutritious.

They’re high in nutrients and believed to aid many ailments. Mung beans are high in nutrients and antioxidants, which may provide health benefits. In fact, they may protect against heat stroke, aid digestive health, promote weight loss and lower “bad” LDL cholesterol, blood pressure and blood sugar levels. Since mung beans are healthy, delicious and versatile, consider incorporating them into your diet. Source

Here are some more savoury pancake or chilla recipes from this blog.

Savoury pancakes with bottle gourd and carrot

Multigrain cheese stuffed pancakes

Green moong uttapam

Sprouts semolina pancake

Oats semolina pancake

You may also like to try delicious Cucumber pancakes from the blog of Priya Vijaykrishnan.

Recipe is very simple. You have to grind the soaked dal or yellow lentil with ginger and green chilli and mix all the ingredients. Its a completely gluten free recipe. Used rice flour with ground lentil to make the pancakes crispy. If you want your pancakes soft make it little thick but to make this crisp make it as thin as possible and fry on low heat. It will take some time but you will get crisp chilla/cheela or pancakes. Add spices and chilli according to your taste. You can also make a stuffing of paneer, potato, cheese etc. Place the stuffing on the pancake and roll. Your stuffed pancake is ready.

Subscribe with your mail address to get all the recipes straight to your mailbox immediately after publishing.

Recipe

Split green moong dal or yellow lentil with skin – 1 cup

Rice flour – 3/4 cup

Curd or yogurt – 1/2 cup

Ginger – 1&1/2 inch piece, peeled and chopped

Green chilli – 3-4 chopped

Onion – 3 large

Cilantro or coriander leaves – handful, chopped

Cumin powder – 1&1/2 teaspoon

Chaat masala – 1&1/2 teaspoon

Salt – 2 teaspoon

Black pepper powder – 1/2 teaspoon

Method

1. Rinse and soak the split and with skin yellow lentil or chhike wali moong dal for 4-5 hours or overnight. I soaked overnight.

2. Drain the water and rinse again. Grind the dal or lentil with ginger, green chilli and 1/4 cup water. Make a smooth paste. You can add more green chilli to make your chilla more spicy. I like the flavour of ginger so used 1&1/2 inch piece but you can use one inch piece if you want.

3. Chop the onions and cilantro or coriander leaves. Chop into small pieces. My son loves lots of onions in this chilla or pancake so I used 3 large onions. You can use less or more according to your taste.

4. Transfer the ground paste into a large bowl. Add curd or yogurt, rice flour, cumin powder, black pepper powder, chaat masala and salt. Mix everything well to make a lump free batter.

5. Taste and adjust salt if required. I had to add 1/2 teaspoon more. You can also use some finely chopped green chilli and little more black pepper powder if you want your chila or cheela more spicy Add finely chopped onion and cilantro or coriander leaves.

6. Mix well. Batter should be thick and flowing. Don’t make runny batter.

7. Heat a pan and add two laddle full batter in the middle of the pan. Spread with the backside of the laddle. Rotate to make round. Keep the flame low medium. Drizzle little oil on the sides of chilla.

8. To make soft cheela make it thick like uttapam but if you want crisp make the chilla thin and cook on simmer. When it starts to leaving the edges of the pan, flip the chilla upside down and let it cook from other side.

9. Cook from both sides till golden brown. You can also fold the pancakes before serving like this 👇

10. Serve hot with any sauce, pickle or raita.

Notes

1. You can add grated carrot, chopped capsicum or any vegetable of your choice in the batter.

2. Use chilli according to your spice tolerance. Reduce if making for kids.

3. Olive oil or any vegetable oil can be used to cook.

4. You can use any spices according to your taste.

5. You can also make it without onion if you want.

If you tried my recipe, you can share your food pictures with me in the social network sites by using hashtag, #batterupwithsujata I would love to see your creations.

I would love to hear from you. Please share your thoughts and suggestions in comment.

Please visit my facebook page and hit the like button to get the latest update

Facebook page

Follow on
Twitter

Instagram

Pinterest

Mushroom Spinach Cheese Sandwich

Mushroom spinach cheese sandwiches. Grilled sandwiches with creamy cheesy delicious stuffing. Sauteed mushrooms and spinach made these sandwiches filling and delectable. And sriracha sauce made the sandwiches perfectly spicy.

Earlier shared Easy quick egg sandwich here but this spinach mushroom sandwiches different in taste and flavour. Both are absolutely delicious but this one is completely vegetarian.

You may like to try some more mushroom recipes from this blog.

1. Mushroom egg Kabab

2. Mushroom egg fried rice

3. Broccoli mushroom noodles

4. Coriander mushroom

5. Mushroom dopeaja

6. Microwave mushroom

And here are some Spinach recipes for you. Try and enjoy the different taste and flavour of the spinach dishes.

Ingredients used to make stuffing

Mushroom – Low calorie and nutritious mushrooms made this sandwich delicious. I used my mini chopper to finely chop the mushrooms because my husband don’t like mushrooms at all. So I always use minced or finely chopped mushrooms in some dishes and he always happily enjoy the dish without recognizing mushrooms. But you can use thinly sliced mushrooms if you want.

Baby Spinach – This leafy green vegetable taste great. Tender leaves are easy to cook and give a slightly sweet taste. And it also has so many health benefits. I blanched the spinach leaves before using.

How to blanch spinach

Rinse the spinach leaves well to remove all the dirt. Heat sufficient water in a pot. Keep a pot with cold water ready. When water starts to rolling boil add the spinach. Let it boil for 3-4 minutes. Leaves will becomes dark in colour after blanching. Immediately remove the spinach from hot water and place in the pot of ice cold water to retain the colour. Take out from the water before chopping.

Onion And Garlic to enhance the taste and flavour.

Sweet corn – Succulent and delicious boiled sweet corn taste mildly sweet and also enhance the taste of your stuffing.

Scallion – Mild taste and flavour of this green long leaves will also enhance the taste and flavour of stuffing.

Salt – Salt used to give savoury taste. Add salt according to your taste.

Black pepper powder – Use black pepper powder to give a lovely aroma and mild heat. You can also use freshly crushed black pepper. Add black pepper powder 1/2 to 1 teaspoon as per your taste.

Fresh cream – Little fresh cream will give a creaminess and enhance the taste. I used Amul fresh cream.

Tomato ketchup – tomato ketchup will give a sweet tangy taste to the stuffing.

Sriracha sauce – Sriracha sauce added to give a spicy kick. Spicy sweet tangy taste of this sauce will make your stuffing lipsmackingly delicious. You can also use any chilli garlic sauce if you don’t have sriracha sauce.

Chilli flakes – Little chilli flakes used to make the stuffing spicy. But its optional, you can skip it if you want.

Cheese – I used cheddar and mozzarella cheese mixed. I have a pack a mixture of both cheese. And this taste great. Used to give a cheesy delicious taste. You can use processed cheese or any cheese of your choice. Used 1/2 cup in stuffing and some to sprinkle over the stuffing. You can always use more cheese if you want. Add as much cheese as you like.

Butter And Olive oil – Used 1 tablespoon butter and 1 tablespoon olive oil for sautéing the stuffing. You can use only butter or only oil if you want. You can also use any other oil instead of olive oil.

Bread – You can use white bread, brown bread, multigrain bread, gluten free bread or any bread of your choice.

If you have the stuffing ready then you can make the sandwiches in a jiffy. You can make the stuffing one day before and store in refrigerator to make the sandwiches for breakfast or lunch. Even you don’t need any chutney or sauce in side to serve these sandwiches or to spread on bread. Because stuffing taste delectable on it’s own. Sauteed mushrooms and spinach and fried onion garlic with sweet corn, scallion, oregano and sriracha sauce, ketchup, butter, cheese and little fresh cream made these sandwich stuffing perfectly spicy creamy cheesy and lipsmackingly delicious.

Subscribe with your mail address to get all the recipes straight to your mailbox immediately after publishing.

Recipe

Mushroom – 200 gram

Baby Spinach- 200 gram, blanched

Onion – 2 medium, finely chopped

Garlic – 3, minced

Sweet corn – 1/2 cup, boiled

Scallion or onion green – 2 finely chopped

Salt to taste

Black pepper powder – 1/2 teaspoon or to taste

Fresh cream – 2 tablespoon

Sriracha sauce – 1&1/2 tablespoon

Oregano – 1 teaspoon

Chilli flakes – 1/2 teaspoon

Tomato ketchup – 2 tablespoon

Cheese – 1/2 cup, grated + to sprinkle

Olive oil – 1 tablespoon

Butter – 1 tablespoon

Bread as required

Method

1. Chop the blanched baby spinach finely. Chop the mushrooms finely. I used my mini chopper. You can grate or thinly slice the mushrooms.

2. Heat 1 tablespoon oil and 1 tablespoon butter in a pan. Add minced garlic and finely chopped onion. When onion becomes light brown add mushrooms.

3. Mushrooms will release water. When mushrooms about to dried up add chopped scallion and saute till dried up completely. Add blanched and chopped spinach. Mix and add boiled sweet corn.

4. Add salt, black pepper powder, fresh cream, sriracha sauce, oregano, chilli flakes and tomato ketchup. Saute till everything blend well and dried up.

5. Now add sriracha sauce, mix and remove from heat. Taste and adjust the seasoning. Let the mixture cool down a bit. Add 1/2 cup grated cheese and mix well.

6. Spread the mushroom spinach mixture on a bread slice. Sprinkle some grated cheese over it. Place a bread piece over the cheese and press gently. Make all the sandwiches like this.

7. Heat little butter or oil in a grill pan. Place sandwich on the pan. Toast on low heat till one side becomes light brown. Flip and turn the sandwich upside down and toast the other side too. Make all the sandwiches. Serve hot with any sauce or chutney. You can also use sandwich toaster to toast the sandwich.

Notes

1. You can use mayonnaise in the stuffing if you want.

2. Any chilli garlic sauce can be used instead of Sriracha sauce.

If you tried my recipe, you can share your food pictures with me in the social network sites by using hashtag, #batterupwithsujata I would love to see your creations.

I would love to hear from you. Please share your thoughts and suggestions in comment.

Please visit my facebook page and hit the like button to get the latest update

Facebook page

Follow on

Twitter

Instagram

Pinterest

Millet Soyabean Cutlets Slim/Air Fried Cutlets

Millet soybean cutlets. Kodo millet soybean cutlets are slim fried in microwave with only two teaspoon oil. One teaspoon oil to grease the crusty plate or baking tray and one teaspoon to brush over the cutlets. You can also use your air fryer to fry these cutlets. Or you can also bake the cutlets in oven or halogen oven at 200° or shallow fry. Sharing all the methods. Cooked kodo millet and soybean with spices and lemon juice made these cutlets delicious. Potatoes are used for binding. You don’t need breadcrumbs or any flour. You can also use sweet potatoes instead of potatoes if you want.

These super healthy gluten free cutlets can be served as party starter or as a teatime snack. Or enjoy it as nutritious and filling breakfast dish with any sauce or chutney. Kodo millet and soybean have an impressive amount of protein and vitamins. Vegan people can skip cheese, I had used cheese only in two cutlets for my kids. Using cheese is completely your choice. I recently shared protein rich Soybean egg casserole. And a delicious Kodo millet broccoli pulao. Here are some recipes with millet. Click on the name below for recipe.

1. Millet walnut date cake

2. Vegan date millet peanut butter cookies

3. Pearl millet pizza crackers

4. Fennel oats millet cookies

5. Manipuri tan or flatbread with finger millet or ragi

6. Finger millet oats chocolate cookies

7. Pearl millet cashew almond honey cookies

8. Pearl millet sesame oats cookies

9. Finger millet or ragi chocolate crinkle cookies

10. Barnyard millet fried idli

11. Potato and barnyard millet cutlets

According to Healthline Although anyone can reap the nutritional benefits of eating millet, it’s been shown to be especially beneficial for diabetes management, making it one of the better whole grains for managing blood sugar. Millet is a good choice for diabetes due to its high fiber content. Fiber helps slow digestion. As a result, sugar enters the bloodstream slowly, lessening the risk of a blood sugar spike.

Potatoes are a versatile and delicious vegetable that can be enjoyed by everyone, including people with diabetes. However, because of their high carb content, you should limit portion sizes, always eat the skin, and choose low GI varieties, such as Carisma and Nicola. They’re rich in potassium and B vitamins, and the skin is a great source of fiber. However, if you have diabetes, you may have heard that you should limit or avoid potatoes. The truth is, people with diabetes can eat potatoes in many forms, but it’s important to understand the effect they have on blood sugar levels and the portion size that’s appropriate. To read more click here.

But as I mentioned above you can always use sweet potatoes instead of potatoes. So these cutlets are gluten free, vegan and diabetic friendly. You have to rinse and soak the soybean overnight like chickpeas rajma etc. Next day pressure cook with 1&1/4 cup water. After one whistle reduce the heat and cook for 20-25 minutes or till soybean becomes soft and easy to mash. Don’t discard the remaining nutritious water of boiled soybean if any. Either cook till water absorbed completely or use the water in soup or other dishes.

You can cook kodo millet as you cook rice. Soak in water for 15-20 minutes drain and cook with double amount of water. Use 1 cup water for 1/2 cup kodo millet. You can also use pressure cooker to boil the kodo millet. Pressure cook for 2 whistle. For open pot,when water starts to rolling boil reduce the heat, cover the vessel and cook on simmer for 10-15 minutes or till moisture evaporate and millet becomes soft. Add spices according to your choice. To make your cutlets more spicy add more chopped green chilli or you can also use red chilli powder.

Subscribe with your mail address to get all the recipes straight to your mailbox immediately after publishing.

Recipe

Kodo millet – 1/2 cup

Soyabean – 1/2 cup

Potato – 3 medium, boiled

Onion – 2 medium, finely chopped

Green chilli -2-3 or to taste, finely chopped

Ginger – 1 inch piece, grated

Cilantro or coriander leaves – handful, chopped

Salt – 1&1/2 teaspoon or to taste

Black salt to taste

Cumin powder – 1 teaspoon

Garam masala powder – 1/2 teaspoon

Chaat masala powder – 1 teaspoon

Lemon juice – 1&1/2 teaspoon

Cheese as require, optional

Method

1..Rinse and soak soybean overnight in enough water. Next day rinse again and pressure cook with 1&1/4 cup water. After one whistle reduce the heat and cook on simmer for 20-25 minutes or till soybean becomes soft. Let the pressure settle down on its own. Open the lid and cook again till all the moisture evaporate if any.

2. Wash the kodo millet well on a colander or sieve. Soak in water for 15-20 minutes. Cook with one cup water till water absorbed and millet becomes soft. You can also pressure cook the kodo millet if you want. Peel the boiled potatoes.

3..Mash the boiled potatoes, kodo millet and soybean with a potato masher or your hand. Make lump free smooth dough. You can use your mixer grinder to grind the boiled soybean. If you find it difficult to mash. But don’t add water.

4. Add chopped onion, green chilli, cilantro or coriander leaves, grated ginger, salt, black salt, lemon juice and all the spices. Mix everything well. Taste and adjust the seasoning. You can add more green chilli if you want your cutlets more spicy or you can also use red chilli powder.

5. Make equal size balls and press with your palm to make flat patties. Shape the cutlets.

6. I made two large size cutlets and stuff with a piece of mozzarella and cheddar mixed cheese. Also sharing the pictures of cheese stuffed cutlets after frying.

7..Grease the crusty plate with 1 teaspoon oil. Arrange the cutlets on crusty plate. Brush the cutlets with little oil. Fry the cutlets in microwave slim fry mode. Set as instructed for veg cutlets. After beeping sound flip the cutlets upside down and press the start button. If cutlets are not perfectly brown cook for a few minutes again on slim fry mode. I had to cook for 5 minutes more.

8. You can also bake the cutlets in your preheated oven at 200° for 10-15 minutes or until cutlets becomes golden brown from both sides.

9. For halogen oven press speed up button. Set the temperature at 200°. Bake for 10 minutes or till upside becomes brown. Flip the cutlets upside down and bake again at 200° for 5-6 minutes or till cutlets becomes golden brown.

10. Or use your air fryer. You can also shallow fry the cutlets from both sides till golden brown.

Notes

1. You can use boiled sweet potatoes instead of potatoes.

2. You can also use cooked quinoa in the cutlets.

If you tried my recipe, you can share your food pictures with me in the social network sites by using hashtag, #batterupwithsujata I would love to see your creations.

I would love to hear from you. Please share your thoughts and suggestions in comment.

Please visit my facebook page and hit the like button to get the latest update

Facebook page

Follow on
Twitter

Instagram

Pinterest

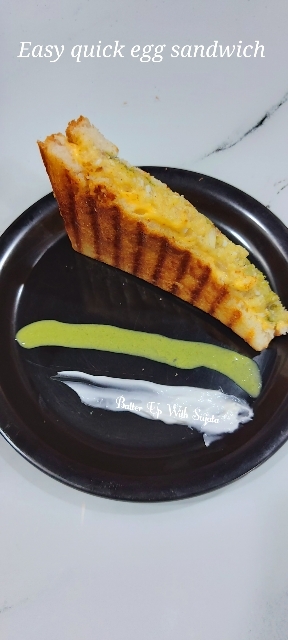
Easy Quick Egg Sandwich

Easy quick cheesy egg sandwich. If you have boiled eggs and potatoes ready then you can make these sandwiches in a jiffy. Vegetarian people can skip eggs and make this with only potatoes. Different types of sauce and mayonnaise with potato and eggs will make these sandwiches absolutely delicious.

Today sharing a most favourite sandwich of my kids. Here is a recipe with two different methods to make the sandwiches. Both taste slightly different. I am sure you will love both the way. Try to following both methods and let me know which one you like more. You may also like one more simple, healthy and delicious bread recipe Soya oats green gram toast here. Click here to get the recipe. And click here for some bread recipes.

I didn’t use lettuce this time. But you can place lettuce over egg potato stuffing if you have. You can use sriracha sauce or any chilli garlic sauce instead of schezwan sauce. Use sauce according to your taste. You can add 1-2 finely chopped green chilli in the stuffing if you like your sandwiches more spicy. But if you are making for kids reduce the amount of chilli and schezwan sauce or skip and add tomato sauce or any sweet and sour sauce.

You can use 2-3 tablespoon more mayonnaise if you like. I had used grated cheese cubes in the stuffing. You can use mozzarella, cheddar or mix of both or whatever you have. Add as much cheese as you like. You can also make a layer of thinly sliced onion, cucumber and tomato if you want to make your sandwiches colorful and you like the taste. Sprinkle little salt and pepper powder over the slices. You can also drizzle little lemon juice if you want.

Subscribe with your mail address to get all the recipes straight to your mailbox immediately after publishing.

Recipe

Potato – 3

Egg – 3-4

Onion – 1 large, finely chopped

Mayonnaise – 5 tablespoon

Pizza sauce – 2 tablespoon

Chilli sauce – 1&1/2 tablespoon

Schezwan sauce – 2 tablespoon, optional

Oregano – 2 teaspoon

Salt – 1 teaspoon or to taste

Black pepper powder – 1/2 teaspoon or to taste

Cheese cube – 2-3

Green chutney to spread on bread Bread as required

Cheese slices as required

Butter or oil as required

Method

Peel the boiled potatoes and eggs. Grate the eggs and potatoes.

For first method

1. Mix grated potatoes and eggs. Add all the sauce, finely chopped onion, salt, grated cheese cubes, oregano and mayonnaise. Taste and adjust the seasoning.

2. You can add 1-2 tablespoon more mayonnaise if you like. Mix everything well. See notes for options to make your sandwiches more spicy.

3. On a bread piece spread a thick layer of egg and potato mixture. Place cheese slice on it.

4..You can make a layer of lettuce, thinly sliced cucumber, tomato and onion over the egg potato mixture if you want.

5. Take one more bread and spread green chutney or any chutney of your choice.

6. Place the bread on cheese slice. Keep chutney side down. You can make 10-11 sandwiches with this egg potato mixture.

7. Toast the sandwich on a pan from both sides with little butter or oil till golden brown.

Second method

1. Grate the boiled potatoes. Add all the sauce, grated cheese cubes, mayonnaise, oregano and 1/2 teaspoon salt or to taste. Add less amount of salt than above because we are using only potatoes. Taste and adjust the seasoning.

3. Spread a layer of potato mixture. Grate boiled egg above potato. Sprinkle black pepper powder and pink or black salt over the grated egg. I used pink salt. Vegetarian people can skip this step. Place cheese slice over it.

4. Spread green chutney or any chutney on a bread. Place it on the cheese slice chutney side down. Make sandwiches as above method.

5. Serve hot with any sauce, ketchup or chutney. Sandwiches have different sauce and absolutely delicious so you can enjoy the sandwiches without any sauce or chutney.

Notes

1. Sriracha or any chilli garlic sauce can be used instead of schezwan sauce. Use whatever you have.

2. You can use finely chopped green chilli in the stuffing if you want your sandwiches more spicy or you like the flavour of green chilli. To reduce the hotness soak finely chopped green chilli in 1-2 teaspoon lemon juice for a few minutes before adding in the stuffing. Take out the green chilli from lemon juice and add.

3. You can use more mayonnaise if you like.

4. Add as much grated cheese as you want. You can use mozzarella, cheddar or mix of both cheese or use whatever you have instead of cheese cubes.

5. You can also make the stuffing with only egg or only potato.

6. You can make a layer of thinly sliced onion, cucumber and tomato if you want. Sprinkle little black or pink salt and pepper powder over it. You can also drizzle little lemon juice over these slices.

If you tried my recipe, you can share your food pictures with me in the social network sites by using hashtag, #batterupwithsujata I would love to see your creations.

I would love to hear from you. Please share your thoughts and suggestions in comment.

Please visit my facebook page and hit the like button to get the latest update

Facebook page

Follow on

Twitter

Instagram

Pinterest

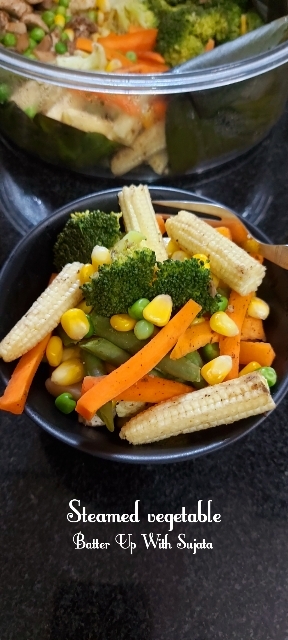
Steamed Vegetable In Rice Cooker

Steamed vegetable in rice cooker. Vegetables are smeared with salt and herbs and steamed on banana leaf till vegetables become fork tender. An easy to cook delicious flavorful and nutritious dish without any oil.
You can enjoy these steamed vegetables on it’s own as a salad or main dish. Or you can also serve this with white sauce. Slightly crunchy and flavorful vegetables taste wonderful. I have served it with grilled paneer or cottage cheese and white sauce.
I have placed the vegetables on banana leaf before steaming. Vegetables release juice while steaming. We don’t want to discard the nutritios juice of vegetables, right? So place any edible leaf under the vegetables. Or you can cook your rice or any other dishes under vegetable basket so that juice of vegetables will mix into the dish below.

I have used mushrooms, broccoli, French beans, carrots, cauliflower, baby corn, sweet corn and green peas and seasoned with rock salt, garlic powder, black pepper powder and oregano. You can use any herbs of your choice. If you don’t have rock salt, use any salt instead. You can also use any vegetable of your choice. Add vegetables less or more according to your taste.

You may also like Baked vegetables on this blog. Or you might like to try Chinese style steamed eggplant from Preethi’s blog.

So here is the recipe as I made this steamed vegetables. My daughter and I love this steamed vegetables as main dish. I gave the measurement of vegetables as we like. You can always use more or less according to your taste. Or you can also use any vegetable of your choice. I like my vegetables in stripes but you can chop the vegetables in small cubes or in round shape. Small sized vegetables will cook quickly. Chop the vegetables in your desired size and shape. As I mentioned above that you can use any herbs of your choice. You can also use Indian spices if you want.

Subscribe with your mail address to get all the recipes straight to your mailbox immediately after publishing.

Recipe

Mushroom – 250 gram

Broccoli – 1

French beans – 1 cup, chopped

Cauliflower – a few florets

Baby corn – 10

Sweet corn – 3/4 cup

Green peas – 1/2 cup

Carrot -2

For seasoning

Rock salt

Garlic powder

Oregano

Black pepper powder

Method

1. Wash all the vegetables well. Cut the broccoli into medium size florets. Chop the carrots into stripes. You can also chop the carrots into small round pieces or in cubes.

2. Cut the mushrooms and baby corn into half. You can also chop the baby corn into thin slices by cutting lengthwise. Chop the French beans into long pieces. Chop the cauliflower into small florets. You can use more cauliflower florets if you like. 

3. Marinate all the vegetables separately with rock salt, garlic powder, oregano and black pepper powder. You can marinate the vegetables altogether. But I have mixed the seasoning separately with all the vegetables because some of my family members don’t like mushrooms. If you marinate and place the vegetables separately in steamer basket everyone can enjoy their favourite vegetable.

4. Wash a banana leaf with running water. Place the banana leaf in steamer basket. You can steam the vegetables without banana leaf but I don’t like to waste the juice of vegetables which released while steaming. You can use any edible leaves instead of banana leaf. Or you can cook your rice under the vegetables. Place all the marinated vegetables, sweet corn and green peas over the banana leaf in steamer basket.

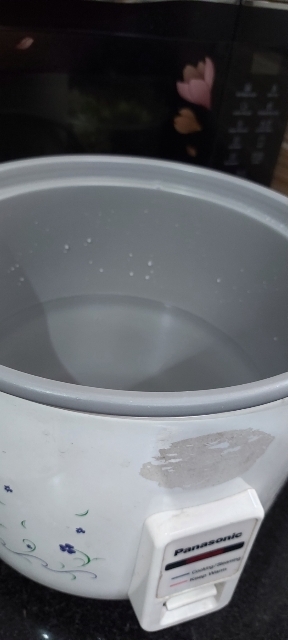
5. Pour 4 cup water in the rice cooker. Cover and heat the water on cooking mode. It will take 4-5 minutes to boil the water.

6. When water starts to boil remove the lid and place the steamer basket with vegetables on the rice cooker. Cover and steam for 10- 15 minutes or until the vegetables become fork tender.

7. Check after 10 minutes. Mine are perfectly steamed after 12 minutes. Vegetables should be little crunchy.

8. You can steam the vegetables on stove top but remember water shouldn’t touch the steamer basket while steaming. Taste and add more seasoning if required. Enjoy the hot delicious and nutritious steamed vegetable. You can add a dash of lemon juice before serving. Or you can also serve this steamed vegetables with white sauce.

Notes

1. You can use any vegetable of your choice.

2. Any herbs can be used for seasoning.

3. You can use any salt instead of rock salt.

4. Use vegetables less or more according to your taste.

5. You can also use Indian spices to marinate the vegetables.

6. You can chop the vegetables according to your desired size and shape.

If you tried my recipe, you can share your food pictures with me in the social network sites by using hashtag, #batterupwithsujata I would love to see your creations.

I would love to hear from you. Please share your thoughts and suggestions in comment.

Please visit my facebook page and hit the like button to get the latest update

Facebook page

Follow on

Twitter

Instagram

Pinterest