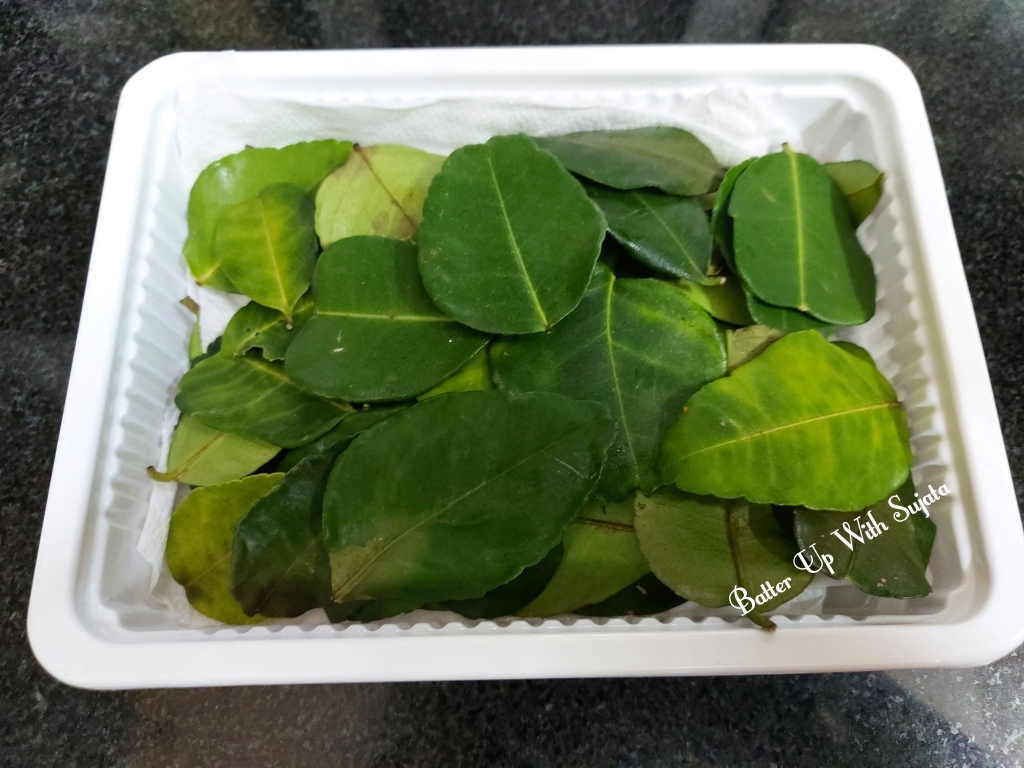
Lemon coconut rice with kaffir lime leaves. A delicious aromatic rice to serve with any spicy curry. Fragrant Kaffir lime leaves infused rice taste divine. And coconut milk gives a rich buttery flavour. Recipe is very simple and easy and completely gluten free and dairy free. You don’t need ghee or clarified butter to make this fragrant rich buttery luscious rice.
Citrus hystrix, called the kaffir lime or makrut lime, is a citrus fruit native to tropical Southeast Asia. Its fruit and leaves are used in Southeast Asian cuisine and its essential oil is used in perfumery. Its rind and crushed leaves emit an intense citrus fragrance. Wikipedia
Did you know that Kaffir lime leaves are super healthy for you? Read on to learn the 6 top health benefits of Kaffir leaves.
1. Stress, Stress Go Away
2. Bad Breath No More
3. No Bacteria Allowed
4. Get Healthy, Glowing Skin
5. Protect Your Mane
6. Buzz Off!
To read more health benefits of Kaffir lime leaves Click here.
Recipe is very easy and simple. You don’t need much spices for this fragrant rice. I have used sweet corn and green peas but you can use any vegetable of your choice. And add green chilli according to your taste. You can skip chilli if you are making for kids. If you don’t have have Kaffir lime leaves then use 1/2 to 1 teaspoon lemon zest.
Subscribe with your mail address to get all the recipes straight to your mailbox immediately after publishing.
Video recipe of this fragrant creamy rice
Recipe
Basmati rice – 1 cup
Kaffir lime leaves – 2
Lemon juice – 1 tablespoon
Ginger – 1 inch piece, grated
Green chilli – 1-2, finely chopped
Onion – 1 sliced
Cumin seeds – 1 teaspoon
Green peas – 1/4 cup
Sweet corn – 1/4 cup
Cilantro or coriander leaves – 2-3 tablespoon
Coconut milk – 1 cup
Water – 1 cup
Salt to taste
Oil – 2 tablespoon
Method
1. Rinse the rice 4-5 times or till water runs out clear. Soak the rice in water for 15 minutes. After 15 minutes drain the water and keep aside.
2. Heat oil in a wok. You can also use pressure cooker if you want. Add cumin seeds. When seeds starts to splutter add sliced onion and finely chopped green chilli. Fry till onion becomes translucent.
3. Add grated ginger and fry till onion becomes brown. Onion shouldn’t be burnt.
4. Add green peas and sweet corn. Saute for a minute. Add chopped cilantro or coriander leaves and mix.
5. Add soaked and drained rice. Saute for 2 minutes. Add salt and mix.
6. Add coconut milk and water. If you are using pressure cooker add half cup water. Tear both Kaffir lime leaves into two pieces and add in the rice. Also add lemon juice and mix well. Let it boil.
7. When it starts to rolling boil reduce the heat. Cover and cook on simmer for 10 minutes.
8. After 10 minutes gently stir the rice and cover again. Cook for five minutes on simmer. Now switch off the heat. Remove the cover and fluff the rice gently.
9. Cover again and serve after 10 minutes. Serve aromatic rice with any spicy curry.
Notes
1. You can use lemon zest instead of Kaffir lime leaves.
2. Use any vegetables of your choice.
If you tried my recipe, you can share your food pictures with me in the social network sites by using hashtag #batterupwithsujata.
I would love to hear from you. Please share your thoughts and suggestions in comment.
Please visit my facebook page and hit the like button to get the latest update
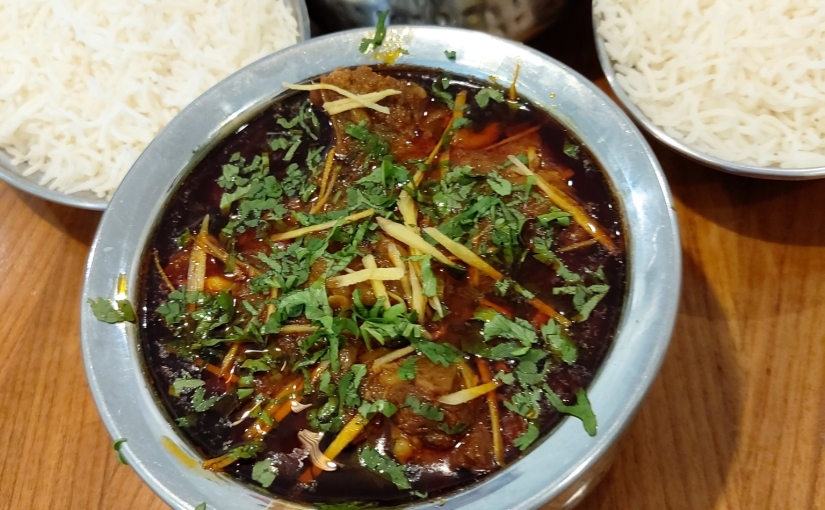
As I mentioned above recipe is very simple and easy to follow. Please watch the YouTube video recipe to know all the process of chef Jeevan.
Subscribe with your mail address to get all the recipes straight to your mailbox immediately after publishing.
To watch video recipe of this lipsmackingly delicious pahadi mutton curry and some glimpses of the beautiful hills and lakes of Uttarakhand click on the link below 👇
Recipe
Mutton – 1 kg
Onion – 1 kg, peeled and sliced
Ginger – 2 inch piece, julienne
Garlic – 1 whole bulb, finely chopped
Green chilli – 4, chopped
Black cardamom – 2
Cumin – 1 teaspoon
Bay leaf – 2
Black pepper – 1 teaspoon
Cloves – 1/2 teaspoon
Oil – 1/2 cup
Salt to taste
Tomato – 4 large, ground
Coriander powder – 1&1/2 tablespoon
Turmeric powder – 1/2 teaspoon
Garam masala powder – 1 teaspoon
Kashmiri red chilli powder – 1&1/2 tablespoon
Red chilli powder – 1 tablespoon
Kitchen king masala – 1 tablespoon
Water – 2-3 cup
Cilantro or coriander leaves – 1/2 cup, chopped
Method
1. Clean, wash and drain the mutton pieces.
2. Heat oil in a pan or wok. Add cumin seeds,,whole black cardamom, cloves and black pepper. You can use 1/2 teaspoon black pepper instead of 1 teaspoon if you want. Use according to your taste.
3. Add chopped garlic and fry for a minute. Now add sliced onion, chopped green chilli and ginger julienne. Fry till onion becomes translucent.
4. Add Kashmiri red chilli powder and tomato paste saute for a minute. Add red chilli powder, turmeric powder, garam masala powder, kitchen king masala and coriander powder. Kitchen king masala is optional. You can skip or you can also use mutton masala, chicken masala etc. Saute till oil leaves the sides.
5. Add mutton and salt. Saute till everything dried up and oil separates. Add 2 cup water, mix and cover. Cook on simmer for 4 minutes.
6. Transfer the mutton to a pressure cooker with 1 cup water and chopped cilantro or coriander leaves. Pressure cook on simmer for 4-5 whistle.
7. Let the pressure settle down on its own. Garnish with cilantro or coriander leaves, ginger julienne and onion rings. Serve with steamed rice, jeera rice, pulao, roti, tandoori roti, naan, paratha or any bread.
If you tried my recipe, you can share your food pictures with me in the social network sites by using hashtag, #batterupwithsujata I would love to see your creations.
I would love to hear from you. Please share your thoughts and suggestions in comment.
Please visit my facebook page and hit the like button to get all the latest update.
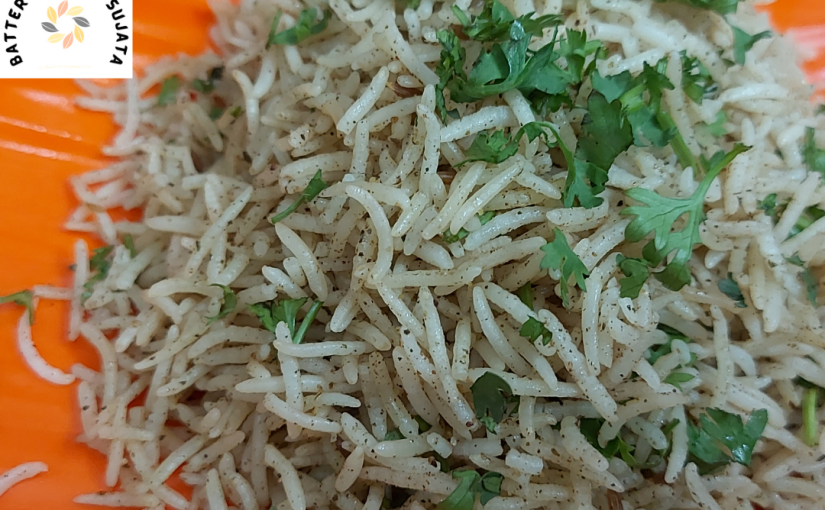
Restaurant style jeera rice in microwave. A very easy to make, flavorful and delicious rice cooked in microwave. Hassle free cooking in a few minutes. Perfect for this summer season. You can cook in microwave with your fan on.
Here are 20 more one pot rice dishes from this blog. Click on the name below for recipe.
Microwave cooking is much convenient way to cook hassle free and in less time. Just check in-between as we check while cooking on stove top. Every oven has different temperature and take different time. If you start to use your microwave regularly, you will know it well. I will share some more oven recipes here. So friends stay tuned 😊
Subscribe with your mail address to get all the recipes straight to your mailbox immediately after publishing.
Cilantro or coriander leaves – 2 tablespoon, chopped
Salt to taste
Water – 1&3/4 cup
Method
1. Rinse the rice well. Rinse till water runs out clear. Soak the rice for 30 minutes. After 30 minutes drain the water and keep aside.
2. In a microwavable glass bowl add ghee and cumin seeds. Microwave on high power for 1 minute. Check and microwave again for 30 seconds if required. Cumin should be fragrant.
3. Take out the bowl. Add cumin powder, pulao masala, chopped cilantro or coriander leaves and mint powder. You can also use 1 tablespoon fresh mint leaves instead of mint powder. Or skip mint if you want. Mix well with a spoon. Get the Pulao Or biryani masala here.
4. Microwave on high power for 2 minutes. Stir once in between. After 2 minutes take out the bowl from microwave.
5. Add water and salt. Mix well. Microwave on high for 5 minutes. Stir the rice. Now loosely cover the bowl with lid or microwavable plate.
6. Microwave on 600 for 8 minutes. Stir once in between. After 8 minutes take out the bowl. Fluff the rice gently with a fork. And give a standing time. Cover and keep the rice in switched off microwave for 8-10 minutes.
7. I am sharing as I like my jeera rice but if you want your rice softer then use 2 cup water instead of 1&3/4 cup and microwave for 10 minutes.
8. Garnish with cilantro or coriander leaves. Serve hot with dal tadka or any curry. For pressure cooker process Follow the process of Easy pulao And for open pot method Shahi coconut milk pulao.
If you tried my recipe, you can share your food pictures with me in the social network sites by using hashtag, #batterupwithsujata I would love to see your creations.
I would love to hear from you. Please share your thoughts and suggestions in comment.
Please visit my facebook page and hit the like button to get the latest update
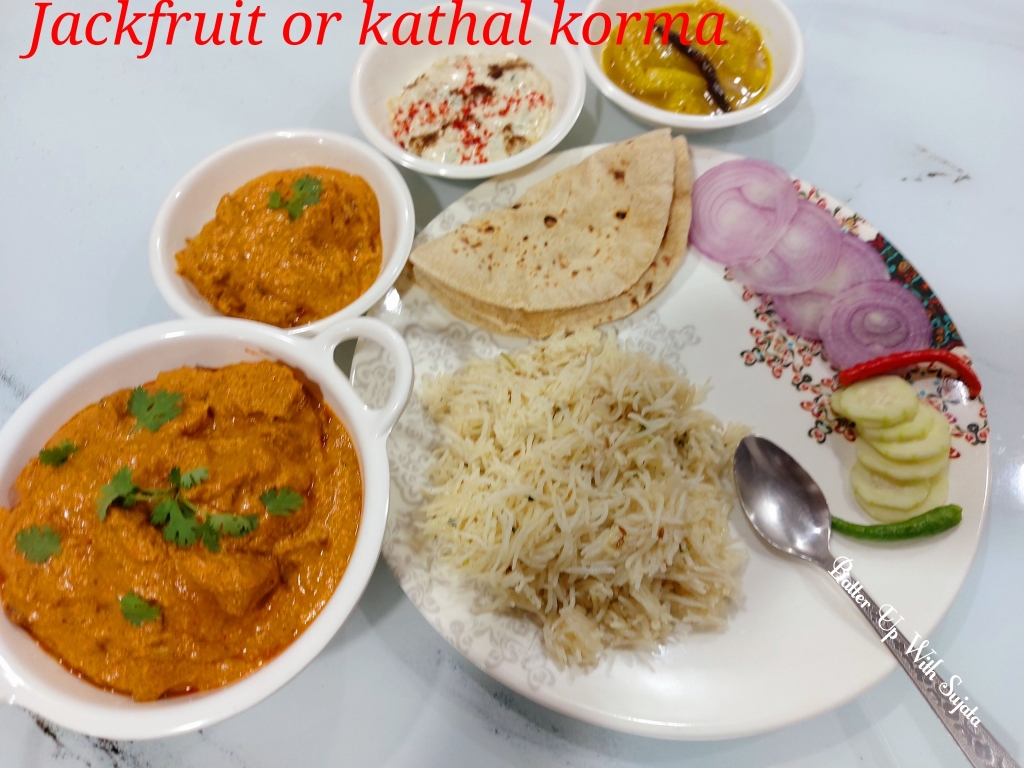
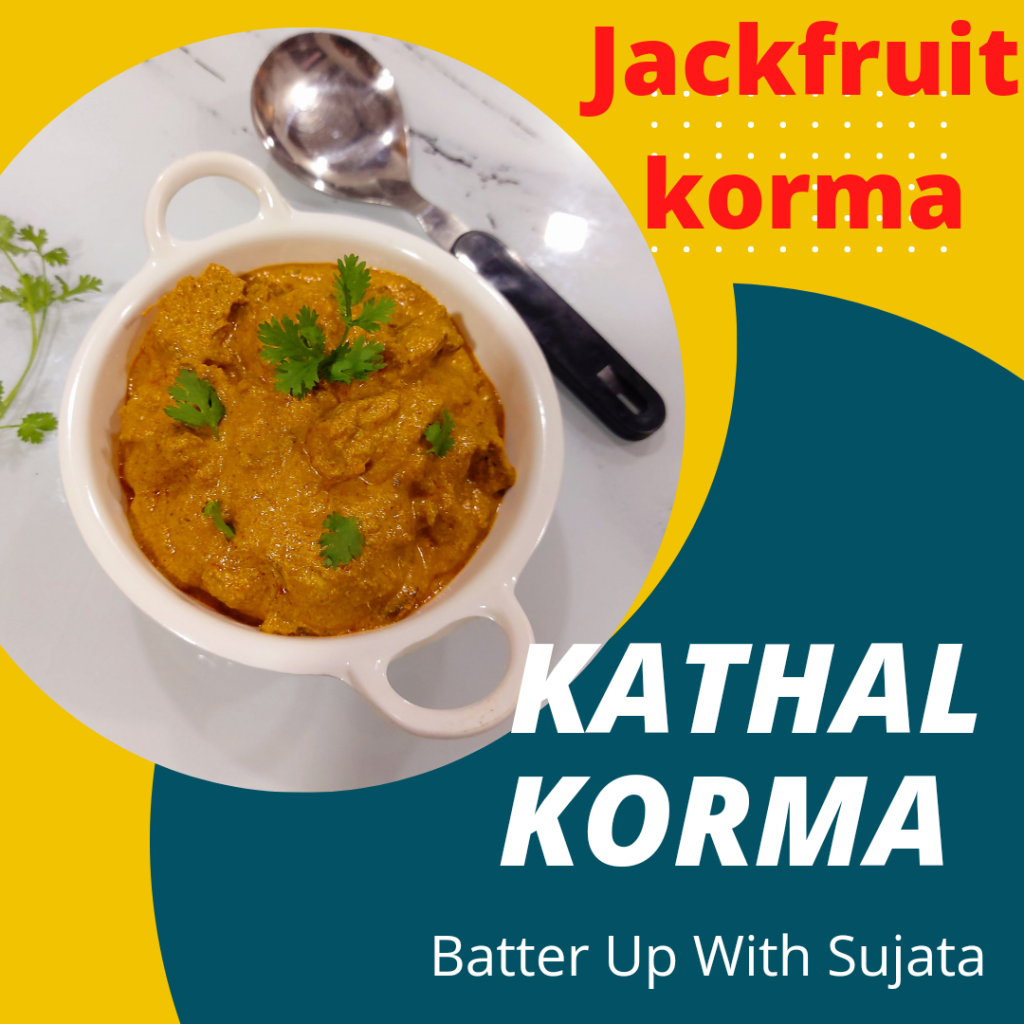
Shahi kathal or jackfruit korma. A lipsmackingly delicious and aromatic Mughlai style jackfruit curry with rich creamy gravy. A delectable shahi korma recipe for vegetarian people.
I have served this delicious kathal korma with jeera rice, roti, salad, raita and Mango chutney.
Here are some more korma and Mughlai recipes from this blog. Try these recipes to enjoy the scrumptious taste.
To make the gravy rich creamy and thick I have used cashew nuts, almond, poppy seeds and coconut. These ingredients also made the curry super tasty. Sauteed and ground onion garlic tomato and whole spices will make your curry smooth and perfectly creamy. Aromatic whole and powder spices and Kewra water made the curry extremely flavorful.
Subscribe with your mail address to get all the recipes straight to your mailbox immediately after publishing.
Recipe video of this delicious korma. Please subscribe the channel to get more recipes.
Recipe
Jackfruit or kathal – 3 cup, peeled and cubed
Onion – 1, chopped
Garlic – 3 cloves
Ginger – 1 inch piece, peeled and chopped
Green chilli – 2, chopped
Tomato – 2 medium, chopped
Green cardamom – 3
Cloves – 3
Cinnamon – 1 inch piece
Bay leaf – 1
Cashew nuts – 2 tablespoon
Almond – 2 tablespoon
Poppy seeds or khas khas – 2 teaspoon
Fresh coconut – 1/4 cup, grated
Salt to taste
Curd or yogurt – 3 tablespoon
Nutmeg or jaiphal powder – 1/8 teaspoon
Mace or javitri powder – 1/8 teaspoon
Cumin powder – 1 teaspoon
Coriander powder – 1 teaspoon
Kashmiri red chilli powder – 2 teaspoon
Turmeric powder – 1/2 teaspoon
Oil – 3 – 4 tablespoon
Ghee or clarified butter – 2 tablespoon
Water – 2 cup
Sugar – 1/2 teaspoon
Cardamom powder – 1/4 teaspoon
Kewra water – 1 teaspoon
Method
1. Rinse the jackfruit cubes well and drain the water completely. Fry the jackfruit pieces in oil and keep aside.
2. In the same oil add bay leaf, green cardamom, cloves and cinnamon. Add chopped onion, garlic, ginger and green chilli. Fry till onion becomes light brown. Add chopped tomato. Saute till tomato becomes mushy.
3. Transfer the mixture in a grinder jar and let it cool down. Discard the bay leaf, add 4 tablespoon water and grind into a smooth paste.
4. Soak the almond in hot water and peel when cool. Grind cashew nuts and poppy seeds into a fine powder. Add peeled almond and grated coconut and grind again.
5. Add curd, nutmeg powder,,mace powder, 3 tablespoon water and blend to make smooth paste.
6. Mix ghee or clarified butter with oil and heat. Add ground onion garlic tomato mixture, cumin powder, coriander powder, Kashmiri red chilli powder and turmeric powder. Saute for 1-2 minutes. Or till oil leaves the sides. Keep the flame low medium.
7. Now add ground cashew nuts, almond and poppy seeds mixture and saute till oil separates.
8. Add fried jackfruit pieces, salt and mix. Saute for 2 minutes more. Stir to avoid sticking to the bottom.
9. Add water and mix. Cover and let it cook till Jackfruit pieces becomes tender and you get your desired consistency. If you need more gravy add little more water. But don’t make runny. Gravy should be thick and creamy.
10. Add sugar and cook for a minute. Taste and adjust salt if required. Add 1/4 teaspoon Cardamom powder and 1 teaspoon Kewra water. Mix and remove from heat.
11. Give a standing time. Let it covered for 5-6 minutes before serving. Garnish with cilantro or coriander leaves and serve with naan, butter naan, roti, rumali roti, paratha, jeera rice, steamed rice or pulao.
If you tried my recipe, you can share your food pictures with me in the social network sites by using hashtag, #batterupwithsujata I would love to see your creations.
I would love to hear from you. Please share your thoughts and suggestions in comment.
Please visit my facebook page and hit the like button to get the latest update
Lemon potato with sesame seeds. This tangy spicy lemon flavoured dry potato curry can be served as a side dish or also as a snack. Very simple ingredients and easy to cook but taste is scrumptious. Serve as teatime snack with toothpick.
Do you know that potatoes are highly nutritious vegetable.
Potatoes are a versatile root vegetable and a staple food in many households. Potatoes are rich in vitamins, minerals and antioxidants, which make them very healthy. Studies have linked potatoes and their nutrients to a variety of impressive health benefits, including improved blood sugar control, reduced heart disease risk and higher immunity. They may also improve digestive health and combat signs of aging. Potatoes are also quite filling, which means they may help you lose weight by curbing hunger pains and cravings. All in all, potatoes are a great addition to your diet in moderation. They are also naturally gluten-free, which means they can be enjoyed by almost everyone. To read more about health benefits of Potato click here.
You may like some more potato recipes from this blog.
Recipe is very simple and easy. If you want to make it gluten free skip hing or asafoetida. I used hing as tempering or tadka with cumin seeds and dry red chilli. Use only cumin seeds and dry red chilli if you want. Lemon juice, lemon zest and little curd or yogurt made this dish perfectly tangy and tasty. This lemon potato is in one word chatpata or lipsmackingly delicious and absolutely flavorful because of cumin powder, mint and cilantro or coriander leaves. These potatoes can be also served as snacks. Serve with toothpick with tea or coffee. Or simply enjoy your munching time.
Subscribe with your mail address to get all the recipes straight to your mailbox immediately after publishing.
Recipe
Potato- 14 small, boiled
Sesame seeds – 1&1/2 tablespoon
Cumin seeds – 1/2 teaspoon
Hing or asafoetida – 1/4 teaspoon
Dry red chilli – 1
Ginger – 1/2 inch piece, grated
Green chilli – 2, finely chopped
Oil – 2 tablespoon
Salt to taste
Curd or yogurt – 2 tablespoon
Cumin powder – 1 teaspoon
Coriander powder – 1 teaspoon
Kashmiri red chilli powder – 1 teaspoon
Turmeric powder – 1/2 teaspoon
Cilantro or coriander leaves – 2 tablespoon, chopped
1. Dry roast the sesame seeds till light brown. Transfer the seeds on a plate.
2. Peel and cut the boiled potatoes into half. If you have too small potatoes then use whole potatoes. Just prick the potatoes with a fork. Or you can also use cubed large size boiled potatoes.
3. In a bowl mix thick curd or yogurt with cumin powder, coriander powder, turmeric powder and Kashmiri red chilli powder. Whisk everything well and keep aside.
4. Heat oil in a pan. Add cumin seeds, hing or asafoetida and dry red chilli. When cumin seeds starts to splutter add grated ginger and chopped green chilli. Fry till ginger starts to change it’s colour.
5. Add potatoes and salt. Saute till potatoes becomes light golden brown. Keep stirring to avoid sticking to the bottom.
6. Reduce the heat and add spices mixed curd or yogurt, water, chopped cilantro or coriander leaves, mint leaves and dry roasted sesame seeds. Reserve some sesame seeds for garnishing.
7. Also add 1-2 slit green chilli if using. Saute till everything about to dried up. Keep stirring and cook on simmer to avoid curdling the yogurt.
8. Add lemon juice and lemon zest. Mix well. When potatoes dried up completely add roasted spice powder. Get the Recipe of roasted spice powder here.
9. Mix well and remove from heat. Taste and adjust salt if required. Your spicy chatpata delicious lemon sesame potatoes are ready to serve.
10. Garnish with cilantro or coriander leaves, mint leaves and dry roasted sesame seeds. Serve with any bread, puri, paratha or dal chawal. Or you can serve this as a snack. To serve as teatime snack or starter serve with some toothpick.
If you tried my recipe, you can share your food pictures with me in the social network sites by using hashtag, #batterupwithsujata I would love to see your creations.
I would love to hear from you. Please share your thoughts and suggestions in comment.
Please visit my facebook page and hit the like button to get the latest update
Red cabbage chickpea curry. If you bored of regular chhole masala or chickpea curry try this delectable chickpea curry with red cabbage or purple cabbage and raw turmeric. Taste and flavour is completely different from our regular chhole. This spicy tasty curry can be served with any bread or rice dishes. You can make this curry dry or with gravy both. Choice is your.
I have used red cabbage in this curry. Red cabbage also called purple cabbage because of it’s dark purple colour.
Purple cabbage is a nutrient-rich vegetable linked to a variety of health benefits. These include reduced inflammation, a healthier heart, stronger bones, improved gut function, and perhaps even a lower risk of certain cancers. This vegetable is also incredibly versatile and one of the most cost-efficient ways to add beneficial antioxidants to your diet. Healthline
I have also use pumpkin seeds with almond in this curry to make the curry creamy and tasty.
Pumpkin seeds may be small, but they’re packed full of valuable nutrients.Eating only a small amount of them can provide you with a substantial quantity of healthy fats, magnesium and zinc.Because of this, pumpkin seeds have been associated with several health benefits.These include improved heart health, prostate health and protection against certain cancers. To read more about health benefits of Pumpkin seeds click here.
You can also make this chickpea curry without red or purple cabbage. Taste and flavour will be great but taste and colour will be differ from with red cabbage. I also sometimes make it without red cabbage with same recipe. Here is a picture for you. You can see the difference in colour.
Red or purple cabbage gives a beautiful colour to the curry. Here are some different types of chickpea recipes from this blog.
This curry is rich creamy flavorful and delicious. You have to grind two different types of spices for this curry. First almond, pumpkin seeds, fresh grated coconut, mint leaves and peeled and chopped raw mango with 1/4 cup water. Paste should be smooth. And second make a paste of ginger, garlic, tomato, chopped raw turmeric and soaked dry red chilli with it’s water. Make a smooth paste. Ground nuts, seeds, coconut and spices will make your curry rich creamy and delicious. If you don’t have raw turmeric, use 1/2 teaspoon turmeric powder.
Subscribe with your mail address to get all the recipes straight to your mailbox immediately after publishing.
Recipe video of this red cabbage chickpea curry
Recipe
Chickpea- 1/2 cup
Red cabbage – 2 cup, shredded
Raw turmeric – 1/2 inch piece, peeled and chopped
Onion- 1, finely chopped
Garlic- 3-4 cloves
Ginger- 1 inch piece, peeled and chopped
Tomato – 1, chopped
Dry red chilli- 2
Cumin powder- 1 teaspoon
Coriander powder- 1 teaspoon
Fennel seeds or sounf powder- 1 teaspoon
Garam masala powder- 1/2 teaspoon
Cilantro or coriander leaves – 2 tablespoon
Mint leaves- 2 tablespoon
Raw mango – 1/4 cup, peeled and chopped into small pieces
Pumpkin seeds- 2 tablespoon
Almond – 2 tablespoon
Grated fresh coconut- 1/4 cup
Bay leaf- 1
Cumin seeds- 1/2 teaspoon
Fenugreek seeds or methi- 1/8 teaspoon
Mustard seeds- 1/4 teaspoon
Oil- 2-3 tablespoon
Salt to taste
Sugar- 1/2 teaspoon, optional
Water – 1&1/2 cup
Method
1. Rinse and soak the chickpea overnight. Next day drain the water and wash again. Pressure cook with sufficient water till chickpea becomes soft. After one whistle pressure cook on simmer for 40-50 minutes. Let it cool down. Chop the red cabbage into this slices.
2. Soak the dry red chilli in 1/8 cup water.
3. Grind pumpkin seeds and almond into a fine powder. Add grated fresh coconut, chopped raw mango, mint leaves and 1/4 cup water. Grind into a smooth paste.
4. Separately grind ginger, garlic, raw turmeric, chopped tomato and soaked dry red chilli with its water. Grind into a smooth paste.
5. Heat oil in a pan. Add bay leaf,mustard seeds, fenugreek seeds and cumin seeds. When seeds starts to splutter add finely chopped onion and fry till onion starts to change it’s colour.
6. Now add ginger, garlic, tomato, turmeric and dry red chilli paste. Fry till raw smell of garlic and turmeric goes away and oil leaves the sides. If you don’t have raw turmeric, use 1/2 teaspoon turmeric powder.
7. Add shredded red cabbage and saute for 2 minutes. Add chopped cilantro or coriander. Saute again for a minute. Now add salt and all the spices.
8. Saute till everything dried up. Add boiled chickpea and saute till all the water evaporate.
9. Add pumpkin seeds, almond, raw mango, coconut and mint leaves paste. Saute till everything dried up. Now add water and sugar. Cook till you get your desired consistency. You can make this with gravy or dry curry both. Gravy also taste great. But today I made it dry. So when it about to dried up remove from heat. Taste and adjust salt if required.
10. Your rich creamy aromatic and lipsmackingly delicious curry is ready to serve. Garnish with cilantro and mint leaves. Serve with any bread or rice dishes.
Notes
1. If you want you can also make this curry with only chickpea. Skip red cabbage and enjoy rich creamy spicy scrumptious chickpea curry.
2. This curry can be made dry and with gravy both. Try both ways or make according to your choice.
Blogger group
Linking this recipe to Facebook gourmet group Shhhhh Cooking Secretly Challenge. In this monthly group members are paired with different partners every month and two secret ingredients are given to each other. We paired every month with different bloggers so that we can interact each other. Sometimes we become very good friend. And after preparing the dish members share a picture of the dish and other members have to guess the ingredients. This month Mango Mania theme suggested by Mayuri Patel. I recently bookmarked her Curried chickpea stuffed sweet potato to try. This month my partner is Renu Agrawal Dongre. Renu has a wonderful blog. I have to try her No churn coffee almond icecream. Sounds interesting isn’t it?
Renu gave me turmeric and mint and I made this red cabbage chickpea curry with a different taste and flavour. I gave her oil and milk as secret ingredient. Renu shared delicious mango cake with these ingredients.
If you tried my recipe, you can share your food pictures with me in the social network sites by using hashtag, #batterupwithsujata I would love to see your creations.
I would love to hear from you. Please share your thoughts and suggestions in comment.
Please visit my facebook page and hit the like button to get the latest update
Shahi coconut milk pulao. A no onion garlic flavorful one pot rice dish with coconut milk, aromatic spices,fried nuts and coconut milk. Very easy to make yet absolutely delicious. Dry fruit, saffron, whole spices, ghee or clarified butter, mint and cilantro with coconut milk made this pulao absolutely shahi or royal.
To make this aromatic and lipsmackingly delicious pulao you need only basmati rice, some dry fruits and whole spices. I have used almond and cashew nuts only. You can use raisins or any other dry fruits of your choice. If you don’t want to use whole spices add half to 1 teaspoon Pulao or biryani masala at the end to make your pulao perfectly flavorful.
Subscribe with your mail address to get all the recipes straight to your mailbox immediately after publishing.
Recipe
Basmati rice – 2 cup
Cashew nuts – 3 tablespoon
Almond – 3 tablespoon
Saffron- 1/4 teaspoon + 1 tablespoon water
Green cardamom – 4
Cloves — 4
Cinnamon – 1 inch piece
Bay leaf – 2
Star anise – half
Kababchini – 4, optional
Mace or javitri – 2 strands
Cumin seeds – 1/2 teaspoon
Cumin powder – 1 teaspoon
Ginger – 1&1/2 inch piece, grated
Green chilli – 2-3 or to taste
Salt to taste
Sugar – 1 teaspoon, optional
Ghee or clarified – 2 tablespoon
Thick coconut milk – 1 cup
Water – 3 cup
Cilantro or coriander leaves – 2 tablespoon, chopped
Mint leaves – 1 tablespoon, chopped
Green peas – 1/2 cup
Method
1. Wash the rice 4-5 times or till water runs out clear. Soak the rice in water for 15 minutes. After 15 minutes drain the water and keep aside.
2. Soak saffron in 1 tablespoon warm water.
3. Heat ghee or clarified butter in a pan or wok. Fry the cashew nuts and almond on low medium heat till light golden brown. Transfer the nuts on a plate.
4. In the same ghee add cumin seeds, lightly crushed green cardamom, cloves, cinnamon, bay leaves, star anise, mace or javitri and Kababchini if using. If you don’t want to use whole spices add half to one teaspoon biryani or pulao masala at the end or before removing from heat. Get the recipe here.
5..When seeds starts to splutter add grated ginger and chopped green chilli. Fry for a few seconds.
6. Now add drained rice, cumin powder and salt. Saute for 2 minutes. Stir the rice gently to avoid breaking the rice. Add soaked saffron and mix.
7. Add coconut milk, water, chopped cilantro or coriander leaves, mint leaves, green peas, fried cashew nuts, almond and sugar. You can also add some raisins if you want. Mix well.
8. When it starts to rolling boil reduce the heat. Cover and cook on simmer for 15 minutes. Stir once in between.
9. After 15 minutes stir the rice gently. Water should be absorbed, if not cover cover on simmer for 5 minutes again.
10. Remove from heat let it covered for 10-15 minutes. Remove the cover and fluff the rice gently. Serve hot and spicy curry or raita.
If you tried my recipe, you can share your food pictures with me in the social network sites by using hashtag, #batterupwithsujata I would love to see your creations.
I would love to hear from you. Please share your thoughts and suggestions in comment.
Please visit my facebook page and hit the like button to get the latest update
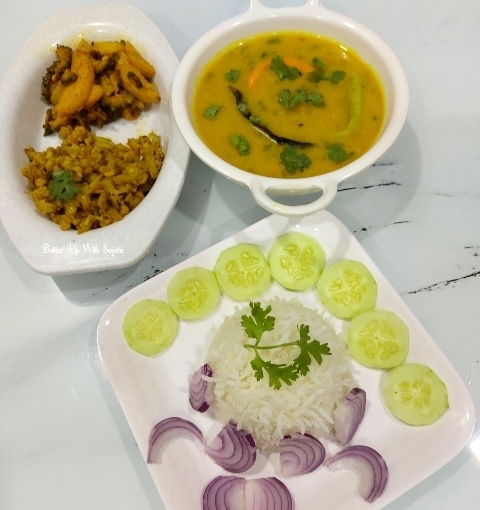
Mixed dal or panchmel dal with mango ginger or amada. A very flavourful and delicious dal to serve with steamed rice. Usually we make this mango ginger or amada dal with moong dal/yellow lentil or masoor dal/red lentil. But here is a panchmel dal or mixed of five lentils. This lightly spiced and aromatic dal with steamed rice is a comfort food for summer.
You may also like to try Healthy methi dal from the blog of Priya Vijaykrishnan.
Ingredients used to make this protein rich mixed dal
Moong dal or split yellow lentil – Moong dal or split yellow lentil or split and skinned green gram/mung beans. Moong dal is a light and protein packed lentil. Also a comfort Indian food.
Arhar/toor dal or split pigeon peas – Used split pigeon peas or arhar/toor dal with equal amount of other lentils or dal.
Chana dal or Bengal gram – Delicious and nutritious dal used to enhance the taste.
Udad dal or split skinned black gram – Dhuli udad dal is used to give a creaminess. Udad dal is also packed with protein and other nutrients.
Masoor dal or red lentil – Protein and vitamins enriched Masoor dal is used to give a wonderful taste and flavour.
Mango ginger or amada – I have used mango ginger from my terrace garden. See the above picture of mango ginger and it’s plant. Bought online and placed some under soil. Now it becomes a lovely bunch of plants.
Curcuma amada, or mango ginger is a plant of the ginger family Zingiberaceae and is closely related to turmeric (Curcuma longa). The rhizomes are very similar to common ginger but lack its pungency, and instead have a raw mango flavour.Wikipedia Amada or mango ginger has also many health benefits. You may like to try Walnut almond chutney with mango ginger.
Ginger or adrakh – Ginger used to give a spicy aroma and enhance the taste.
Tomato – Tomato or tamatar used to give a mild tangy taste. You can omit if you want.
Panch phoran – Panch phoran or Bengali five spices used for tempering. To make panch phoran or five spice mix 1 tablespoon each nigella seed or kalonji, cumin seeds or jeera, mustard seeds or sarso, fennel seeds or sounf and 1/2 tablespoon fenugreek seeds or methi. Here are some recipes using panch phoran.
Dry red chilli – One whole dry red chilli is used for tempering or tadka. You can break the chilli before adding in the oil if you want your dal more spicy.
Hing or asafoetida – A pinch of hing used for flavour. You can skip if you want your dal gluten free.
Onion – Used one chopped large onion to enhance the taste. Fried onion will give a scrumptious taste to your dal. You can use one more onion if you like. Or you can also skip if you want your dal no onion garlic or satwik.
Salt – Salt or namak is used for taste.
Turmeric powder or haldi – Turmeric powder used to give a nice colour.
Green chilli or hari mirch – Green chilli used to give a spicy kick to the dal. You can use more green chilli if you want your dal more spicy. I have used slit green chilli, you can also use chopped green chilli.
Oil – Used mustard oil for tempering or tadka. You can use any oil of your choice but mustard oil will give a lovely flavour.
This dal is very flavourful because of mango ginger or amada and completely vegan. And also lightly spiced so perfect for this hot weather. Really a comfort food with hot steamed rice, some potato fry and dry vegetables. Try and enjoy the delectable taste. I have boiled all dal with mango ginger or amada in pressure cooker. But you can also add grated or ground mango ginger before adding water while tempering. Boil the dal only. Add everything while tempering or tadka. Add chilli according to your spice tolerance.
Subscribe with your mail address to get all the recipes straight to your mailbox immediately after publishing.
Video recipe of this delicious flavorful dal
Recipe
Moong dal or split yellow lentil – 1/8 cup
Arhar dal/toor dal or split pigeon peas – 1/8 cup
Chana dal or Bengal gram – 1/8 cup
Udad dal or split and skinned black gram – 1/8 cup
Masoor dal or red lentil – 1/8 cup
Mango ginger or amada – 3 tablespoon, peeled and grated
Ginger – 1 inch piece, chopped
Tomato – 1, chopped
Panch phoran – 2 teaspoon
Dry red chilli – 1
Hing or asafoetida – 1/4 teaspoon, optional
Onion – 1 large, finely chopped
Salt to taste
Turmeric powder – 1/2 teaspoon
Slit green chilli – 2
Cilantro or coriander leaves – 2 tablespoon
Mustard oil – 2 tablespoon
Method
1. Rinse all the lentils or dal well and soak in sufficient water for 15-20 minutes. Peel, wash and grate the mango ginger or amada. Drain the water and boil the dal with grated mango ginger or amada in a pressure cooker with 2 or 2&1/ cup water till dal becomes soft. Or reduce the flame after one whistle and pressure cook on simmer for 20-25 minutes. Let the pressure settle down on its own.
2. Grind the ginger and tomato. You can use grated ginger and finely chopped tomato but I like to use these smooth paste. Also peel wash and chop the onion.
3. Heat oil in a pan or wok. Add panch phoran and dry red chilli. If you want your dal more spicy break the dry red chilli before adding.
4. When seeds starts to splutter add chopped onion. Fry till onion starts to change it’s colour. Now add ginger tomato paste. Mix well.
5. Add salt and turmeric powder. Saute for a minute. Add hing or asafoetida if using and saute till oil leaves the sides.
6. Add mango ginger mixed boiled dal and mix well. Add two cup water, two slit green chili and chopped cilantro or coriander leaves. Mix and let it cook till you get your desired consistency. I like this dal semi thick. You can make thick or thin according to your choice.
7. Keep stirring in regular interval. When you get your desired consistency, taste and adjust salt.
8. Remove from heat and garnish with cilantro or coriander leaves. Serve hot with steamed rice,some potato fry or aloo bhaja and any dry vegetables.
Notes
1. You can also make this dal without onion. Follow the same recipe and omit onion. Also reduce the amount of oil if you are not using chopped onion.
2. This dal can be made with only moong or masoor dal instead of mixed dal.
3. To make gluten free skip hing or asafoetida.
4. Add less or more chilli according to your spice tolerance.
If you tried my recipe, you can share your food pictures with me in the social network sites by using hashtag, #batterupwithsujata I would love to see your creations.
I would love to hear from you. Please share your thoughts and suggestions in comment.
Please visit my facebook page and hit the like button to get the latest update
Tomato chutney. Here is an easy and delicious Bengali style sweet tomato chutney to serve with any meal. Recipe is very simple and easy to make. If you have boiled tomatoes ready then you can make it in a jiffy.
You may also like to try Imli ki chutney from the blog of Preethi Prasad.
Ingredients used to make this chutney.
Tomato or tamatar – I have used 4 small medium tomatoes. If you have large tomato then use two only.
Salt or namak – Used 1/4 teaspoon salt only. You can use according to your taste.
Sugar or chini – Sugar used to sweetened the chutney. You can use jaggery or any other sweetener. But sugar will taste best.
Raisins or kishmish – Used raisins for taste. If you don’t like the taste of raisins then you can omit it. You can also use cashew nuts if you want.
Ginger or adrakh – Ginger will give a spicy kick to your chutney. You can use less or more according to your taste.
Mustard seedsor sarso – Mustard seeds used for tempering or tadka. You can use black or yellow any mustard seeds. Use whatever you have.
Dry red chillior sukhi lal mirch – Whole dry red chilli also used for tempering or tadka. It will give a very light heat to the chutney. If you want your chutney more hot break the red chilli into half before adding in oil.
Oil or tel – Used very little mustard oil to cook the chutney. You can also use any vegetable oil.
I made this chutney in small quantity. You can double the recipe if you want. Usually this chutney served after meal with papad before serving dessert. But I like this chutney with khichdi, dal chawal, puri or luchi, paratha or with anything. I have used boiled tomatoes but you can also use chopped tomatoes. I like my chutney smooth so boiled and peeled the tomatoes. I have small medium sized tomatoes so I used four but if you have large tomato then use two large tomatoes. Rest of the ingredients will be same.
Subscribe with your mail address to get all the recipes straight to your mailbox immediately after publishing.
Recipe video of tomato chutney
Recipe
Tomato – 2 large
Ginger 1/2 inch piece grated
Mustard seeds – 1/4 teaspoon
Dry red chilli – 1
Raisins – 2 teaspoon
Salt – 1/4 teaspoon or to taste
Sugar to taste – 3 tablespoon
Oil – 2 teaspoon
Water – 2 cup
Method
1. Wash the tomatoes well. Make a cross-shaped incision or make X with a knife at one end. Don’t make too deep cut. See the method in video recipe above.
2. Soak raisins in 4 tablespoon water. If you don’t like raisins, omit it. You can also use cashew nuts if you want.
3. Boil 2 cup water in a pan. Add the tomatoes in it. Boil for 4 – 5 minutes or until the skin starts to separate.
4. Let it cool down. Peel the boiled tomatoes. Discard the skin and chop into small pieces.
5. Heat oil in a pan. Add mustard seeds and dry red chilli.
6. When seeds starts to splutter add the tomatoes, salt and ginger. Saute, keep the flame low.
7. Add raisins and keep stirring. You can also add cashew nuts if you want. I didn’t. When tomatoes become soft add sugar and mix. Cook on low flame for 5-6 minute or till tomatoes become mushy and thick.
8. And its ready. Transfer the chutney in a bowl to serve.
If you tried my recipe, you can share your food pictures with me in the social network sites by using hashtag, #batterupwithsujata I would love to see your creations.
I would love to hear from you. Please share your thoughts and suggestions in comment.
Please visit my facebook page and hit the like button to get the latest update
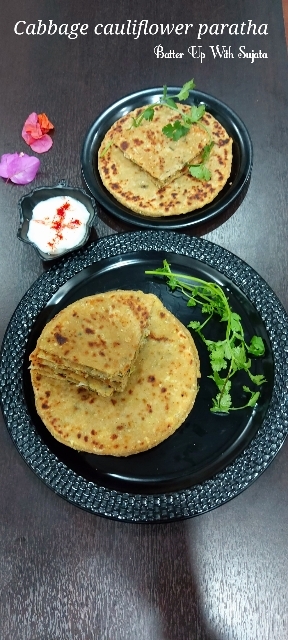
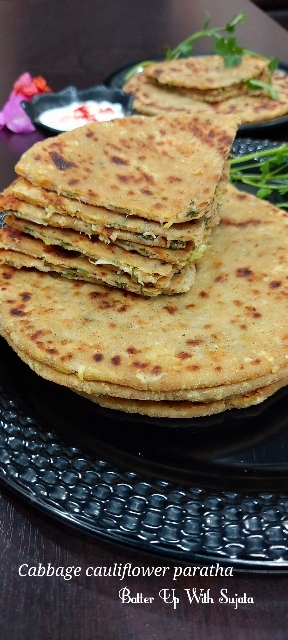
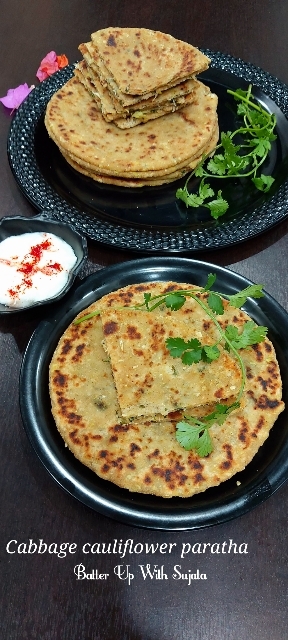
Cabbage cauliflower paratha. Outer layer of this paratha is made with cabbage and flour dough and stuffud with spicy delicious cauliflower. We often make gobhi paratha or cauliflower paratha or with a cauliflower cabbage mixed stuffing. But this paratha is totally different. You don’t need any sides to serve this paratha. This spicy soft paratha taste scrumptious.
You may like to try four different types of paratha from this blog. Click on the name below to get the recipe.
Cabbage – Cabbage used to make the dough. Grated cabbage kneaded with whole wheat flour.
Cabbage is an exceptionally healthy food. It has an outstanding nutrient profile and is especially high in vitamins C and K. In addition, eating cabbage may even help lower the risk of certain diseases, improve digestion and combat inflammation. Plus, cabbage makes a tasty and inexpensive addition to a number of recipes. Source
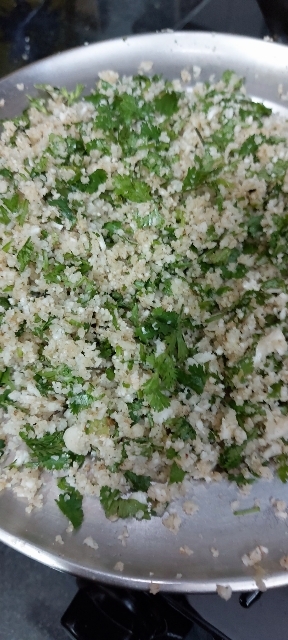
Cauliflower – Grated cauliflower with some spices used to make stuffing.
Cauliflower is an extremely healthy vegetable that’s a significant source of nutrients. It also contains unique plant compounds that may reduce the risk of several diseases, including heart disease and cancer. Additionally, it’s weight loss friendly and incredibly easy to add to your diet. To read more health benefits of cauliflower click here.
Salt – Salt used to enhance the taste.
Cumin powder – Cumin powder used for a lovely aroma.
Garam masala powder – Garam masala powder used to give a lovely aroma to the stuffing. Garam masala powder is a blend of different aromatic spices like cardamom, cloves, cinnamon, mace, nutmeg etc.
Green chilli – Used Green chilli to make the stuffing spicy.
Cilantro or coriander leaves – Chopped cilantro or coriander leaves used for flavour.
Whole wheat flour or atta – I used atta or whole wheat flour to make the dough. You can use maida or all purpose flour or half whole wheat flour and half all purpose flour.
Oil or ghee/clarified butter – I used peanut oil to shallow fry the paratha. You can use olive oil or any flavorless oil or ghee/ clarified butter to fry.
Blogger group
This post is going to be featured on Facebook gourmet group Shhhhh Cooking Secretly Challenge. In this group every month one of the members decide the theme. And members paired to give two secret ingredients each other. Best part is we paired every month with different bloggers so that we can interact with each other. And after preparing the dish members share a picture of the dish and other members have to guess the ingredients.
This month’s theme is Flatbread suggested by Anu Kollon who blog at Ente Thattukada. I have bookmarked her Neer dosa to try.
This month my partner is Kalyani Sri. You may like to try Quinoa dosa from her space. Kalyani gave me ginger and cabbage as secret ingredients and I made this delicious cabbage cauliflower paratha. I gave watermelon and coconut and Kalyani shared an amazing recipe of Watermelon rind dosa with these ingredients.
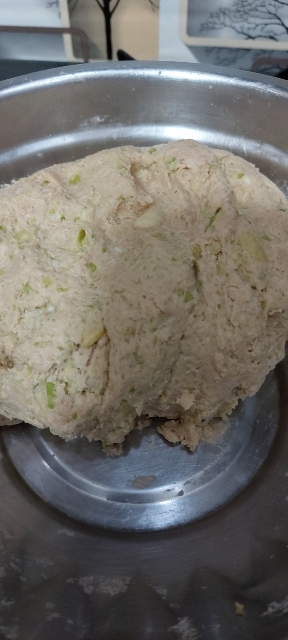
We have to make the dough with cabbage. Grate the cabbage,add salt and mix well. After 15-20 minutes cabbage will release enough water. Squeeze out the water completely. We will knead the dough with this water so reserve it in a bowl. In a large bowl mix flour with squeezed cabbage and knead dough with the help of it’s reserved water. Add all the spices, grated ginger, finely chopped green chilli and cilantro or coriander. Add salt just before rolling and stuffing the paratha. Roll into a small roti, place cauliflower in the middle and close the edges. Roll again and fry all paratha on a skillet/griddle/tawa or nonstick pan with the help of little oil or ghee. Easy isn’t it? If you have grated cabbage and cauliflower ready then you can make it in short notice or whenever you want to enjoy these delicious paratha.
Subscribe with your mail address to get all the recipes straight to your mailbox immediately after publishing.
Recipe
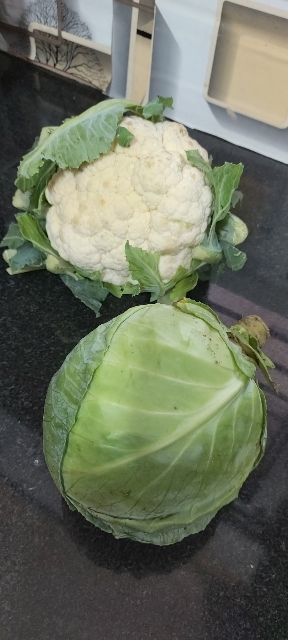
Cabbage – 1
Cauliflower – 1
Salt to taste
Ginger – 1&1/2 inch piece, grated
Cumin powder – 1 teaspoon
Garam masala powder – 1/2 teaspoon
Green chilli – 2-3 or to taste, finely chopped
Cilantro or coriander leaves – handful chopped
Whole wheat flour or atta – 2 cup
Oil or ghee/clarified butter for shallow fry
Method
1. Rinse the cauliflower well. Drain the water completely. Wash the cabbage. Discard the outer layer.
2. Grate the cabbage and add salt. Mix well and keep aside for 15-20 minutes. Cabbage will release water.
3. Now wipe the cauliflower with a kitchen napkin. Grate the cauliflower with a box grater. Or you can use your food processor. Add grated ginger, finely chopped Green chilli, cilantro or coriander leaves, cumin powder and garam masala powder. Use green chilli according to your taste. Mix everything with a spoon. Don’t add salt. We will add salt just before stuffing the paratha to avoid the cauliflower becomes soggy.
4. Squeeze out all the water from grated cabbage. Don’t discard the water. We will use it to knead the dough.
5. Place the squeezed cabbage in a large bowl. Add whole wheat flour or atta. Knead the dough with the water of squeezed cabbage. Already added salt in cabbage so don’t add salt. Add water slowly to knead a soft dough.
6. Make equal size balls. Add salt in the grated cauliflower mixture and mix.
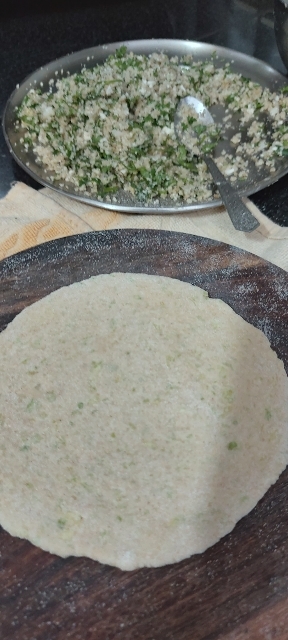
7. Roll the kneaded flour balls with the help of wheat flour. Dip the ball in flour and start to roll. Roll into 4 inch diameter. Place some cauliflower stuffing in the middle.
8. Gather the edges and pinch to close. Make a ball again. Dip the ball in wheat flour from both sides. Roll again carefully with the help of some flour. Dust some flour and roll gently, don’t press much. Stuffing shouldn’t be comes out.
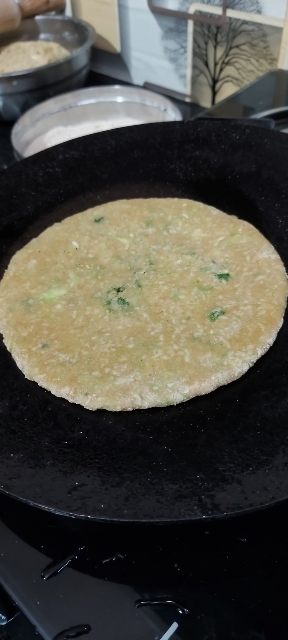
9. Heat a tawa or skillet/griddle. Place the paratha on hot tawa. Let it cook till bubbles appear on the paratha. Flip and cook other side till light brown.
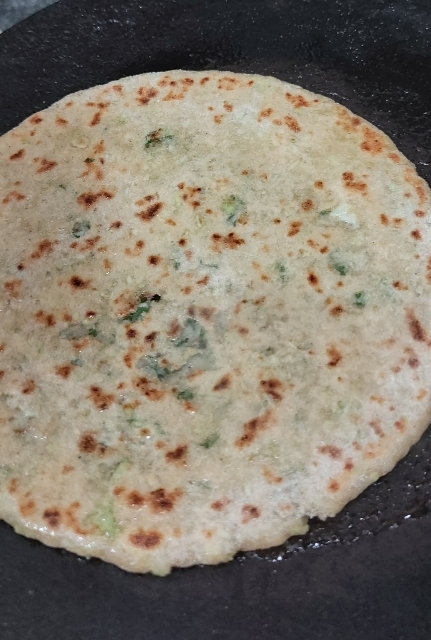
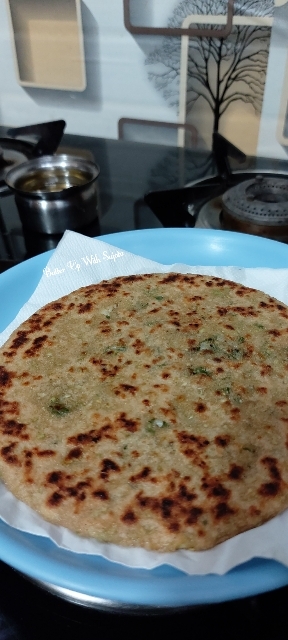
10. Brush little oil or ghee/clarified butter and fry from both sides. Make all the paratha like this. Serve hot with yogurt, pickle or chutney.
11. If you have some leftover cabbage mixed dough then you can make roti or paratha with it. Your roti or paratha will be super soft even after a few hours.
If you tried my recipe, you can share your food pictures with me in the social network sites by using hashtag, #batterupwithsujata I would love to see your creations.
I would love to hear from you. Please share your thoughts and suggestions in comment.
Please visit my facebook page and hit the like button to get the latest update