Mixed Dal/Lentil With Mango Ginger Or Amada/Panchmel Dal

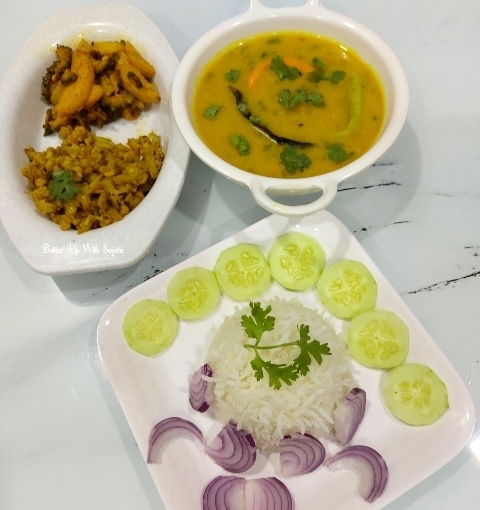
Mixed dal or panchmel dal with mango ginger or amada. A very flavourful and delicious dal to serve with steamed rice. Usually we make this mango ginger or amada dal with moong dal/yellow lentil or masoor dal/red lentil. But here is a panchmel dal or mixed of five lentils. This lightly spiced and aromatic dal with steamed rice is a comfort food for summer.

Here are some more dal recipes from this blog.

1. Lemony dal

2. Panch phoran dal

3. Beetroot dal or lentil curry

4. Whole masoor dal

5. Masoor dal chochchori or chorchori

6. Mediterranean red lentil soup

7. Dal rasam

8. Dal makhani

9. Red lentil soup

10. Lebanese lentil lemon soup

11. Goan dal curry with coconut and kokum

12. Dal kanda or chana dal fry

13. Dal palak

14. Egg dal tadka

You may also like to try Healthy methi dal from the blog of Priya Vijaykrishnan.

Ingredients used to make this protein rich mixed dal

Moong dal or split yellow lentil – Moong dal or split yellow lentil or split and skinned green gram/mung beans. Moong dal is a light and protein packed lentil. Also a comfort Indian food.

Arhar/toor dal or split pigeon peas – Used split pigeon peas or arhar/toor dal with equal amount of other lentils or dal.

Chana dal or Bengal gram – Delicious and nutritious dal used to enhance the taste.

Udad dal or split skinned black gram – Dhuli udad dal is used to give a creaminess. Udad dal is also packed with protein and other nutrients.

Masoor dal or red lentil – Protein and vitamins enriched Masoor dal is used to give a wonderful taste and flavour.

Mango ginger or amada – I have used mango ginger from my terrace garden. See the above picture of mango ginger and it’s plant. Bought online and placed some under soil. Now it becomes a lovely bunch of plants.

Curcuma amada, or mango ginger is a plant of the ginger family Zingiberaceae and is closely related to turmeric (Curcuma longa). The rhizomes are very similar to common ginger but lack its pungency, and instead have a raw mango flavour.Wikipedia Amada or mango ginger has also many health benefits. You may like to try Walnut almond chutney with mango ginger.

Ginger or adrakh – Ginger used to give a spicy aroma and enhance the taste.

Tomato – Tomato or tamatar used to give a mild tangy taste. You can omit if you want.

Panch phoran – Panch phoran or Bengali five spices used for tempering. To make panch phoran or five spice mix 1 tablespoon each nigella seed or kalonji, cumin seeds or jeera, mustard seeds or sarso, fennel seeds or sounf and 1/2 tablespoon fenugreek seeds or methi. Here are some recipes using panch phoran.

Panch phoran bhaja or dry roasted Bengali five spice powder

Panch phoran dal

Panch phoran tarkari

Olive chutney with jaggery and panch phoran

Dry red chilli – One whole dry red chilli is used for tempering or tadka. You can break the chilli before adding in the oil if you want your dal more spicy.

Hing or asafoetida – A pinch of hing used for flavour. You can skip if you want your dal gluten free.

Onion – Used one chopped large onion to enhance the taste. Fried onion will give a scrumptious taste to your dal. You can use one more onion if you like. Or you can also skip if you want your dal no onion garlic or satwik.

Salt – Salt or namak is used for taste.

Turmeric powder or haldi – Turmeric powder used to give a nice colour.

Green chilli or hari mirch – Green chilli used to give a spicy kick to the dal. You can use more green chilli if you want your dal more spicy. I have used slit green chilli, you can also use chopped green chilli.

Oil – Used mustard oil for tempering or tadka. You can use any oil of your choice but mustard oil will give a lovely flavour.

This dal is very flavourful because of mango ginger or amada and completely vegan. And also lightly spiced so perfect for this hot weather. Really a comfort food with hot steamed rice, some potato fry and dry vegetables. Try and enjoy the delectable taste. I have boiled all dal with mango ginger or amada in pressure cooker. But you can also add grated or ground mango ginger before adding water while tempering. Boil the dal only. Add everything while tempering or tadka. Add chilli according to your spice tolerance.

Subscribe with your mail address to get all the recipes straight to your mailbox immediately after publishing.

Video recipe of this delicious flavorful dal

Recipe

Moong dal or split yellow lentil – 1/8 cup

Arhar dal/toor dal or split pigeon peas – 1/8 cup

Chana dal or Bengal gram – 1/8 cup

Udad dal or split and skinned black gram – 1/8 cup

Masoor dal or red lentil – 1/8 cup

Mango ginger or amada – 3 tablespoon, peeled and grated

Ginger – 1 inch piece, chopped

Tomato – 1, chopped

Panch phoran – 2 teaspoon

Dry red chilli – 1

Hing or asafoetida – 1/4 teaspoon, optional

Onion – 1 large, finely chopped

Salt to taste

Turmeric powder – 1/2 teaspoon

Slit green chilli – 2

Cilantro or coriander leaves – 2 tablespoon

Mustard oil – 2 tablespoon

Method

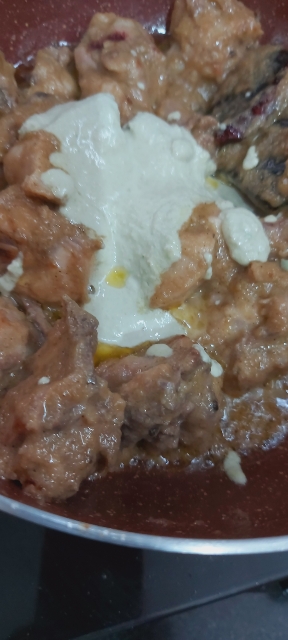
1. Rinse all the lentils or dal well and soak in sufficient water for 15-20 minutes. Peel, wash and grate the mango ginger or amada. Drain the water and boil the dal with grated mango ginger or amada in a pressure cooker with 2 or 2&1/ cup water till dal becomes soft. Or reduce the flame after one whistle and pressure cook on simmer for 20-25 minutes. Let the pressure settle down on its own.

2. Grind the ginger and tomato. You can use grated ginger and finely chopped tomato but I like to use these smooth paste. Also peel wash and chop the onion.

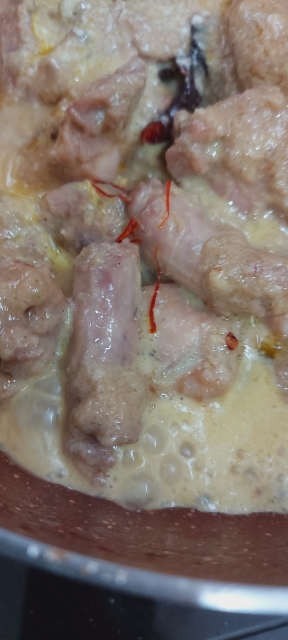
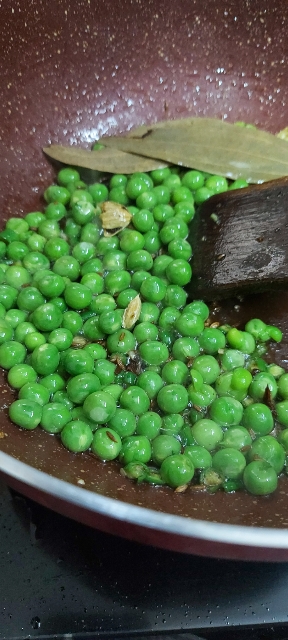
3. Heat oil in a pan or wok. Add panch phoran and dry red chilli. If you want your dal more spicy break the dry red chilli before adding.

4. When seeds starts to splutter add chopped onion. Fry till onion starts to change it’s colour. Now add ginger tomato paste. Mix well.

5. Add salt and turmeric powder. Saute for a minute. Add hing or asafoetida if using and saute till oil leaves the sides.

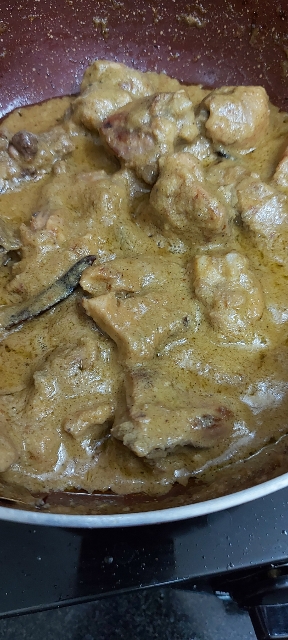
6. Add mango ginger mixed boiled dal and mix well. Add two cup water, two slit green chili and chopped cilantro or coriander leaves. Mix and let it cook till you get your desired consistency. I like this dal semi thick. You can make thick or thin according to your choice.

7. Keep stirring in regular interval. When you get your desired consistency, taste and adjust salt.

8. Remove from heat and garnish with cilantro or coriander leaves. Serve hot with steamed rice,some potato fry or aloo bhaja and any dry vegetables.

Notes

1. You can also make this dal without onion. Follow the same recipe and omit onion. Also reduce the amount of oil if you are not using chopped onion.

2. This dal can be made with only moong or masoor dal instead of mixed dal.

3. To make gluten free skip hing or asafoetida.

4. Add less or more chilli according to your spice tolerance.

If you tried my recipe, you can share your food pictures with me in the social network sites by using hashtag, #batterupwithsujata I would love to see your creations.

I would love to hear from you. Please share your thoughts and suggestions in comment.

Please visit my facebook page and hit the like button to get the latest update

Facebook page

Follow on

Twitter

Instagram

Pinterest

Tomato Chutney

Tomato chutney. Here is an easy and delicious Bengali style sweet tomato chutney to serve with any meal. Recipe is very simple and easy to make. If you have boiled tomatoes ready then you can make it in a jiffy.

And its also perfect to serve with Bhoger khichuri or bhuni khichuri, Bengali Sabudana khichdi, Basanti pulao, Aloo chutney pulao, Luchi or any pulao.

You may like some more chutney recipes on this blog. Click on the link below for recipe.

1. Brinjal chutney

2. Almond walnut chutney with mango ginger or amada

3. Olive chutney

4. Tomato oambal or Tomato chutney

5. Ginger chutney

6. Mango sesame chutney

7. Date raisins jaggery chutney with mango bar

8. Waterchestnut chutney

9. Onion tomato chutney or dip

10. Mango raisins chutney

11. Peanut chutney

22. Mint yogurt dip

You may also like to try Imli ki chutney from the blog of Preethi Prasad.

Ingredients used to make this chutney.

Tomato or tamatar – I have used 4 small medium tomatoes. If you have large tomato then use two only.

Salt or namak – Used 1/4 teaspoon salt only. You can use according to your taste.

Sugar or chini – Sugar used to sweetened the chutney. You can use jaggery or any other sweetener. But sugar will taste best.

Raisins or kishmish – Used raisins for taste. If you don’t like the taste of raisins then you can omit it. You can also use cashew nuts if you want.

Ginger or adrakh – Ginger will give a spicy kick to your chutney. You can use less or more according to your taste.

Mustard seeds or sarso – Mustard seeds used for tempering or tadka. You can use black or yellow any mustard seeds. Use whatever you have.

Dry red chilli or sukhi lal mirch – Whole dry red chilli also used for tempering or tadka. It will give a very light heat to the chutney. If you want your chutney more hot break the red chilli into half before adding in oil.

Oil or tel – Used very little mustard oil to cook the chutney. You can also use any vegetable oil.

I made this chutney in small quantity. You can double the recipe if you want. Usually this chutney served after meal with papad before serving dessert. But I like this chutney with khichdi, dal chawal, puri or luchi, paratha or with anything. I have used boiled tomatoes but you can also use chopped tomatoes. I like my chutney smooth so boiled and peeled the tomatoes. I have small medium sized tomatoes so I used four but if you have large tomato then use two large tomatoes. Rest of the ingredients will be same.

Subscribe with your mail address to get all the recipes straight to your mailbox immediately after publishing.

Recipe video of tomato chutney

Recipe

Tomato – 2 large

Ginger 1/2 inch piece grated

Mustard seeds – 1/4 teaspoon

Dry red chilli – 1

Raisins – 2 teaspoon

Salt – 1/4 teaspoon or to taste

Sugar to taste – 3 tablespoon

Oil – 2 teaspoon

Water – 2 cup

Method

1. Wash the tomatoes well. Make a cross-shaped incision or make X with a knife at one end. Don’t make too deep cut. See the method in video recipe above.

2. Soak raisins in 4 tablespoon water. If you don’t like raisins, omit it. You can also use cashew nuts if you want.

3. Boil 2 cup water in a pan. Add the tomatoes in it. Boil for 4 – 5 minutes or until the skin starts to separate.

4. Let it cool down. Peel the boiled tomatoes. Discard the skin and chop into small pieces.

5. Heat oil in a pan. Add mustard seeds and dry red chilli.

6. When seeds starts to splutter add the tomatoes, salt and ginger. Saute, keep the flame low.

7. Add raisins and keep stirring. You can also add cashew nuts if you want. I didn’t. When tomatoes become soft add sugar and mix. Cook on low flame for 5-6 minute or till tomatoes become mushy and thick.

8. And its ready. Transfer the chutney in a bowl to serve.

If you tried my recipe, you can share your food pictures with me in the social network sites by using hashtag, #batterupwithsujata I would love to see your creations.

I would love to hear from you. Please share your thoughts and suggestions in comment.

Please visit my facebook page and hit the like button to get the latest update

Facebook page

Follow on

Twitter

Instagram

Pinterest

Kesar/Saffron Pista/Pistachio Rasgulla

Kesar pista rasgulla or saffron pistachio rasgulla. Saffron flavoured soft spungy rasgulla stuffed with pistachio taste scrumptious. Try and enjoy a different flavoured homemade rasgulla.

Rasgulla or rosogolla is chhena/chhana or Indian cottage cheese small ball shaped dumplings boiled in light sugar syrup. These rasgulla can be made with different flavour. You can also make these with any fruity flavour. Have a look on the kesar pista rasgulla while cooking. Looks beautiful isn’t it?

You may like some different flavoured rasgulla recipes on this blog. Please read all the tips and tricks to make perfect spungy rasgulla before starting to make rasgulla. Click on the name below to get all the tips and tricks and flavoured rasgulla.

1. Rasgulla with tips and tricks

2. Mint rasgulla

3. Chilli rasgulla or green chilli infused rasgulla

4. Komola bhog or orange rasgulla

5. Mango rasgulla

6. Watermelon rasgulla

And here are some sweet and savoury recipes with rasgulla.

1. Baked rasgulla

2. Savoury rasgulla korma

3. Rasgulla kheer/paesh or pudding

Making rasgulla is little tricky. So please read all the tips and tricks first before you start to making it. Full cream cow milk is best for spungy rasgulla. You have to mash the paneer or cottage cheese well. Mash cottage cheese with your finger tips and heel of your palm till your palm becomes greasy. Make thin sugar syrup. Take 4 cup water and 1 cup sugar to make sugar syrup. And never use small pan. Always use broad and large size pan to make rasgulla. If you are using small sized pan your rasgulla may be flat or loss it’s shape. Try and enjoy homemade rasgulla and don’t forget to drop a comment if you like the taste.

Subscribe with your mail address to get all the recipes straight to your mailbox immediately after publishing.

Recipe

Full cream cow milk – 1 liter

Lemon juice or vinegar -3 – 4 tablespoon or as require

Sugar – 1 cup

Water – 4 cup

Saffron – 1/2 teaspoon

Cardamom powder – 1/4 teaspoon

Rose water or essence – 1/2 teaspoon, optional

Shredded pistachios or pista as require

Method

Read all the tips and tricks to make perfect spungy rasgulla here.

1. Place a cheesecloth on a strainer.

2. Heat full cream cow milk in a heavy bottom pan and stir well. When it starts to rolling boil add lemon juice or vinegar. Add 1 tablespoon at a time. Stir and add 1 tablespoon more or as require to curdle the milk completely.

3. You can make cottage cheese with curd in same method. First add 1/4 cup curd then add as require. It will depends on the milk. You need 1/4 to 1/2 cup curd to make cottage cheese.

4. When greenish whey and cottage cheese separates immediately remove from heat and pour into the strainer and wash the paneer. If you boil further after curdling your cottage cheese and rasgulla will be hard.

5. Wash the paneer under running water or dip the cheesecloth in a bowl filled with cold water. Wash the cottage cheese well to remove the smell of vinegar or lemon.

6. Squeeze the cloth well to drain all the water from cottage cheese. Remove the cottage cheese on a large dry cloth. Wrap well and put a heavy weight on it for 3-4 hours. There should be no moisture in cottage cheese. It will break in the sugar syrup if it not drained properly.

7. Take out the cottage cheese or paneer on a large plate.

8. Mash with your finger tips and heel of your palm. Mash till your palm becomes greasy and cottage cheese becomes smooth.

9. Make small balls. These will become double. I have made 6 rasgulla out of this cottage cheese. You can make 7 small size balls.

10. Flatten the balls with your palm. Place little chopped pistachio in the middle and close the edges. Make a ball again.

11. There shouldn’t be any crack on the balls. Press the balls between your fingers and palm tightly to make crack free balls.

12. In a large and broad pan heat 1 cup sugar and 4 cup water. Add saffron, cardamom powder and rose water or essence if using.

13. When sugar dissolved and it starts to rolling boil add the cottage cheese balls one by one. Let it boil on full flame from 2-3 minutes.

14. Cover and cook on medium high heat for 20 minutes.

15. After 20 minutes switch off the heat. Keep it covered for 3-4 hours or until completely cool down.

16. Serve chilled or at room temperature. You can store leftover rasgulla in refrigerator for 4-5 days.

Notes

1. Always use full cream cow milk to make rasgulla.

2. To make spungy rasgulla mash the cottage cheese well with your finger tips and heel of your palm for 4 – 5 minutes or until your palm becomes greasy.

3. Use a large and broad pan to make rasgulla. Because these will be double when cooked.

4. Cottage cheese should be drained well. If not drained properly and moisture remains in cottage cheese, rasgulla balls will break in the sugar syrup.

If you tried my recipe, you can share your food pictures with me in the social network sites by using hashtag, #batterupwithsujata I would love to see your creations.

I would love to hear from you. Please share your thoughts and suggestions in comment.

Please visit my facebook page and hit the like button to get the latest update

Facebook page

Follow on

Twitter

Instagram

Pinterest

Cauliflower In Microwave Or Bhapa Fulkopi/Steamed Cauliflower

Cauliflower in microwave or Fulkopi bhapa. A very easy to make yet lipsmackingly delicious no onion garlic curry made with lightly fried cauliflower, fresh coconut and some spices. Just mix everything and microwave for 10 minutes. A perfect side dish to serve with steamed rice. 

Here are some sweet and savoury microwave recipes from this blog. 

1. Steamed sandesh with date palm jaggery

2. Bhapa doi or steamed yogurt

3. Green moong idli

4. Cornmeal oats soya vegetable idli

5. Microwave chicken

6. Hariyali chicken

7. Microwave mushroom

8. Microwave chivra

You may also like to try a wonderful Microwave recipe from the blog of my friend Sasmita.

This Fulkopi bhapa or steamed cauliflower is very easy to make. Just marinate everything and microwave for 10 minutes. A delicious side dish without any mess. If you don’t have microwave, then you can also make it on stove top. Place the marinated cauliflower in a covered container and steam. To steam on stove top heat water in a pot or steamer basket. Place the covered container with marinated cauliflower over the pot and steam.  For me microwave cooking is much easy and hassle free. 

Subscribe with your mail address to get all the recipes straight to your mailbox immediately after publishing.

Recipe

Cauliflower- 1

Mustard powder- 1&1/2 tablespoon 

Poppy seeds or khas khas- 2&1/2 tablespoon

Kashmiri red chilli powder- 1&1/2 teaspoon

Turmeric powder- 1/2 teaspoon 

Green chilli- 2-3 or to taste 

Coconut- 2 tablespoon 

Salt to taste 

Mustard oil- 3 teaspoon 

Curd or yogurt – 1/4 cup

Water-1 cup + 3 tablespoon to soak Mustard powder, turmeric powder and Kashmiri red chilli powder. And   3-4 tablespoon to grind the spices

Method

1. Cut the cauliflower into medium size florets. Rinse and drain the water. 

2. Soak mustard powder in 3 tablespoon water. Add turmeric powder and Kashmiri red chilli powder with mustard powder mix well. 

3. Heat 2 tablespoon mustard oil in a pan. Add cauliflower florets and fry till cauliflower florets becomes light brown. Remove from heat and keep aside. 

4. Grind the poppy seeds or khas khas into fine powder. You can also soak the poppy seeds in hot water and grind to make smooth paste when cool.  After grinding the poppy seeds add chopped green chilli and grated coconut and grind altogether with 2-3 tablespoon water. Add green chilli more or less according to your taste. Make a smooth paste of poppy seeds, green chilli and coconut. You can use 1-2 tablespoon more water to grind if require.

5. Now add curd or yogurt and blend with the paste. You can whisk the curd separately if you want. Curd should be blend really well. 

6. In a microwavable glass bowl pour the ground paste with curd, soaked mustard powder with turmeric and Kashmiri red chilli powder and salt. Mix everything well. 

7. Add fried cauliflower and mix again. Add 1-2 tablespoon mustard oil and 2 tablespoon chopped cilantro or coriander leaves. You can also add 2-3 slit green chili. 

8. Cover the bowl loosely and microwave on high power for 10 minutes.  Switch off the oven and keep it in microwave for 5-6 minutes. 

9. After 5-6 minutes take out the cauliflower from oven and garnish with cilantro or coriander leaves. Serve hot with steamed rice. 

If you tried my recipe, you can share your food pictures with me in the social network sites by using hashtag, #batterupwithsujata I would love to see your creations.

I would love to hear from you. Please share your thoughts and suggestions in comment. 

Please visit my facebook page and hit the like button to get the latest update

  Facebook page

Follow on

  Twitter

Instagram

Pinterest

Date Almond Sandesh/Gulkand Stuffed Sandesh

Gulkand stuffed date almond sandesh. Soft mouth melting and delicious sandesh sweetened with date powder and topped with white chocolate. Gulkand stuffing taste heavenly with the outer layer of sandesh.

One more fusion recipe for my readers. Sharing a sandesh recipe after a long time. Taste flavour and look is completely different from other traditional sandesh. You can call it kids friendly sweet. Because not only adults but kids will also enjoy the taste and look. You don’t need sugar or jaggery to make these sandesh. Little date powder gives enough sweetness to these sandesh. My last post Apple coconut kheer was also made with date powder.

Sandesh is a delicious sweet from Bengali cuisine. These sweets are very easy to make. You need some cottage cheese/chhena or paneer with any flavoring to make this sandesh. Homemade paneer or cottage is best for sandesh. You can also use different types of fruits with cottage cheese to make sandesh. Here are some different flavoured sandesh recipes from this blog.

1. Hazelnut chocolate sandesh

2. Carrot sandesh

3. Sugar free date sandesh

4. Sugar free pineapple sandesh

5. Coconut sandesh

6. Chocolate sandesh

7. Coconut pomegranate sandesh

8. Paan or betel leaf sandesh

9. Sandesh

10. Watermelon sandesh

11. Cake sandesh

12. Chocolate coconut sandesh

13. Kesar pista sandesh

14. Mango sandesh

15. Chocolate stuffed chocolate sandesh

16. Steamed sandesh

17. Steamed sandesh with date palm jaggery

18. Saffron pistachio sandesh panna cotta

19. Mango steamed sandesh

As I mentioned above making sandesh is very easy. You need to mash the paneer or cottage cheese mixture well and then add date powder, almond powder and milk powder. Mash again to make smooth. Cook on low heat for 3-4 minutes. Stir continuously while cooking and don’t cook more than 3-4 minutes to get soft sandesh mixture. Over cooking will make your sandesh crumbly and chewy. So to get soft mouth melting sandesh always cook on low heat till mixture starts to leave the sides, immediately remove from heat. Mash the mixture again when still slightly warm to make smooth.

Subscribe with your mail address to get all the recipes straight to your mailbox immediately after publishing.

Recipe

Paneer or cottage cheese – 3/4 cup

Date powder – 1/4 cup

Milk powder – 3 tablespoon

Almond – 1/4 cup

Caramel essence – 1/4 teaspoon, optional

White chocolate – 1/4 cup, grated

Gulkand for stuffing

Method

1. Make the paneer with curd instead of lemon juice or vinegar to get soft paneer for sweets. Get the method of making paneer here. After draining the whey from paneer or cottage cheese transfer the paneer on a plate.

2. Grind the almond to make fine powder.

3. Mash the paneer with your finger tips and heel of your palm to make the paneer smooth. Add date powder, milk powder and almond powder and mash again.

4. Grease a silicon chocolate mould with ghee or oil. I used little ghee or clarified butter.

5. Melt white chocolate in microwave or double boiler. I have used microwave. In a microwavable glass bowl melt the white chocolate on full power for 1 minute. Stir with a spoon. If your chocolate not melted completely then microwave for a few seconds more. Spread a layer of melted white chocolate in every mould and keep aside to set.

6. Heat a nonstick or heavy bottom pan. Add the paneer mixture. Cook on low heat and stir continuously. Cook till moisture almost evaporate and mixture becomes like a soft smooth dough. Don’t overcook because overcooked paneer mixture becomes grainy and chewy. And remember don’t increase the heat, cook on simmer.

7. When the mixture starts to leaving the sides immediately remove from heat. Add caramel essence if using and mix well. Let the mixture cool down.

8. Mash the mixture again when slightly warm. Mash to make smooth. Make small equal size balls. Flatten the balls with your palm and place half teaspoon Gulkand in the middle. Seal the edges and make a ball again. Press the balls over white chocolate layer in every mould. Press gently.

9. Keep the silicon chocolate mould in refrigerator for an hour. After one hour demould the sandesh and arrange on a plate. Serve chilled. Leftover can be stored in refrigerator for 4-5 days.

Notes

1. Mash the paneer really well to make smooth. You can use your food processor to mash the paneer or cottage cheese.

2. Any essence can be used instead of caramel essence.

3. Don’t cook the paneer or cottage cheese mixture more than 3-4 minutes. And don’t increase the heat. Cook on simmer and stir continuously.

4. You can use sugar or any sweetener instead of date powder.

5. If you don’t want to use milk powder then you can use same amount of mawa or evaporated milk and add little more date powder.

This recipe is going to be feathered in Facebook gourmet group Shhhhh Cooking Secretly Challenge. In this monthly group members are paired with different partners every month and two secret ingredients are given to each other. We have to use these ingredients in our recipe.

This month theme is Diwali Dhamaka suggested by the admins Mayuri Patel and Renu Agrawal Dongre. You can get numerous delicious recipes on Mayuri’s blog. Mayuri shared Kalakand with cottage cheese for this Diwali theme.

Renu gave me milk powder and white chocolate as secret ingredients and I made this soft mouth melting and delicious sandesh with these ingredients. Renu has a wonderful blog and she shared Easy milk powder chocolate laddu modak for this theme. Do visit her space for many more amazing recipes.

If you tried my recipe, you can share your food pictures with me in the social network sites by using hashtag, #batterupwithsujata I would love to see your creations.

I would love to hear from you. Please share your thoughts and suggestions in comment.

Please visit my facebook page and hit the like button to get the latest update

Facebook page

Follow on

Twitter

Instagram

Pinterest

Kheerer Malpua Or Mawa Malpua

Kheerer malpua or mawa malpua. Soft fluffy delicious fried pancake from Bengali cuisine. Malpua is soft but edges are crisp and taste heavenly. Saffron and cardamom flavored kheerer malpua or mawa malpua is a perfect festive treat.

You can also make this malpua to offer Goddess Durga or Bhog prasad.

Earlier shared delicious Malpua. Method of making this malpua is same but khoya/mawa or dried milk used in this malpua. You have to make a smooth lump free batter to make perfect malpua. Khoya or mawa and milk should be blend really well. You can add any shredded dry fruits in the batter. You may like some more fried and sugar syrup soaked sweets on this blog like Gulab jamun, Chhanar jilipi, Pantua, Gokul pithe and Ranga aloor pithe or sweet potato dumplings. And you may also like to try Pahala rasgulla from Sasmita’s blog.

This malpua is very easy to make and taste is delectable. Remember that batter should not be very thick. Make a lump free smooth flowing batter for perfect malpua. Fennel seeds or sounf is optional, you can skip it. But lightly crushed fennel seeds will give a lovely flavour. Sugar syrup is flavored with cardamom and saffron. If you don’t like cardamom then use only half teaspoon. I have used peanut oil mixed with 2 tablespoon ghee or clarified butter for frying. You can use only oil or only ghee/clarified butter if you want. You can use any flavorless oil for frying.

Subscribe with your mail address to get all the recipes straight to your mailbox immediately after publishing.

Recipe

Khoya or mawa – 1 cup

Maida or all purpose flour – 1 cup

Suji or semolina – 4 tablespoon

Saunf or fennel seeds – 1 teaspoon, optional

Baking soda – 1/4 teaspoon

Warm milk – 1&3/4 cup

Oil or ghee/clarified butter for frying

Sugar – 1&1/2 cup

Water – 1 cup

Saffron or keshar – a pinch

Cardamom powder – 1 teaspoon

Method

1. Blend khoya or mawa and warm milk with a hand whisker or you can use your blender to mix really well. Homemade khoya will be soft and easy to blend. Get the method of making khoya here. But if you are using store bought khoya or mawa, grate the khoya before using.

2. Lightly crush the fennel seeds or sounf in a mortar pestle.

3. In a large bowl whisk maida or all purpose flour gradually with khoya and milk mixture. Don’t add all the maida in one go to avoid forming lump.

4. Add lighly crushed fennel seeds, semolina or suji and baking soda. Whisk well to make a lump free batter. Cover and keep aside for 30-40 minutes. Batter shouldn’t be thick. Make a flowing batter.

5. In a pan boil water and sugar with a pinch of saffron. Let it boil for 4 minutes. Add cardamom powder, mix and switch off the heat. If you don’t like the flavour of cardamom then add only half teaspoon cardamom powder.

6. Heat oil or ghee/clarified butter in a wok or pan. I used oil with two tablespoon ghee for flavour.

7..When oil becomes hot reduce the heat. Give a good stir to the batter. Pour a ladle full of batter in the middle of the ghee or oil. Fry on low medium heat till light golden brown from both sides and transfer on a plate. Fry all the malpua.

8. Dip the malpua in warm sugar syrup for 2-3 minutes. Press gently with a spoon to soak from both sides. Take out from the sugar syrup and arrange on a plate. Dip all the malpua this way.

9. Dip 2-3 malpua at a time and arrange on a large plate. Don’t dip in syrup for more than 2-3 minutes to soak each malpua. And remember sugar syrup should be warm.

10. Garnish with pistachios. You can also use shredded almond or grated khoya or mawa for garnishing. Serve warm or at room temperature. You can also serve malpua with rabri.

Notes

1. You can use shredded almond,cashew nuts or any dry fruits in the batter.

2. Batter should be lump free, smooth and flowing.

3. You can use only oil or ghee for frying. Or use a mixture of oil and ghee.

4. Any flavorless oil can be used for frying.

If you tried my recipe, you can share your food pictures with me in the social network sites by using hashtag, #batterupwithsujata I would love to see your creations.

I would love to hear from you. Please share your thoughts and suggestions in comment.

Please visit my facebook page and hit the like button to get the latest update

Facebook page

Follow on

Twitter

Instagram

Pinterest

Masoor dal Chochchori Or Chorchori

Masoor dal chochchori or chorchori. A flavorful and delicious thick dal to serve with roti, paratha or steamed rice. Easy to cook but taste is scrumptious. This red lentil or Masoor dal chochchori is an age old recipe from Bengali cuisine.

After bhaja muger dal and narkol die chholar dal this Masoor dal chochchori is my most favourite dal. Serve it as a side dish or enjoy bowlful hot dal on its own. Earlier shared one more masoor dal recipe from Bengali cuisine. To get the recipe click here.

This recipe is my contribution for 306 #Foodiemonday bloghop theme is dal or lentil. This time it was my turn to suggest. Let’s see what my fellow bloggers share. Waiting for some wonderful dal or lentil recipes.

This dal recipe is very easy but taste is absolutely mouthwatering. I have used fried garlic cloves to garnish because my daughter loves fried garlic cloves in dal but you can skip this step if you don’t like. Also Kashmiri red chilli powder is not used in authentic recipe but I used to add some colour. You can use mustard oil to make this dal and omit ghee. Or make the dal with any oil and add a teaspoon of ghee before removing from heat. Choice is your.

Recipe

Masoor dal or red lentil – 1 cup

Green cardamom – 2-3

Cinnamon – 1/2 inch piece

Cloves – 3

Bay leaf – 1

Onion – 1, chopped

Garlic – 3-4

Ginger – 1/2 inch piece

Ghee or clarified butter – 2 tablespoon

Salt to taste Sugar – 1/2 teaspoon, optional

Garlic cloves – 6 to garnish, optional

Cumin powder – 1/2 teaspoon

Coriander powder – 1/2 teaspoon

Kashmiri red chilli powder – 1 teaspoon, optional

Water – 3 cup

Cilantro or coriander leaves – 2-3 tablespoon, chopped

Green chilli – 3-4 or to taste

Method

1. Wash the dal well and soak in water for 5-10 minutes. Drain the water completely and keep aside.

2. Crush the cardamom, cinnamon and cloves in a mortar pestle.

3. Grind onion, garlic, ginger and one green chilli into a smooth paste.

4. In a small bowl mix turmeric powder, cumin powder, coriander powder, Kashmiri red chilli powder and 1 tablespoon water. Mix well. You can use hot variety red chilli powder if you want your dal more spicy.

5. In a pan or wok heat ghee or clarified butter. You can use half ghee half oil if you want. See notes for more options.

6. Fry the garlic cloves till golden brown and take out of the ghee or clarified butter. This step is optional. You can skip if you want.

7. Add crushed cardamom, cinnamon, cloves and bay leaf. Add onion, garlic, ginger, chilli paste and saute till oil leaves the sides and raw smell of onion garlic goes away.

8. Add water mixed all the spices. Fry again till everything dried up and oil leaves the sides.

9. Now add drained dal or red lentil. Saute for 2 minute. Add water, salt, chopped cilantro or coriander leaves, 2-3 green chilli and sugar if using. Mix well.

10. Cover and cook for 10 minutes or until dal becomes soft and thick on medium flame. Check in-between and stir. Dal should be thick. Taste and adjust salt if required.

11. Garnish with cilantro or coriander leaves and fried garlic cloves if using. Serve with steamed rice or Indian flatbread or any bread.

Notes

1. Mustard oil can be used instead of ghee or clarified butter.

2. Add green chilli according to your taste. Use more green chilli or red chilli powder if you want your dal spicy.

If you tried my recipe, you can share your food pictures with me in the social network sites by using hashtag, #batterupwithsujata I would love to see your creations.

I would love to hear from you. Please share your thoughts and suggestions in comment.

Please visit my facebook page and hit the like button to get the latest update

Facebook page

Follow on

Twitter

Instagram

Pinterest

Chicken Rezala


Chicken rezala. A mughlai dish which is very famous in Bengal. Chicken rezala is a yogurt based fragrant rich creamy curry. Yogurt, whole spices and Kewra water made the dish aromatic and delicious.

First time I tasted famous rezala of Sabir in Kolkata with my elder sister Chhobidi and brother in law long years ago. But still remember the taste. Chhobidi and brother in-law were left for heavenly abode. But I am dedicating this post to their younger daughter and my lovely niece Ellora Roy.

I have shared some more chicken recipes on this blog. Click on the name below for recipe.

1. Chicken chaap

2. Chicken clear soup

3. Chicken dak bungalow

4. Zafrani chicken

5. Chicken kosha

6. Sikkimese chicken curry

7. Hariyali chicken

8. Easy spicy pressure cooker chicken

9. Andhra chicken curry


Monday again and this week its time for dahi/curd or yogurt. 294 #Foodiemonday bloghop theme is Dahi Dhamal suggested by Priya Vijaykrishnan who blog at Sweet Spicy Tasty. Priya has amazing collection of authentic South Indian recipes with different types of continental recipes. I have to try her Bean corn Quesadilla and Keerai sambhar soon.

To make this chicken rezala you have to marinate the chicken pieces in yogurt or curd/dahi and some spices for atleast an hour. You can marinate the chicken for overnight in refrigerator. Make a smooth paste of poppy seeds and cashew nuts. For easy grinding soak poppy seeds and cashew nuts in hot water. Or you can dry grind the poppy seeds first. I always store some dry ground poppy seeds. Just add little water with dry ground poppy seeds and grind for a few seconds. You will get perfectly ground smooth paste for your curry. For better result cook chicken rezala with ghee or clarified butter. But if you don’t want to use ghee use any vegetable oil with 1 tablespoon ghee. I have used 1 tablespoon Mustard oil in marination and refined white oil with ghee for cooking. You can also marinate with the chicken with ghee or any white oil.

Video recipe of this aromatic and delicious chicken rezala


Recipe

Chicken – 500 gram

Curd/dahi oryogurt – 1/2 cup

Ginger garlic paste – 1&1/2 tablespoon

Black pepper powder – 1 teaspoon

Salt to taste

Oil – 4 tablespoon + 1 tablespoon

Ghee – 1 tablespoon

Onion – 2 large

Green chilli – 5 – 6 or to taste

Cashew nuts – 12

Poppy seeds – 2 tablespoon

Bay leaf – 2

Dry red chilli – 5

Black cardamom – 1

Green cardamom – 4

Cinnamon – 1&1/2 inch piece

Cloves – 4

Saffron – a pinch

Milk – 1/4 cup

Water – 1&1/2 cup

Kewra water – 2- 3 drops


Method

1. Clean and wash the chicken well. Drain the water completely. Marinate with curd, black pepper powder, ginger garlic paste, salt and 1 tablespoon oil or ghee. I have used mustard oil in marination but you can use any oil. Mix well, cover and keep in refrigerator for an hour. You can keep the marinated chicken overnight in refrigerator. But if you don’t have time marinate the chicken at least 30 minutes to one hour.

2. Soak the cashew nuts and poppy seeds in hot water. This time I have used dry ground poppy seeds so soaked only cashew nuts in little hot water till cashew nuts becomes soft. Soaking will make your grinding easy. You can dry grind the poppy seeds or khas khas into a fine powder and store in an airtight container in refrigerator to make your cooking easy. Grind the cashew nuts, poppy seeds and green chilli into a smooth paste and keep aside.

3. Also grind the onion into smooth paste separately.

4. Lightly crush the green cardamom in a mortar pestle. Soak saffron in 1/4 cup hot milk.

5..Heat oil and ghee or clarified butter in a pan or wok. You can use only ghee if you like or skip ghee and make with oil only. But for better taste use little ghee. I have used only 1 tablespoon. You can use any refined vegetable oil.

6. Now add bay leaves, crushed green cardamom, black cardamom, cinnamon, cloves and dry red chilli. Fry for a few seconds or until whole spices becomes fragrant. Spices shouldn’t be burnt. Add onion paste and saute till oil leaves the sides.

7. Take out the chicken from marinated mixture and mix with sauteed onion paste. Add salt. Be careful while adding salt. We already used salt in marination. Stir well. Cover and stir in between.

8. Cook till chicken dried up and oil floats on top. Don’t forget to check and stir in regular interval to avoid sticking to the bottom. Add cashew nuts, poppy seeds and green chilli paste. Saute and till oil leaves the sides.

9. Add soaked saffron and water.Add warm water as require to make gravy. I have used 1 cup first and added 1/2 cup more warm water because chicken was about to dried up and still little uncooked.

10. Cover and cook till chicken becomes soft. Timing depends on the quality of chicken. So keep an eye and check in between.

11. Taste and adjust the salt. Add Kewra water mix and remove from heat. Garnish with saffron and fried dry red chilli and serve with steamed rice, pulao, rumali roti, naan, tandoori roti, paratha or simple fulka roti or any Indian flat bread.

If you tried my recipe, you can share your food pictures with me in the social network sites by using hashtag, #batterupwithsujata I would love to see your creations.

I would love to hear from you. Please share your thoughts and suggestions in comment.

Please visit my facebook page and hit the like button to get the latest update

Facebook page

Follow on

Twitter

Instagram

Pinterest

Bati Chochchori


Bati chochchori. A simple, easy, quick and delicious curry without any spice. Sharing a simple and easiest potato recipe from Bengali cuisine. You can add any vegetable of your choice with potatoes.

You need only panch phoran or Bengali five spices, salt and mustard oil to make this curry. Even you don’t need turmeric or any other spice powder. Sounds healthy isn’t it? Normally it’s cooked in a bowl. And in Bengali bati means bowl. And vegetables with panch phoran called chochchori or chorchori. Mixed vegetable chochchori is always a dry curry. But this bati chochchori can be made with gravy. You can keep the consistency of gravy as you like.

To make bati chochchori you can use cauliflower, eggplant or any vegetable of your choice. Bati chochchori can be made with fish too. Just mix everything and cook. A super easy method. I like bati chochchori with only potatoes.

Do you love potatoes? Here are some potato recipes from this blog.

1. Spicy potato with tamarind

2. Coriander red potatoes

3. Potatoes with green peas

4. Rosti or Swiss potato pancake

5. Potatoes in yogurt gravy

6. Grilled potatoes

7. Potato curry to serve with hing kachodi

8. Batata bhaji

9. Peanut potato

10. Potato pie

11. Potato with nigella seeds, poppy seeds and tomato

12. Savoury potato cake

13. Stuffed potato

14. Aloo chop or potato fritters

15. Dum aloo

16. Spicy potatoes

17. No onion garlic potato curry

18. Aloo chaat

19. Aloo ke gutke

20. Matar nimona

21. Panch phoran tarkari

22. Kashmiri dum aloo

23. Aloo kabli/chaat

24. Aloo kofta curry

25. Dum aloo with luchi

This stew like curry is best accompany with luchi, puri, paratha or any Indian flatbread. I have served it with luchi. Get the recipe here.

Now why I am talking about this easy and simple recipe. Actually this week its my turn to suggest the theme for 286 #Foodiemonday bloghop. And I suggested my fellow bloggers to cook an easiest dish which you make so often and it should be your family member’s favorite. And better to use minimum spices. So the theme is Cook In A Jiffy. And I also suggested savoury bake as second option but easiest recipe won unanimously.

We are always looking for some easy quick and simple recipes to make in a jiffy for our busy days. Right? Believe me easy and quick recipes can also be delicious 😊 In winter a bowl of hot bati chochchori with fulko or fluffy luchi or puri is a bliss. If you like light less spicy curry then its perfect for you.

If you don’t have panch phoran, then you can make the mixture of five whole spices. To make panch phoran or five spice mix 1 tablespoon each nigella seed or kalonji, cumin seeds or jeera, mustard seeds or sarso, fennel seeds or sounf and 1/2 tablespoon fenugreek seeds or methi. Use green chilli according to your taste. You can also add 1 – 2 teaspoon more mustard oil for an extra zing. Bati chochchori is a light curry. Mix mustard oil, salt panch phoran and water as require with chopped potatoes, green chilli and tomatoes. If you want your chochchori without much gravy, then add less water. I like the taste of light gravy so used 1 cup water. I have used pressure cooker but you can also make it in microwave. Mix everything in a microwavable glass bowl, cover and cook on full power for 4 – 5 minutes or until potatoes becomes soft. Or make in a covered bowl or pot on stove.

Recipe

Potato – 3

Tomato – 2

Slit green chilli – 4 or to taste

Panch phoran or five spices (mixture of fenugreek seeds, nigella seeds, cumin, mustard seeds and fennel seeds) – 1 teaspoon

Mustard oil – 1 tablespoon

Salt to taste

Water – 1 cup


Method

1. Peel and chop the potatoes lengthwise. Rinse well.

2. Rinse and chop the tomatoes in small pieces.

3. In a pressure cooker mix chopped potatoes, tomatoes, panch phoran, slit green chilli, mustard oil, salt and water. Add green chilli according to your taste. If you like your curry hot add some more chilli or if you are making for kids reduce the amount of green chilli.

4. If you don’t want much gravy add 1/2 cup to 3/4 cup water. Use water as you like your curry, thick or thin. Pressure cook for 2 – 3 whistle.

5. Let the pressure settle down on its own. Taste and adjust salt. You can add 1 – 2 teaspoon more mustard oil for an extra zing.

6. For microwave mix everything in a microwavable glass bowl. Cover and microwave on high power for 4 – 5 minutes or until potatoes becomes soft.

7. Or you can make this bati chochchori in a pot or wok. Mix everything, cover and cook till potatoes becomes tender and tomato becomes mushy. Check and stir in between. If your curry is too runny, then cook for some more time to reduce the gravy. Your bati chochchori is ready. Serve hot with Luchi , paratha or any Indian flatbread.

Take care and stay safe 🙏 😊

If you tried my recipe, you can share your food pictures with me in the social network sites by using hashtag, #batterupwithsujata I would love to see your creations.

I would love to hear from you. Please share your thoughts and suggestions in comment.

Please visit my facebook page and hit the like button to get the latest update

Facebook page

Follow on

Twitter

Instagram

Pinterest

Mix Vegetable Fried Rice

Mix Vegetable Fried rice. Fried rice with all the seasonal vegetables. An aromatic, no onion garlic and easy to make rice dish from Bengali cuisine. You will love the delectable taste and flavour.

Fried carrots, French beans, cauliflower, green peas ,cashew nuts and raisins made this rice absolutely delicious. You can use whatever vegetables you like and available. And the rice is flavored with whole spices and Bengali garam masala.

You can serve this fried rice with any curry or

Fish kalia

Chicken kosha

Potol dolma

Railway mutton curry

Doi potol

Dim kosha

Chhanar dalna

Khejur aamsotto chutney

Mango chutney

Chicken dak bungalow

Savoury rasgulla korma

To get some more recipes from Bengali cuisine click here.

And for some more rice recipes click on the name below.

1. Mexican green rice

2. Tricolour rice

3. Carrot rice

4. Mexican rice

5. Beetroot rice

6. Mint rice

7. Spanish moulded rice

8. Aloo chutney pulao

9. Korean rice

10. Corn peas barista fried rice

11. Easy pulao

12. Saffron rice

Monday again and our 281 #Foodiemonday bloghop theme is Variety Rice Special suggested by Narmadha who blog at Nams Corner. Narmadha is a very talented blogger. I always love her authentic South Indian recipes. I have bookmarked her Veg lunch menu and Curry leaves rice to try. I am sure you will love to visit her space for more authentic, innovative and healthy recipes.

This fried rice recipe is very simple and easy to make. Its a no onion garlic recipe but you can use sliced onion if you want. After adding whole spices add sliced onion with chopped green chilli and fry. When onion becomes golden brown add green peas. You can also make it with leftover rice but rice shouldn’t be over cooked. I have used carrots, French beans, cauliflower and green peas. If you don’t like any of these vegetables you can omit it.

Recipe

Basmati Rice – 1 cup

Carrot – 2

French beans – 100 gram

Cauliflower florets – 1/2 cup

Green peas – 1/2 cup

Green chilli – 3, finely chopped

Green cardamom – 4

Cinnamon – 1 inch piece

Cloves – 4

Bay leaf – 2

Cumin seeds – 1/2 teaspoon

Refined oil – 2 tablespoon

Ghee or clarified butter – 2 tablespoon

Salt – 1 & 1/2 teaspoon or to taste

Sugar – 2 teaspoon or taste

Bengali garam masala – 1/2 teaspoon

Method

1. Rinse the rice well. Soak in water for 15 minutes. Drain the water and keep aside.

2. Heat sufficient water in a pan. When water starts to rolling boil add the rice. Stir and cook until rice becomes soft. Rice shouldn’t be mushy. Keep checking, remove from heat when 90 percent cooked. Check the rice by pressing between your fingers. Strain the rice immediately on a colander to drain the water well.

3. Spread the rice on a plate to cool down. Add salt and sugar and mix well. Add sugar according to your taste. I have used 2 and 1/2 teaspoon sugar, but you can use less sugar. But don’t skip it, add at least 1 teaspoon for taste. Be careful, rice shouldn’t be broken.

4. Wash all the vegetables well. Chop French beans into 1/2 inch pieces. Peel the carrots. Chop into small cubes. Cut the cauliflower into small florets.

5. Marinate the carrots, beans and cauliflower florets with little salt.

6. Crush green cardamom, cinnamon and cloves in a mortar pestle.

7. Heat ghee and oil in a pan or wok. Fry the carrot cubes. Transfer fried carrots to a plate.

8. Now fry the French beans for 1 – 2 minutes. Beans should be remain green. Remove the fried beans from oil.

9. Fry the cauliflower florets till golden brown and remove from oil.

10. Fry the cashew nuts till golden brown and remove from oil. Fry the raisins. When raisins starts to fluff up immediately remove from oil. You can use the raisins without frying if you want.

11. Add cumin seeds, bay leaves, crushed cardamom, cinnamon and cloves in the same oil ghee mixture. When cumin seeds starts to splutter and green peas and finely chopped green chilli. Sprinkle little salt. Saute till green peas becomes tender. To add onion see notes.

12. Now add rice, fried cashew nuts, raisins and all the fried vegetables. Mix well.

13. Fry for 2 – 3 minutes. Stir gently. Rice should be intact. Add 1/2 teaspoon Bengali garam masala powder, mix well and switch off the heat. Your Bengali style fried rice is ready. Serve hot with kosha chicken, fish kalia, dum aloo, dim kosha, chhanar dalna, mutton curry, chutney or any curry.

Notes

1. You can use sliced onion if you want. Add sliced onion after adding cumin, bay leaves, cardamom, cinnamon and cloves and fry. Add green peas when onion becomes light brown.

2. Add green chilli according to your taste.

If you tried my recipe, you can share your food pictures with me in the social network sites by using hashtag, #batterupwithsujata I would love to see your creations.

I would love to hear from you. Please share your thoughts suggestions in comment.

Please visit my facebook page and hit the like button to get the latest update

Facebook page

Follow on

Twitter

Instagram

Pinterest