Besan Or Gram Flour Cake / 7 year blog anniversary

Celebrating 7 years blog anniversary today. Seven years with 613 posts. And now its 614. Thanks to all my readers for your constant support, love and encouragement. Its possible only because of you. Now also started YouTube channel. Here is the link https://youtube.com/c/SujataRoy. Please visit and subscribe for video recipes. Hope you will like it. Thanks again.

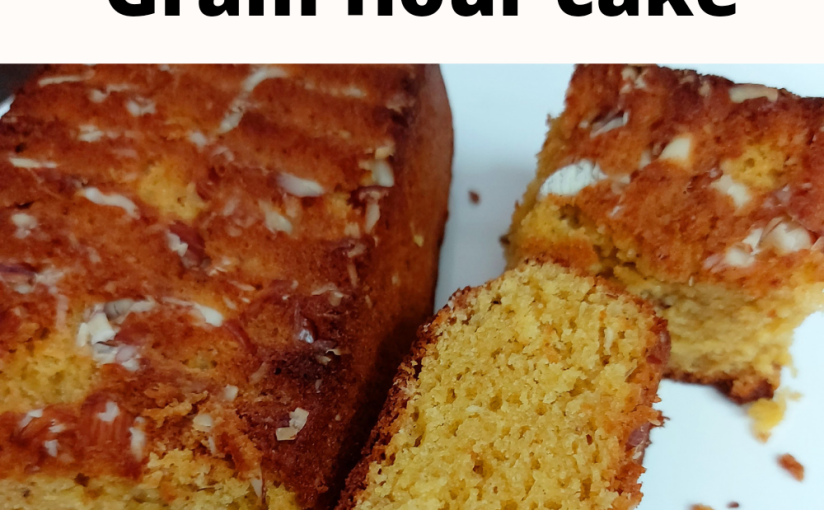
Eggless besan/gram flour or chickpea flour cake. A super soft and easy to make cake made with very simple and easily available ingredients. Try and enjoy the delectable taste. You will love the aroma and taste. Earlier shared many more eggless cake recipes on this blog. Click here to get the recipes.

This besan cake is very easy to make and taste is absolutely delicious. You can call it a healthy treat. Coconut, cardamom, yogurt and almond will give a wonderful taste and flavour. I always love to use different flours in my bakes. You can get different types of gluten free cakes and cookies on this blog. But never tried besan in my cake. Made besan cookies but not cake. Recently watched a video of Chef Kunal Kapur. Loved the look and texture of the cake. So here is my version of besan cake for my blog anniversary. A big thank to Chef Kunal Kapur.

Subscribe with your mail address to get all the recipes straight to your mailbox immediately after publishing.

Video recipe of this delicious cake

Recipe

Besan- 1 cup

Oil- 1/3 cup

Curd or yogurt- 1/2 cup

Powdered sugar- 1/2 cup

Shredded almond- 2 tablespoon

Desiccated coconut – 2 tablespoon

Milk powder- 1/4 cup

Baking powder- 1 teaspoon

Baking soda- 1/2 teaspoon

Cardamom powder- 1/2 teaspoon

Shredded almond to garnish

Method

1. Sieve besan or chickpea flour, baking powder and soda. Add shredded almond, desiccated coconut and milk powder. Mix everything well. Add cardamom powder and mix.

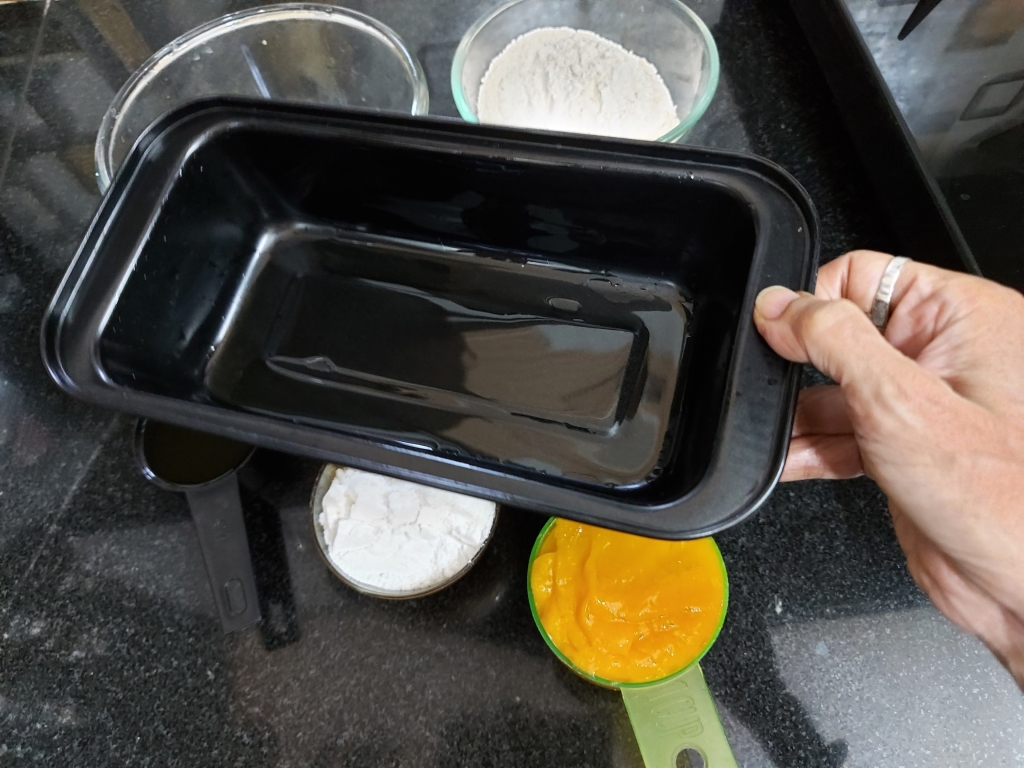
2. Grease a baking pan. I used loaf pan but you can use round pan or any pan of your choice. Spread some shredded almond in the greased pan. I made it upside down cake. If you don’t want upside down cake skip this step. Spread shredded almond after pouring cake batter in the pan.

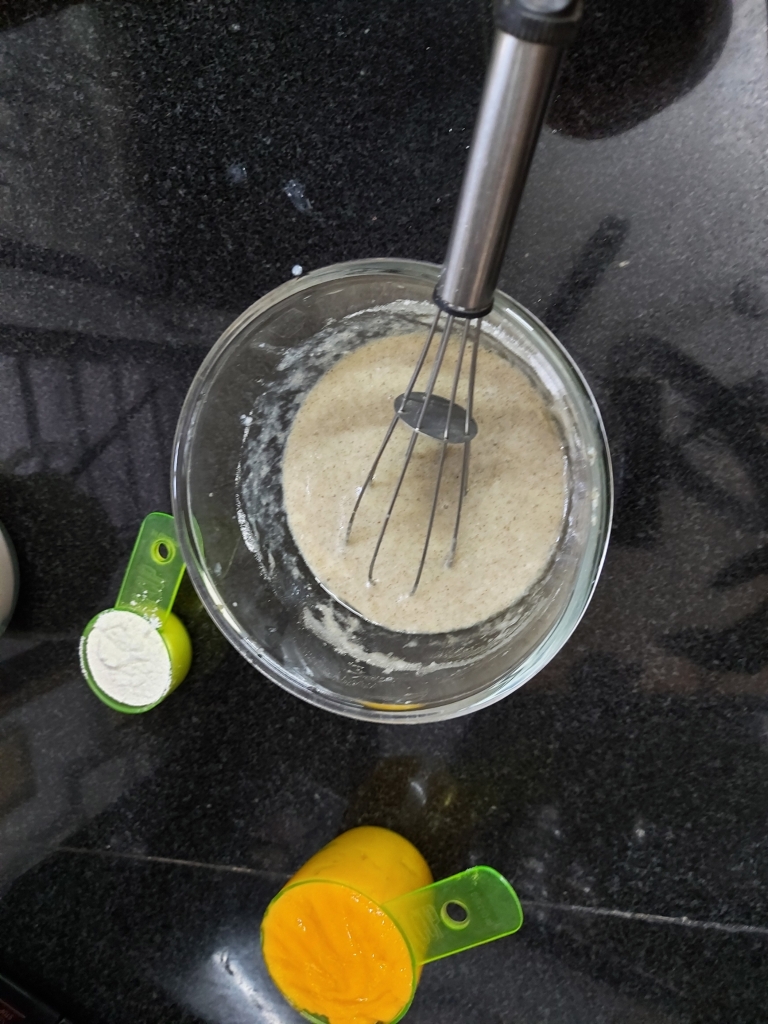
3. In a large bowl mix oil, yogurt and powdered sugar. Whisk everything well. Add dry ingredients gradually. Mix well. Make a lump free smooth batter. Watch video recipe for detailed method.

4. Preheat the oven at 170°. Use convection or hot blast mode. For OTG preheat at 180° for 10 minutes.

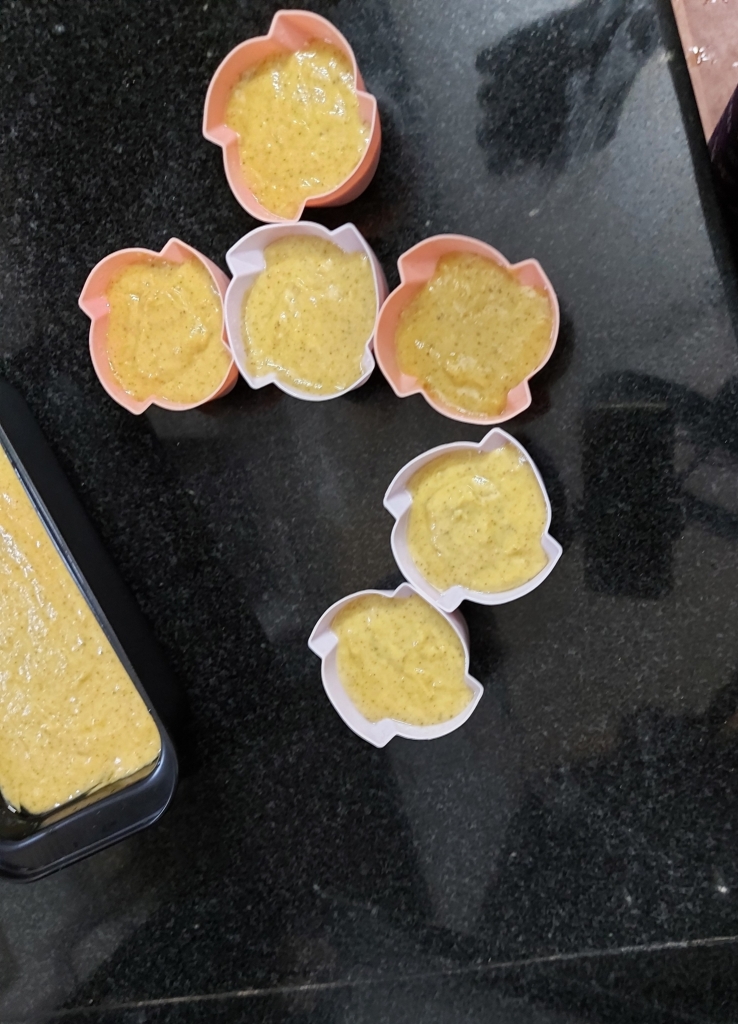
5. Pour the batter in greased baking pan. Tap the cake pan gently on your kitchen counter to remove the air bubbles. If you are not making upside down cake, then sprinkle shredded almond over the batter.

6. Bake the cake in preheated oven at 170° for 28 minutes or till toothpick comes out clean. Insert a toothpick in the middle of the cake to check. In OTG bake for 30-35 minutes at 180°. Let it cool down completely before slicing.

7. Cut and serve delicious soft moist flavorful besan cake and enjoy the heavenly taste. Happy baking!

If you tried my recipe, you can share your food pictures with me in the social network sites by using hashtag, #batterupwithsujata I would love to see your creations.

I would love to hear from you. Please share your thoughts and suggestions in comment.

Please visit my facebook page and hit the like button to get the latest update

Facebook page

Follow on

Twitter

Instagram

Pinterest

Semolina Or Suji Quesadilla

Semolina or suji quesadilla. You can name it Indian style quesadilla. Quesadilla is a Mexican dish made of tortilla. But here is a breakfast Quesadilla made with suji pancake or our humble suji chilla. A perfect kids friendly breakfast dish. You can make any veg or non veg stuffing instead of potatoes with lots of cheese. Kids will love the taste. 

A quesadilla is a Mexican dish consisting of a tortilla that is filled primarily with cheese, and sometimes meats, spices, and other fillings, and then cooked on a griddle or stove. Traditionally, a corn tortilla is used, but it can also be made with a flour tortilla. A full quesadilla is made with two tortillas that hold a layer of cheese between them. A half is a single tortilla that has been filled with cheese and folded into a half-moon shape. Wikipedia

As I mentioned above you can make any filling of your choice. I have made a creamy stuffing with boiled potatoes, mayonnaise, some sauce, oregano and cheese. You can use any herbs and lots of mozzarella cheese. Your kids will love the taste. You can also use grated vegetables or paneer in the stuffing. You can also use any sauce of your choice instead of pizza sauce.

I like the taste of sriracha sauce but if you don’t have sriracha sauce then you can use any chilli garlic sauce. You can also use leftover roti instead of suji chilla. See the video recipe below of this roti quesadilla. 

Subscribe with your mail address to get all the recipes straight to your mailbox immediately after publishing.

Watch the video recipe below

Recipe

For stuffing

Potato- 4 medium, boiled 

Mayonnaise – 1/3 cup 

Pizza sauce – 3 tablespoon 

Oregano – 1 teaspoon 

Tomato sauce – 2 tablespoon 

Sriracha sauce – 1 tablespoon 

Cheese cube – 2

Salt – 1/4 teaspoon or to taste 

For chila or pancake 

Semolina or suji – 1 cup

Rice flour – 1/2 cup

Curd or yogurt – 1/2 cup 

Salt to taste 

Chilli flakes – 1/2 teaspoon 

Cilantro or coriander leaves – 2-3 tablespoon, chopped 

Water – 1 cup 

Oil as required 

Cheese slices or mozzarella cheese as required 

Method

1. In a large bowl mix suji or semolina, rice flour and curd or yogurt. Add water slowly and mix well. Don’t add entire water in one go. Add 1/4 cup at a time. Mix everything well and make a lump free smooth batter.

2. Now add salt, chilli flakes and chopped cilantro or coriander leaves. Mix well. Cover the bowl and keep aside. 

3. Peel and grate the potatoes. Grate the cheese cubes and mix with potatoes. You can use more cheese cubes if you want.

4. Add salt, oregano, sriracha sauce, mayonnaise, tomato ketchup and pizza sauce. Mix well. Your stuffing is ready.  Taste and adjust the seasoning. Add little more sauce and mayonnaise if required. Add less or more sauce according to your taste.

5. You can use any chilli garlic sauce if you don’t have sriracha sauce. You can add finely chopped onion in potato mixture if you want. You can also make sandwiches with this potato mixture. 

6. Heat a pan or skillet. Brush with little oil. Pour a ladle full of batter in the middle. Spread with the back of the ladle by rotating. Reduce the heat and cook on low heat.  Drizzle little oil on the sides.

7. When the edges becomes brown flip the chila upside down and fry the other side too. Remove the chilla or pancake on a plate. Make one more pancake like this.

8. Spread potato mixture all over the pancake.   Spread small pieces of cheese slice over the potato mixture. You can also use grated mozzarella cheese. Use as much cheese as you like.

9. Place another pancake over it and flip carefully. Drizzle little oil on the sides. Press gently with a spatula. Fry both the sides till golden brown.  Remove on a plate and cut into four pieces with a knife or pizza cutter.  Serve hot with any sauce.

10..You can also use leftover roti instead of chilla or pancake to make this delicious Indian style quesadilla.  Do you have any leftover stuffing? Make sandwiches with it. It will be a delicious sandwich filling.

Notes

1. You can use any flour in chilla or pancake. But don’t skip rice flour. Rice flour will make your quesadilla crisp.

2. You can use any sauce of your choice in stuffing.

3. Grated carrot, capsicum, bell peppers, boiled sweet corn or any vegetable or paneer can be used in stuffing.

4. If your kids love cheesy stuffing then add more cheese. Use as much cheese as you like.

If you tried my recipe, you can share your food pictures with me in the social network sites by using hashtag, #batterupwithsujata I would love to see your creations.

I would love to hear from you. Please share your thoughts and suggestions in comment.

Please visit my facebook page and hit the like button to get the latest update

Facebook page

Follow on

Twitter

Instagram

Pinterest

Peanut Butter

Peanut butter. Here is an easy and quick recipe to make peanut butter at home. Homemade peanut butter is much better than store bought. Its absolutely sugar free, preservative free and delicious. You can make creamy delectable peanut butter easily and you can also customize according to your taste. Add any flavour of your choice.

Recipe is completely vegan and gluten free. Store bought peanut butter contain unhealthy oils and additives. But this homemade peanut butter contains only peanut, salt and very little peanut oil. And peanut oil is completely optional, you can skip it if you want. Earlier shared this recipe with my Multigrain bread post. Now here is a separate post and YouTube video recipe for you. Hope you will like it. Please subscribe my YouTube channel for more video recipes. And don’t forget to click on the bell icon to get all the recipes immediately after uploading. Click on the link below to subscribe. https://youtube.com/c/SujataRoy

Benefits of peanut butter

Peanut butter doesn’t just contribute to weight loss. Consuming peanuts as a regular part of your diet has other benefits, too.

• Peanut butter helps you recover after a workout. It’s high in protein, which you need to boost recovery if you’re going hard at the gym.

• Peanut butter may reduce your risk of diabetes. Because of the low glycemic score of peanuts, consuming peanuts regularly can help keep blood sugar stable and lower your diabetes risk.

• Peanut butter is packed with vitamins and minerals. Copper, folate, B vitamins, and manganese are all right there.

• Peanut butter may reduce your risk of heart disease and other leading causes of death.

To read more health benefits of Peanut butter click here

How to customize according to your taste?

You can use 1 tablespoon honey to make your peanut butter sweet. And you can also make it without any oil or you can use any flavorless oil instead of peanut oil. Yes, you can make it without any oil or use only 1 spoon of oil instead of 2 tablespoon. Choice is your. You can also add chocolate or cocoa powder, mint or any herbs to give different flavour. I am sharing basic recipe. You can make it in different flavour every time.

Subscribe with your mail address to get all the recipes straight to your mailbox immediately after publishing.

Click on the link below and watch video recipe of this healthy and delicious peanut butter

Recipe

Peanut – 1 cup

Sea salt or pink salt – 1/4 teaspoon

Peanut oil – 2 tablespoon, optional

Method

1. Dry roast the peanut on low medium heat till peanut becomes crisp and slightly change it’s colour. Don’t make too brown. And peanut should be roasted well to preserve for a long time.

2. Or microwave on high power for 2 minutes. After one minute stir and press the start button.

3. Take out the peanut and stir well. Microwave again for 1-2 minutes. Every oven takes different time. I had to microwave for 4 minutes. Check and stir after every 1 minute. Don’t make too brown. Check out the video recipe above .After roasting well you can peel the peanut easily.

4. Let the peanut cool down. Take out all the peanut on a kitchen napkin or any cotton cloth. Wrap and rub with your palm to remove the skin of peanut. Separate the peanut and peel.

5. Grind the peanut. Scrap the sides with a spoon or knife and grind again.

6. Now peanut will release oil. You can use it as a spread if you don’t want to use oil.

7. Add 2 tablespoon peanut oil in the grinder jar. If you want your peanut butter slightly sweet add 1 tablespoon honey at this stage. I didn’t. If you are using honey add only 1 tablespoon oil instead of 2 tablespoon. You can also add cocoa powder or chocolate chips or any herbs of your choice. Grind again to make smooth creamy butter.

8. Store the peanut butter in covered container in refrigerator for later use.

Notes

1. Roast the peanut properly for longer shelf life. You can store your homemade peanut butter in refrigerator for a month.

2. Any herbs or chocolate can be added while grinding the peanut. You can try different flavour every time.

If you tried my recipe, you can share your food pictures with me in the social network sites by using hashtag, #batterupwithsujata I would love to see your creations.

I would love to hear from you. Please share your thoughts and suggestions in comment.

Please visit my facebook page and hit the like button to get the latest update

Facebook page

Follow on

Twitter

Instagram

Pinterest

Eggless Mango chia seed cake

Eggless mango chia seed cake with whole wheat flour. You don’t need refined flour or maida, egg and butter to make this delicious cake. Yes a butter free cake with mango and chia seeds. Cake is super soft, moist and very easy to make.

We normally use chia seeds in our smoothie or overnight oats now try a cake with these nutritious chia seeds.

Chia seeds may be small, but they’re incredibly rich in nutrients. A staple in the ancient Aztec and Maya diets, these seeds have been touted for their health benefits for centuries. The antioxidants, minerals, fiber, and omega-3 fatty acids in chia seeds may promote heart health, support strong bones, and improve blood sugar management. Source

But chia seeds are completely optional. If you don’t like the taste, you can skip chia seeds. And if you are not using chia seeds then you need less milk for the batter. Because chia seeds soak lots of moisture.

You can always use refined flour/all purpose flour or maida instead of whole wheat flour if you want. And you can also make this cake with any fresh fruit of your choice. Already shared one more Fresh fruit cake with carrot here.

Subscribe with your mail address to get all the recipes straight to your mailbox immediately after publishing.

Video recipe of this healthy and delicious cake

Recipe

Whole wheat flour or atta – 1&1/2 cup

Mango puree – 1 cup

Chia seeds – 2 tablespoon

Powdered sugar – 3/4 cup

Milk powder – 1/4 cup

Baking powder – 1 teaspoon

Baking soda – 1/2 teaspoon

Thick curd or yogurt – 1/4 cup

Milk – 3/4 cup

Oil – 1/2 cup

Vanilla essence – 1 teaspoon

Method

1. Preheat the microwave convection or hot blast mode at 170°. For OTG preheat at 180°.

2. Grease a baking pan. I used loaf pan and some cupcake moulds. You can use any cake pan or make cupcakes in muffins or cupcake moulds.

3. In a bowl mix flour, baking powder and soda. Grind the mango pieces to make puree. Take out the mango puree in a bowl.

4. In the same mixer grinder jar blend half of the milk and chia seeds. Chia seeds are optional, you can skip if you don’t like the taste.

5. In a large bowl add blended chia seeds and milk with sugar. If you are not using chia seeds add only milk. And also reduce the milk. Use only half cup.

6. Now add oil and curd or yogurt. Whisk well. Add vanilla essence, remaining milk and milk powder. Whisk again.

7. Add mango puree and mix. Add half of the dry ingredients and mix well. Add remaining dry ingredients and mix to make a lump free smooth batter.

8. Pour the batter in baking pan or cupcake moulds. Fill upto 3/4 pan or moulds. Tap gently to remove air bubbles.

9. Bake in preheated oven at 170° for 28-30 minutes. For OTG bake for 35-40 minutes. Check with a toothpick after 28 minutes. Fresh fruit cake takes longer time to bake. My cupcakes are perfectly baked in 28 minutes. But I had to bake the cake in loaf pan for 4 minutes again. Every oven takes different time so check after 28-30 minutes.

10. Let the cake cool down. Run a knife at the edges. Demould on a plate. Slice and enjoy the healthy and delicious mango chia whole wheat cake. Happy baking. Stay safe healthy and blessed.

Notes

1. You can use refined flour or maida instead of whole wheat flour.

2. If you are not using chia seeds then use less milk for the batter.

If you tried my recipe, you can share your food pictures with me in the social network sites by using hashtag, #batterupwithsujata I would love to see your creations. I would love to hear from you. Please share your thoughts and suggestions in comment.

Please visit my facebook page and hit the like button to get the latest update

Facebook page

Please subscribe my YouTube channel for more recipes

Follow on

Twitter

Instagram

Pinterest

Watch “Sujata Roy” on YouTube

https://youtube.com/channel/UCuAk8k5GnN6U_b5TEGe6sUQ

I would like to thank all my readers, followers, friends and relatives for all the support, love and encouragement. Here is my newly started YouTube channel. Posted the link above 👆. Hope you will like it.

Please subscribe the channel and click on bell icon to get all the recipes immediately after uploading. And also like and share if you like the recipes. Your one like will encourage me to share more interesting recipes.

If you want any recipe from this blog in YouTube video please let me know in comment. Thank you everyone for being with me on this journey.

I would love to hear from you. Please share your thoughts and suggestions in comment.


Please visit my facebook page and hit the like button to get the latest update

Facebook page


Follow on

Twitter

Instagram

Pinterest