Kodo Millet Broccoli Pulao

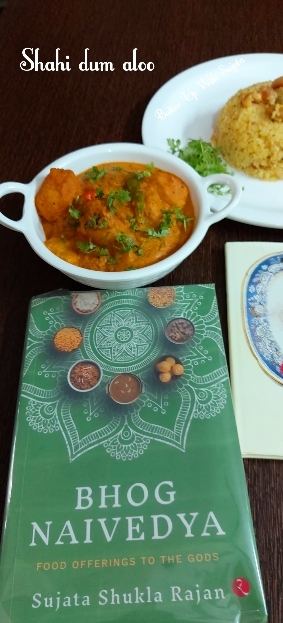
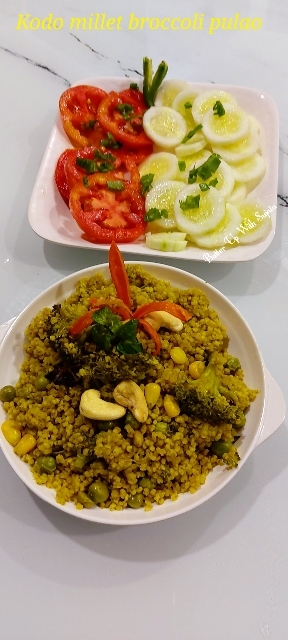
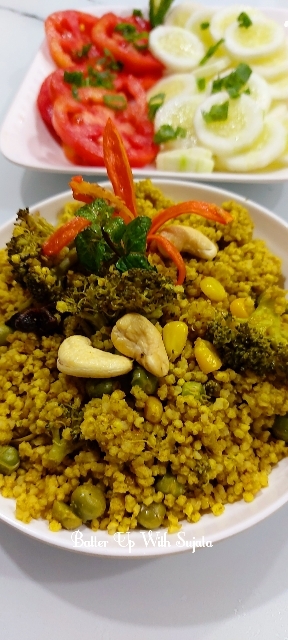
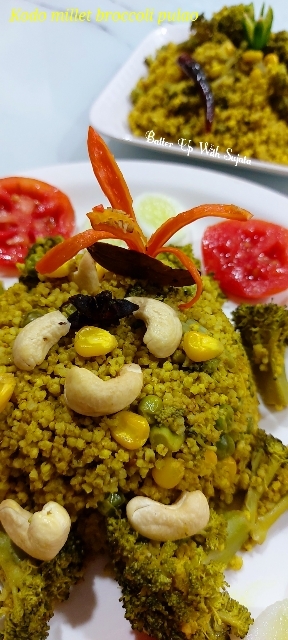
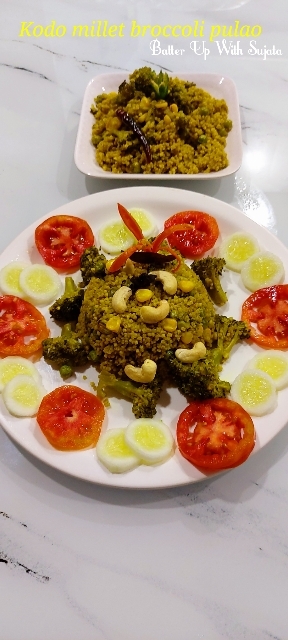
Kodo millet broccoli pulao. A flavorful, spicy, no onion garlic and delicious pulao made with kodo millet and broccoli. You don’t have broccoli? No problem try with cauliflower, carrot, beans or mixed vegetables. An absolutely easy to make and delectable one pot meal. A very nutritious and gluten free dish for everyone.

According to Wikipedia Paspalum scrobiculatum, commonly called Kodo millet or Koda millet, is an annual grain that is grown primarily in Nepal (not to confuse with Kodo (Finger millet, Eleusine coracana) and also in India, Philippines, Indonesia, Vietnam, Thailand, and in West Africa from where it originated. The plant is called Arikelu in the Telugu language, Varagu in Tamil, Varak (വരക്) in Malayalam, Arka in Kannada,Kodra in Hindi and Bajra (ਬਾਜਰਾ) in Punjabi.

Now what is millet?

Millet is a group of small-seeded grains resembling small pearls. In the United States, some people haven’t heard of millet, yet it’s a staple in many parts of the world. It’s commonly included in Indian and African dishes. Millet is a gluten-free grain that’s rich in antioxidants, soluble fiber, and protein. In particular, it may lower cholesterol and blood sugar levels. The different types of millet include:

• pearl

• foxtail

• finger

• little

• jowar

• kodo

Millet is a whole grain. It’s considered a “good” carb, so it’s easily digestible. And since it’s also gluten-free, it’s a great alternative for people living with celiac disease or gluten sensitivity. Additionally, millet has a high nutritional value Millet is a whole grain that’s packed with protein, antioxidants, and nutrients. It may have numerous health benefits, such as helping lower your blood sugar and cholesterol levels. Plus, it’s gluten-free, making it an excellent choice for people who have celiac disease or follow a gluten-free diet. Its nutty taste and versatility make it well worth trying. Source – Healthline

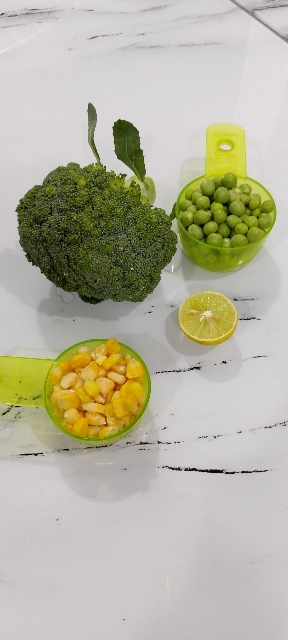
I have used nutrient-rich broccoli with corn, green peas, green chilli, ginger and some aromatic whole spices in this millet pulao.

Broccoli is a rich source of multiple vitamins, minerals and fiber. Different cooking methods may affect the vegetable’s nutrient composition, but broccoli is a healthy addition to your diet whether cooked or raw. Broccoli is a nutrient-rich vegetable that may enhance your health in a variety of ways, such as by reducing inflammation, improving blood sugar control, boosting immunity and promoting heart health. However, keep in mind that good health doesn’t come from any single food. Broccoli is merely one of numerous healthy foods that can contribute to optimal health. Including this nutritious vegetable in your healthy, balanced diet may help you achieve your health goals more easily. To read more about health benefits of broccoli click here.

Here are some more broccoli recipes from this blog. Click on the link below for recipe.

1. Broccoli stir fry with carrot beans and olive

2. Broccoli mushroom noodles with sriracha sauce

3. No onion garlic broccoli potato stir fry

4. Broccoli malai curry

5. Broccoli with cottage cheese and mixed vegetables

6. Broccoli almond cheese soup

7. Broccoli stir fry with lemon and ginger julienne

8. Broccoli with egg and tomato

9. Steamed vegetable

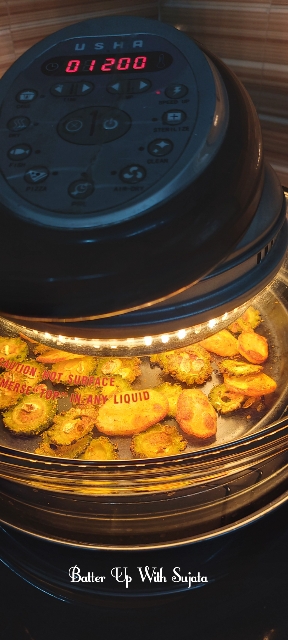
As I mentioned above recipe is very easy to make. You can also make it in pressure cooker. Just reduce the amount of water while cooking in pressure cooker. For 1 cup millet use 1&1/2 cup water instead of 2 cup and cook for 2 whistle. Let the pressure settle down on its own. Use green chilli according to your spice tolerance. To make the pulao more spicy add more chopped green chilli or if you are making for kids, use only one green chilli or skip chilli. You can also use mixed vegetables in this pulao like cauliflower, carrot, beans etc with broccoli. Or you can also make it like Mixed vegetable fried rice if you want. Use cooked millet instead of rice.

Subscribe with your mail address to get all the recipes straight to your mailbox immediately after publishing.

Recipe

Kodo millet – 1 cup

Broccoli – 1

Green peas – 1/2 cup

Sweet corn – 1/3 cup

Great chilli – 2-3 or to taste, finely chopped

Ginger – 1 inch piece, grated

Oil – 1/2 tablespoon

Ghee or clarified butter – 1/2 tablespoon

Green cardamom – 2-3, broken

Cloves – 1 inch piece

Star anise – 1 small

Cumin seeds – 1/2 teaspoon

Dry red chilli – 1

Bay leaf – 2 small

Salt – 1&1/2 teaspoon or to taste

Sugar – 1/2 teaspoon, optional

Mint leaves – 8-10 leaves, optional

Cumin powder – 1 teaspoon

Coriander powder – 1/2 teaspoon

Turmeric powder – 1/2 teaspoon

Bengali garam masala powder – 1/2 teaspoon

Water – 2 cup

Lemon juice – 1/2 tablespoon

Method

1. Wash the kodo millet on a strainer. Soak in sufficient water for 15 minutes. After 15 minutes drain and keep aside.

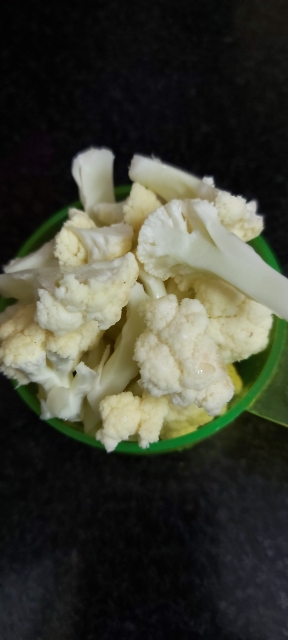
2. Wash and chop the broccoli into medium size florets.

3. Heat oil and ghee in a wok or pan. You can use only ghee or only oil if you want.

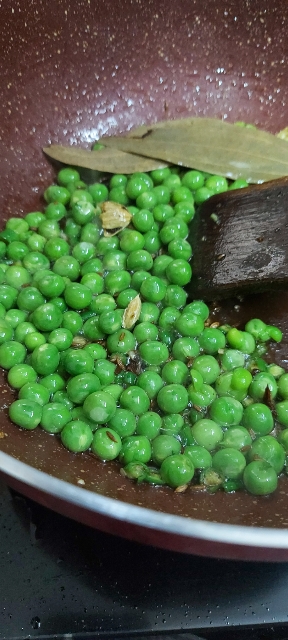
4. Add cumin seeds, start anise, green cardamom, cloves, cinnamon, dry red chilli and bay leaf. When cumin seeds starts to splutter add grated ginger and chopped green chilli. Saute for a minute. Add some more chopped green chilli to make the pulao spicy if you want.

5. You can also use finely chopped onion and garlic with ginger and green chilli if you want. Fry the onion garlic till light brown if using.

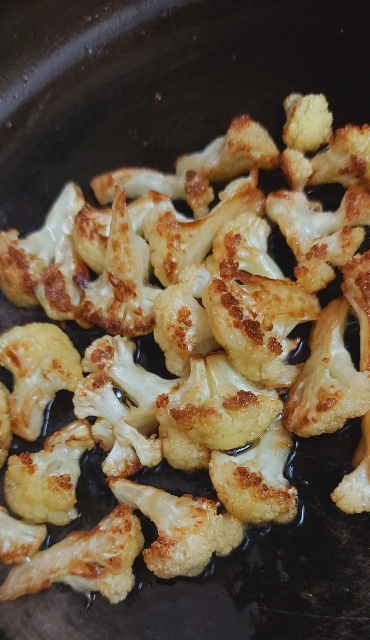
6. Add broccoli florets, cumin powder, coriander powder and turmeric powder. Saute for 2-3 minutes. You can use any vegetable with broccoli like cauliflower, carrot, beans, mushrooms etc. Even you can also use fried cubed cottage cheese or paneer in the pulao if you want.

7. Now add kodo millet and saute for a minute. Add salt, sugar, green peas and sweet corn. Saute for a minute again.

8. Add water and lemon juice. Tear up mint leaves roughly with your hand and add. You can also add 2 tablespoon chopped cilantro or coriander leaves with mint leaves. I didn’t. If you are using pressure cooker add 1&2/ cup water instead of 2 cup and pressure cook for 2 whistle. Let the pressure settle down on its own.

9. When it starts to rolling boil reduce the heat. Cover and cook on simmer for 10 minutes.

10. Remove the cover. Add Bengali garam masala powder and stir. Get the homemade garam masala powder recipe here.

11. Cover again and cook on simmer for 5 minutes more or till water absorbed completely. Remove from heat. Cover and keep aside for 5-10 minutes.

12. Your kodo millet pulao is ready. Serve hot with any raita, chutney or any spicy curry.

This post is going to feature on Facebook gourmet group Shhhhh Cooking Secretly Challenge for the theme Healthy Ideas. In this monthly group members are paired with different partners every month and two secret ingredients are given to each other. We have to use these ingredients in our recipe. Best part of this group is we can interact with a blogger every month. This month my partner is Shobha Keshwani. We had a lovely chat about healthy food. She has also an awesome YouTube channel. Shobha Keshwani gave me cardamom and star anise as secret ingredients. I made this healthy and delicious millet pulao with with these ingredients. And I gave Moringa leaves and black pepper to her as secret ingredients. And she made nutritious and delicious Corn and Moringa soup with these ingredients.

If you tried my recipe, you can share your food pictures with me in the social network sites by using hashtag, #batterupwithsujata I would love to see your creations.

I would love to hear from you. Please share your thoughts and suggestions in comment.

Please visit my facebook page and hit the like button to get the latest update

Facebook page

Follow on

Twitter

Instagram

Pinterest

Mor Kulambu Or Buttermilk Kuzhambu

Mor Kulambu or buttermilk Kuzhambu from Tamil cuisine. A no onion garlic spicy tangy and lipsmackingly delicious curry made with curd or buttermilk. Similar to kadhi but without besan or chickpea flour. A perfect side dish to serve with steamed rice.

This yogurt based curry is usually made with okra/ladyfingers/bhindi, ash gourd or other vegetables but I am sharing the recipe of curry only because I love it without vegetables but you can use okra, winter melon, ash gourd, colocasia or any vegetable of your choice. Vegetables should be cooked till tender before adding in the ground paste of coconut and spices.

Here are some more South Indian style recipes on this blog.

1. Cornmeal oats soya vegetable idli

2. Chutney idli

3. Green moong idli

4. Barnyard millet fried idli

5. Masala paniyaram or appe

6. Carrot peas instant appe or paniyaram

7. Rice appe

8. Masoor dal or red lentil appe

9. Beetroot appe

10. Semolina and lentil appe

11. Roasted gram or sattu appe

12. Semolina and flatten rice appe

13. Sprouts and oats appe

14. Green moong uttapam or dosa

15. Hayagriva-or-hayagreeva maddi or chana dal halwa

16. Sprouts sundal

17. Paruppu payasam

18. Dal rasam

19. Kadala curry or black chickpea curry

You may also like to try Mor kootu recipe from the blog of Priya Vijaykrishnan.

According to Wikipedia Buttermilk Kuzhambu or Moru Curry(Malayalam) Mor Kuzhambu(Tamil) is a commonly prepared dish in Kerala and Tamil Nadu. This is a liquid curry recipe which is served with white or boiled rice, pancake made of lentils / mixed gram dosa. Traditionally, it includes vegetables like okra, winter melon or ash gourd, colocasia, etc. The taste is a bit sour, and it is a dish of Tamil Nadu. It is widely prepared on festivals as a special dish. It is often served with hot steamed rice and potato fries.

This buttermilk Kuzhambu or Mor Kulambu is very easy to make. Just don’t forget to blend the curd or yogurt well. Without blending curd will curdle and texture will differ. And ground spices should be a smooth paste. Colour of the curry should be pale yellow so don’t use turmeric powder more than 1/4 teaspoon. I have made this curry without vegetables but if you want to use ladyfingers/okra or bhindi or ash gourd or any other vegetable, chop and cook them with one teaspoon oil before adding in the curry. Try this delicious yogurt curry and let me know how you like it.

Subscribe with your mail address to get all the recipes straight to your mailbox immediately after publishing.

Recipe

Curd or thick yogurt – 1 cup

Turmeric powder – 1/4 teaspoon

Salt to taste

Ginger – 1/2 inch piece

Green chilli – 3-4 or to taste

Coconut – 1/4 cup, grated or finely chopped

Curry leaves – 4-5

Cumin seeds – 1 teaspoon

Coriander seeds – 1 teaspoon

Arhar dal or toor dal/ split pigeon peas – 1 tablespoon

Rice – 1/2 teaspoon

Water – 1 cup

For tempering

Oil – 1 tablespoon

Mustard seeds – 1/2 teaspoon

Cumin seeds – 1/4 teaspoon

Methi or fenugreek seeds – 1/4 teaspoon

Dry red chilli – 2

Curry leaves – 10-12

Hing or asafoetida – 1/4 teaspoon

Method

1..Wash dal and rice well. Soak in 3-4 tablespoon hot water for 30 minutes.

2. Grind cumin seeds, coriander seeds, ginger, green chilli and coconut. Drain the water of soaked rice and dal or split pigeon peas lentil. Add in the grinder with cumin, coriander, ginger chilli and coconut paste. Add 3 tablespoon water and make a smooth paste.

3. Take out the ground mixture in a pan or wok. Add 1/4 teaspoon turmeric powder, salt and 1 cup water. Also add the cooked vegetables if using. See notes for more options.

4. Mix well and let it boil on medium heat for 6-7 minutes. Stir in between to avoid sticking to the bottom.

5. In the meantime blend the curd or yogurt. You can use your mixer grinder or hand blender to blend. Curd should be blend really well.

6. After 6-7 minutes reduce the heat to lowest. Add blended curd and mix. Cook on simmer for two minutes or until it starts to boil and becomes frothy. Keep stirring to avoid curdling the yogurt or curd. Remove from heat. Don’t boil for a long time.

7. Now heat oil in a small pan. Add cumin seeds, mustard seeds, fenugreek seeds, dry red chilli, curry leaves and hing or asafoetida. When seeds starts to splutter remove the pan from heat and mix in cooked curd or yogurt mixture. Mix well and cover for a few minutes.

8. Serve hot with steamed rice and potato fries.

Notes

1. Never use yogurt or curd without blending well.

2. You can use ash gourd, okra/ladyfingers/ bhindi or any other vegetables. Even you can use udad dal or black lentil pakoda or vada in this yogurt coconut curry if you want. If you are using vegetables, cook them with one teaspoon oil till tender before adding in the curry.

3. Use green chilli according to your spice tolerance.

4. Use thick yogurt or curd for perfect taste.

If you tried my recipe, you can share your food pictures with me in the social network sites by using hashtag, #batterupwithsujata I would love to see your creations.

I would love to hear from you. Please share your thoughts and suggestions in comment.

Please visit my facebook page and hit the like button to get the latest update

Facebook page

Follow on

Twitter

Instagram

Pinterest

Shahi Dum Aloo

Shahi dum aloo. A no onion garlic rich creamy and delicious curry. Easy to make spicy and flavorful curry to paired with puri, paratha, roti, fried rice, jeera rice or pulao. A perfect side dish for this festive season.

On upcoming Navaratri which starts from 7th October this year, many people avoid onion garlic on these days. So here is a mouthwatering and easy recipe for you. You can also make it to serve as Bhog prasad with Luchi, Basanti pulao, Bhuni khichuri or Bengali pulao. I have served it with basanti pulao.

Potatoes are always comes to our resque when no other vegetables available for some reason. I always store potatoes when my vegetable vendor is on leave. Versatile potatoes are

• Packed With Nutrients.

• Contain Antioxidants. Potatoes are rich in compounds like flavonoids, carotenoids and phenolic acids

• May Improve Blood Sugar Control

• May Improve Digestive Health

• Naturally Gluten-Free

• Incredibly Filling

• Extremely Versatile

To read more about health benefits of potato click here.

Some fragrant spices are used to make this potato curry flavorful. I have used ground paste of these spices. You can also use these cardamom, cloves and cinnamon in tempering or tadka. If you are using in tempering don’t forget to crush the whole spices in a mortar pestle. But I like my gravy smooth and many people don’t like if these whole spices comes in mouth while eating. So to make the gravy smooth and creamy grind the spices into a smooth paste. And you can also add 1-2 tablespoon fresh cream at the end of cooking if you want.

Subscribe with your mail address to get all the recipes straight to your mailbox immediately after publishing.

Recipe

Small potatoes – 500 gram

Tomato – 1 medium, chopped

Green chilli – 3-4 or to taste

Ginger – 1 inch piece

Cashew nuts – 10

Melon seeds – 1 tablespoon

Poppy seeds or khas khas – 1 tablespoon

Green cardamom – 3

Cinnamon – 1/2 Inch piece

Cloves – 3

Cumin powder – 1 teaspoon

Coriander powder – 1 teaspoon

Turmeric powder – 1/2 teaspoon

Kashmiri red chilli powder – 2 teaspoon

Curd or yogurt – 4 tablespoon

Mustard oil – 3 tablespoon

Salt to taste

Sugar – 1/2 teaspoon

Kasuri methi – 1 teaspoon

Water – 1&1/2 cup + 4 tablespoon

Ghee or clarified – 2 teaspoon

Cilantro or coriander leaves – to garnish

Method

1. Boil the potatoes in a pressure cooker for 2 whistle. Don’t make too soft because we will fry the potatoes. If you don’t have small potatoes then you can also use large size potatoes. Cut the boiled potatoes in large pieces before frying.

2. Let the cooker cool down. Take out the potatoes and peel them. Prick the potatoes with a fork and keep aside.

3. Dry grind poppy seeds, melon seeds and cashew nuts. Add 3-4 tablespoon water and grind again. Make a smooth paste. Pour the paste into a bowl. Mix well beaten curd or yogurt with the mixture and keep aside.

4. In the same grinder grind tomato, ginger, 1-2 green chilli, cinnamon, green cardamom and cloves. You can use green cardamom, cinnamon and cloves for tempering or tadka but I recommend to grind everything into a smooth paste to get creamy smooth gravy. And the whole spices will not come in mouth while eating.

5. Heat oil in a pan. Add potatoes and salt. Fry till potatoes becomes golden brown.

6. Add tomato, ginger, green chilli, cardamom, cinnamon and cloves paste. Mix well. Add cumin powder, turmeric powder, coriander powder and Kashmiri red chilli powder. Saute till oil leaves the sides.

7. Reduce the heat and add cashew nuts, melon seeds and poppy seeds paste mixed with curd or yogurt. Saute till everything dried up and oil leaves the sides. Don’t increase the heat. Cook on simmer to avoid curdling the yogurt.

8. Add 1 & 1/2 cup water, sugar, 2-3 green chilli and little salt. Remember we have added salt in potatoes.

9. Increase the flame. When the gravy starts to rolling boil reduce the heat. Cook on simmer for 10-15 minutes. Or till you get your desired consistency.

10. Crush Kasuri methi with your palm and add in potatoes. Taste and adjust the salt if required. Add a dollop of ghee or clarified butter and remove from heat. You can add 1-2 tablespoon fresh cream if you like. I didn’t.

11. Garnish with chopped cilantro or coriander leaves. Serve with any pulao, steamed rice, puri, luchi, naan, paratha or any Indian flatbread.

Notes

1. You can use almond instead of cashew nuts.

2. Use chilli according to your spice tolerance.

If you tried my recipe, you can share your food pictures with me in the social network sites by using hashtag, #batterupwithsujata I would love to see your creations.

I would love to hear from you. Please share your thoughts and suggestions in comment.

Please visit my facebook page and hit the like button to get the latest update

Facebook page

Follow on

Twitter

Instagram

Pinterest

Kaju Curry/No Onion Garlic Curry

Wishing a very happy Janmashtami to you all and your family. May Lord Krishna fill your life with bliss and joy. May God bless you all with good health, happiness and prosperity 🙏

Kaju or cashew nut curry. A no onion garlic rich creamy, mildly spicy and delicious tomato based gravy with fried cashew nuts. A scrumptious side dish to serve with paratha, puri or any bread and rice dishes.

You can also make it with onion garlic. Also sharing the recipe below with onion and garlic. You may like some Janmashtami special recipes on this blog. Click on the link for recipe.

1. Apple coconut fudge or barfi

2. Chhena kheer

3. Malpua

4. Mohanbhog

5. Makhana curry

And many other dessert, sweet and no onion garlic satwik recipes. Or you might like to try Janmashtami prasad thali to celebrate the festival from the blog of Poonam Bachhav.

This Kaju curry is completely Satwik recipe. But you can also make it with onion garlic if you want as I mentioned above. To make with onion garlic fry the roughly chopped onion, garlic cloves, ginger and green chilli. When onion becomes translucent add tomatoes. Saute till tomato becomes mushy. Let the sauteed mixture cool down and grind into a smooth paste. Then follow the steps as given below. Add the ground mixture in oil instead of tomato green chilli and ginger paste.

I served this delicious Kaju curry with paratha. To make paratha in a bowl mix 1 cup maida or refined flour and 1/2 cup whole wheat flour or atta. You can use only maida or only atta if you want. Add 1/4 teaspoon salt and 2 teaspoon oil or ghee. Mix well. Now add water gradually to make a smooth dough. Smear the dough with half teaspoon of oil. Cover and keep aside for 30 minutes. Make medium sized balls and roll into a thin roti with the help of little flour. Fold the round roti into half then fold again into a triangle. You can spread ghee on both layers. Fry the triangle paratha from both sides on a griddle or tawa.

Subscribe with your mail address to get all the recipes straight to your mailbox immediately after publishing.

Recipe

Kaju or cashew nuts – 3/4 cup

Ghee or clarified butter – 1 teaspoon

For gravy

Tomato – 3 medium

Ginger – 1/2 inch piece

Green chilli – 2-3 or to taste

Cashew nuts or Kaju – 2 tablespoon

Poppy seeds or khas khas – 2 tablespoon

Melon seeds – 2 tablespoon

Oil – 3 tablespoon

Salt to taste

Sugar – 1/2 teaspoon

Cumin powder – 1 teaspoon

Coriander powder – 1 teaspoon

Turmeric powder – 1/4 teaspoon

Fresh cream – 2 tablespoon

Kashmiri red chilli powder – 1&1/2 teaspoon

Garam masala – 1/2 teaspoon

Kasuri methi – 1/2 teaspoon

Water 1&1/2 cup + 4 tablespoon

Cilantro or coriander leaves – 1 tablespoon, chopped, optional

Method

1. Dry grind cashew nuts, poppy seeds and melon seeds into a fine powder. Add 4 tablespoon water and grind again to make smooth paste.

2. Grind chopped tomatoes, 1-2 green chilli and ginger. Make a smooth paste.

3. Heat one teaspoon ghee or butter in a pan. I used ghee. Add the cashew nuts or Kaju and fry on low medium heat till light golden brown. Take out the cashews and ghee and place on a plate.

4. In the same pan heat 3 tablespoon oil. You can use ghee or butter if you want. Add tomato, chilli and ginger paste, cumin powder, coriander powder, turmeric powder, Kashmiri red chilli powder, salt and sugar. Saute till oil leaves the sides.

5. Add cashew nuts, melon seeds and poppy seeds paste and fresh cream. Saute again till everything dried up and oil leaves the sides.

6. Add water and let it boil for 4-5 minutes on low heat. Stir in between to avoid sticking to the bottom.

7. Now add the fried cashew nuts, 1-2 slit green chili and chopped cilantro or coriander leaves . Reserve some fried cashew nuts for garnishing. Cook again for 3-4 minutes.

8. Crush the Kasuri methi with your palm and add in the gravy. Mix well.

9. Add garam masala and remove from heat. I have used homemade Bengali garam masala. Get the recipe here.

10. Garnish with cilantro or coriander leaves and fried cashew nuts. You can also use fresh cream to garnish your Kaju curry. Serve with paratha, puri, or any bread and rice dishes.

Notes

1. You can use ghee or butter instead of oil to make the gravy.

2. You can also use 1-2 tablespoon more cream at the end if you want.

3. Dry roasted cashew nuts can be used instead of fried cashew nuts.

4. Use green chilli according to your taste.

If you tried my recipe, you can share your food pictures with me in the social network sites by using hashtag, #batterupwithsujata I would love to see your creations.

I would love to hear from you. Please share your thoughts and suggestions in comment.

Please visit my facebook page and hit the like button to get the latest update

Facebook page

Follow on

Twitter

Instagram

Pinterest

Mint Yogurt Dip

Mint yogurt dip. A delicious dip similar to Greek sauce tzatziki which is a yogurt based sauce made of cucumber, lemon juice or vinegar, garlic, mint or dil. But its without cucumber and garlic. Mint, little cilantro, a small green chilli and a dash of lemon juice mixed this yogurt based sauce taste delectable.

Here are some more dip or chutney recipes on this blog.

1. Beetroot dip

2. Waterchestnut chutney or dip

3. Onion tomato chutney or dip

4. Peanut chutney or dip

5. Eggplant chutney

6. Almond walnut chutney with mango ginger

7. Mint almond hummus

8. Mint carrot beetroot hummus with green peas

9. Ginger chutney

10. Mango sesame chutney

11. Capsicum salsa

To make this delicious dip we need thick curd. You can serve this dip with veggies, snacks or pita bread. I think it would be great with Aruna’s Cucumber discs and pipes.

Strain the curd or yogurt with a cheesecloth or use Greek yogurt. Don’t use watery curd or yogurt. Very finely chopped or coarsely ground mint leaves and green chilli will give a wonderful taste. This dip is very lightly spicy because of a small green chilli and pepper powder. You can increase or decrease the chilli and pepper according to your taste. I have used 1 tablespoon cilantro or coriander leaves for taste. You can use 1 tablespoon more if you like. Or skip if you don’t like cilantro. Leaves should be coarsely ground don’t grind to a smooth paste. You can also use half grated and squeezed cucumber into the dip. Taste the cucumber before using. Don’t use bitter cucumber.

Recipe

Thick curd or hung curd – 1/2 cup

Mint leaves – 1/4 cup

Cilantro or coriander leaves – 1 tablespoon, chopped

Green chilli – 1 small

Lemon juice – 1 & 1/2 teaspoon or to taste

Black or pink salt – 1/2 teaspoon or to taste

Black pepper powder – 1/2 teaspoon

Method

1. Finely chop or coarsely ground mint leaves ,green chilli and cilantro or coriander.

2. Add hung curd or thick yogurt, black or pink salt, black pepper powder and lemon juice. If you don’t like your dip tangy use one teaspoon lemon juice.

3. Blend everything well. Taste and adjust the seasoning. Add more lemon juice if require.

4. Pour the dip into a bowl. Garnish with mint leaves. Serve with any snacks, pita bread, vegetable sticks or serve with any meal instead of raita. You can also use the dip as a sandwich spread.

Notes

1. Use chilli and black pepper according to your taste.

2. If you like less salted dip add 1/4 teaspoon first and adjust after tasting. 1/2 teaspoon is perfect for me. You can also use rock salt instead of black salt. But black or pink salt taste best.

3. You can add half grated and squeezed cucumber into the dip while blending. Squeeze the water of cucumber completely before adding.

4. You can store this dip in refrigerator to serve chilled.

If you tried my recipe, you can share your food pictures with me in the social network sites by using hashtag, #batterupwithsujata I would love to see your creations.

I would love to hear from you. Please share your thoughts and suggestions in comment.

Please visit my facebook page and hit the like button to get the latest update

Facebook page

Follow on

Twitter

Instagram

Pinterest

Masala Paniyaram Or Appe

Masala paniyaram or appe. A delicious and cute looking snack or breakfast dish with only a few drops of oil. Earlier shared some easy and quick instant appe recipe. Now sharing authentic recipe of appe or masala paniyaram. You need only thick grain rice and black lentils or udad dal with some spices to make this delicious appe/kuzhi paniyaram or paddu.

You can also use leftover fermented idli or dosa batter to make appe.

Paddu is an Indian dish made by steaming batter using a mould. It is named variously kuzhi paniyaram, paniyaram, paddu, guliyappa, yeriyappa, gundponglu, gunta ponganalu, or Tulu: appadadde, appe. The batter is made of black lentils and rice and is similar in composition to the batter used to make idli and dosa.  Wikipedia

My Family members and friends love these appe as breakfast or snacks. I got this recipe 7-8 years ago from my friend Keerti Gupta. Now she is just like my younger sister. We met in a food group. That time I was a novice in food photography and writing recipes. I started to share my diabetic friendly innovative recipes whatever I tried for my husband. I love the way Keerti shared her recipes and interact with other group members. She always supports me and gave all the tips and tricks to click and write down the recipes. Now she is not active on social media but we are still connected with each other. I am very happy today to sharing her recipe on my blog. Thanks Keerti for the recipe.

Copy pasting Keerti’s words here. “The authentic recipe looks little cumbersome but trust me this gonna taste heaven.” So friends try and enjoy these delicious cuties as snacks or breakfast.

You may like some instant appe recipes on this blog.

1. Carrot peas instant appe

2. Rice appe with cooked rice

3. Masoor dal or red lentil appe

4. Beetroot appe

5. Semolina and lentil appe

6. Roasted gram or sattu appe

7. Semolina and flatten rice appe

8. Sprouts and oats appe

Monday again and this week’s 305 #Foodiemonday bloghop theme is Monsoon Snacks suggested by Sasmita Sahoo Samanta who blog at First Timer Cook. You can get numerous delicious recipes on her space like Jamun coconut panna cotta and many more.

My contribution for this theme is this healthy and yummy masala paniyaram. You need thick rice or mota chawal or idli rice to make these appe. But sometimes I also used regular Basmati rice if thick rice or idli rice was not available. But now its always available in local grocery store. You have to soak rice and split black lentils or udad dal overnight and grind in the morning. Let it ferment till evening and make the paniyaram for evening snacks. Or you can soak rice and lentil in the morning and grind in evening. Ferment overnight and your batter will ready for breakfast. You can half the ingredients if you want. Rice:dal ratio should be 1:1/3. You need only a drop of oil for each appe and after flipping no oil required for cooking other side.

Recipe

Thick rice/mota chawal or idli rice – 3 cup

Black lentils or udad dal – 1 cup

Salt to taste

Cilantro or coriander – handful, chopped

Green chilli – 3-4 or to taste, finely chopped

Ginger – 1 inch piece, grated or paste

Grated Coconut – 1/4 cup to 1/2 cup, optional

Mustard seeds or rai as require

Vegetable oil as require

Curry leaves – 1 tablespoon, finely chopped

Method

1. Wash & soak dal and rice separately for atleast for 5 hours or overnight. I have used split black lentils or udad dal.

2. First grind dal with little water to a smooth paste and in the same jar grind the rice with just enough water.

3. In a large bowl mix ground rice, udad dal or black lentils and salt. Mix well and cover with a lid (not an airtight lid). Leave it overnight to ferment. You can keep it in your switched off microwave oven. Batter will rise after ferment so don’t fill the bowl. Fill half of the bowl only or batter will be spilled out of the bowl after ferment.

4. In the morning the batter should be raised but in case it doesn’t add a teaspoon of Eno fruit salt just before pouring them in Paniyaram Pan. If the batter has raised, dont use eno.

5. Add chopped cilantro or coriander leaves, green chilli, ginger, chopped curry leaves and coconut if using. Mix well.

6. Heat a appe or paniyaram pan on high flame. Now simmer the flame and pour one drop of oil in each slot.

7. Sprinkle a pinch of rai. When the seeds starts to splutter start pouring Paniyaram batter in every holes. Flame should be sim.

8. After filling all the holes close the pan with a lid & Increase the flame to low medium. Dont ever put it on high.Let it cook for 3-4 minutes, checking occasionally. Remember the slots in middle cook faster than others.

7. When appe becomes nicely browned, flip them with fork or spoon or wooden stick. After flipping dont cover.

8. Cook on low medium heat. This side will take more time than the previous one so please be patient. If u increase the flame they will burn and remain raw from inside.

9. Now your masala paniyaram is ready. Serve with any chutney or sauce of your choice.

Notes

1. If batter doesnt rise overnight add a teaspoon of Eno right before you pour the batter in pan.

2. You can add grated carrot, onion or any vegetable of your choice.

3. You need only a drop of oil. After flipping the appe or paniyaram you don’t need need to add oil again.

4. Patience is the key, dont leave the sight else it will be a mess. Better to cook on low heat for crisp outside paniyaram.

5. Paniyarams taste best when hot.

If you tried my recipe, you can share your food pictures with me in the social network sites by using hashtag, #batterupwithsujata I would love to see your creations.

I would love to hear from you. Please share your thoughts and suggestions in comment.

Please visit my facebook page and hit the like button to get the latest update

Facebook page

Follow on

Twitter

Instagram

Pinterest

Bati Chochchori


Bati chochchori. A simple, easy, quick and delicious curry without any spice. Sharing a simple and easiest potato recipe from Bengali cuisine. You can add any vegetable of your choice with potatoes.

You need only panch phoran or Bengali five spices, salt and mustard oil to make this curry. Even you don’t need turmeric or any other spice powder. Sounds healthy isn’t it? Normally it’s cooked in a bowl. And in Bengali bati means bowl. And vegetables with panch phoran called chochchori or chorchori. Mixed vegetable chochchori is always a dry curry. But this bati chochchori can be made with gravy. You can keep the consistency of gravy as you like.

To make bati chochchori you can use cauliflower, eggplant or any vegetable of your choice. Bati chochchori can be made with fish too. Just mix everything and cook. A super easy method. I like bati chochchori with only potatoes.

Do you love potatoes? Here are some potato recipes from this blog.

1. Spicy potato with tamarind

2. Coriander red potatoes

3. Potatoes with green peas

4. Rosti or Swiss potato pancake

5. Potatoes in yogurt gravy

6. Grilled potatoes

7. Potato curry to serve with hing kachodi

8. Batata bhaji

9. Peanut potato

10. Potato pie

11. Potato with nigella seeds, poppy seeds and tomato

12. Savoury potato cake

13. Stuffed potato

14. Aloo chop or potato fritters

15. Dum aloo

16. Spicy potatoes

17. No onion garlic potato curry

18. Aloo chaat

19. Aloo ke gutke

20. Matar nimona

21. Panch phoran tarkari

22. Kashmiri dum aloo

23. Aloo kabli/chaat

24. Aloo kofta curry

25. Dum aloo with luchi

This stew like curry is best accompany with luchi, puri, paratha or any Indian flatbread. I have served it with luchi. Get the recipe here.

Now why I am talking about this easy and simple recipe. Actually this week its my turn to suggest the theme for 286 #Foodiemonday bloghop. And I suggested my fellow bloggers to cook an easiest dish which you make so often and it should be your family member’s favorite. And better to use minimum spices. So the theme is Cook In A Jiffy. And I also suggested savoury bake as second option but easiest recipe won unanimously.

We are always looking for some easy quick and simple recipes to make in a jiffy for our busy days. Right? Believe me easy and quick recipes can also be delicious 😊 In winter a bowl of hot bati chochchori with fulko or fluffy luchi or puri is a bliss. If you like light less spicy curry then its perfect for you.

If you don’t have panch phoran, then you can make the mixture of five whole spices. To make panch phoran or five spice mix 1 tablespoon each nigella seed or kalonji, cumin seeds or jeera, mustard seeds or sarso, fennel seeds or sounf and 1/2 tablespoon fenugreek seeds or methi. Use green chilli according to your taste. You can also add 1 – 2 teaspoon more mustard oil for an extra zing. Bati chochchori is a light curry. Mix mustard oil, salt panch phoran and water as require with chopped potatoes, green chilli and tomatoes. If you want your chochchori without much gravy, then add less water. I like the taste of light gravy so used 1 cup water. I have used pressure cooker but you can also make it in microwave. Mix everything in a microwavable glass bowl, cover and cook on full power for 4 – 5 minutes or until potatoes becomes soft. Or make in a covered bowl or pot on stove.

Recipe

Potato – 3

Tomato – 2

Slit green chilli – 4 or to taste

Panch phoran or five spices (mixture of fenugreek seeds, nigella seeds, cumin, mustard seeds and fennel seeds) – 1 teaspoon

Mustard oil – 1 tablespoon

Salt to taste

Water – 1 cup


Method

1. Peel and chop the potatoes lengthwise. Rinse well.

2. Rinse and chop the tomatoes in small pieces.

3. In a pressure cooker mix chopped potatoes, tomatoes, panch phoran, slit green chilli, mustard oil, salt and water. Add green chilli according to your taste. If you like your curry hot add some more chilli or if you are making for kids reduce the amount of green chilli.

4. If you don’t want much gravy add 1/2 cup to 3/4 cup water. Use water as you like your curry, thick or thin. Pressure cook for 2 – 3 whistle.

5. Let the pressure settle down on its own. Taste and adjust salt. You can add 1 – 2 teaspoon more mustard oil for an extra zing.

6. For microwave mix everything in a microwavable glass bowl. Cover and microwave on high power for 4 – 5 minutes or until potatoes becomes soft.

7. Or you can make this bati chochchori in a pot or wok. Mix everything, cover and cook till potatoes becomes tender and tomato becomes mushy. Check and stir in between. If your curry is too runny, then cook for some more time to reduce the gravy. Your bati chochchori is ready. Serve hot with Luchi , paratha or any Indian flatbread.

Take care and stay safe 🙏 😊

If you tried my recipe, you can share your food pictures with me in the social network sites by using hashtag, #batterupwithsujata I would love to see your creations.

I would love to hear from you. Please share your thoughts and suggestions in comment.

Please visit my facebook page and hit the like button to get the latest update

Facebook page

Follow on

Twitter

Instagram

Pinterest

Mix Vegetable Fried Rice

Mix Vegetable Fried rice. Fried rice with all the seasonal vegetables. An aromatic, no onion garlic and easy to make rice dish from Bengali cuisine. You will love the delectable taste and flavour.

Fried carrots, French beans, cauliflower, green peas ,cashew nuts and raisins made this rice absolutely delicious. You can use whatever vegetables you like and available. And the rice is flavored with whole spices and Bengali garam masala.

You can serve this fried rice with any curry or

Fish kalia

Chicken kosha

Potol dolma

Railway mutton curry

Doi potol

Dim kosha

Chhanar dalna

Khejur aamsotto chutney

Mango chutney

Chicken dak bungalow

Savoury rasgulla korma

To get some more recipes from Bengali cuisine click here.

And for some more rice recipes click on the name below.

1. Mexican green rice

2. Tricolour rice

3. Carrot rice

4. Mexican rice

5. Beetroot rice

6. Mint rice

7. Spanish moulded rice

8. Aloo chutney pulao

9. Korean rice

10. Corn peas barista fried rice

11. Easy pulao

12. Saffron rice

Monday again and our 281 #Foodiemonday bloghop theme is Variety Rice Special suggested by Narmadha who blog at Nams Corner. Narmadha is a very talented blogger. I always love her authentic South Indian recipes. I have bookmarked her Veg lunch menu and Curry leaves rice to try. I am sure you will love to visit her space for more authentic, innovative and healthy recipes.

This fried rice recipe is very simple and easy to make. Its a no onion garlic recipe but you can use sliced onion if you want. After adding whole spices add sliced onion with chopped green chilli and fry. When onion becomes golden brown add green peas. You can also make it with leftover rice but rice shouldn’t be over cooked. I have used carrots, French beans, cauliflower and green peas. If you don’t like any of these vegetables you can omit it.

Recipe

Basmati Rice – 1 cup

Carrot – 2

French beans – 100 gram

Cauliflower florets – 1/2 cup

Green peas – 1/2 cup

Green chilli – 3, finely chopped

Green cardamom – 4

Cinnamon – 1 inch piece

Cloves – 4

Bay leaf – 2

Cumin seeds – 1/2 teaspoon

Refined oil – 2 tablespoon

Ghee or clarified butter – 2 tablespoon

Salt – 1 & 1/2 teaspoon or to taste

Sugar – 2 teaspoon or taste

Bengali garam masala – 1/2 teaspoon

Method

1. Rinse the rice well. Soak in water for 15 minutes. Drain the water and keep aside.

2. Heat sufficient water in a pan. When water starts to rolling boil add the rice. Stir and cook until rice becomes soft. Rice shouldn’t be mushy. Keep checking, remove from heat when 90 percent cooked. Check the rice by pressing between your fingers. Strain the rice immediately on a colander to drain the water well.

3. Spread the rice on a plate to cool down. Add salt and sugar and mix well. Add sugar according to your taste. I have used 2 and 1/2 teaspoon sugar, but you can use less sugar. But don’t skip it, add at least 1 teaspoon for taste. Be careful, rice shouldn’t be broken.

4. Wash all the vegetables well. Chop French beans into 1/2 inch pieces. Peel the carrots. Chop into small cubes. Cut the cauliflower into small florets.

5. Marinate the carrots, beans and cauliflower florets with little salt.

6. Crush green cardamom, cinnamon and cloves in a mortar pestle.

7. Heat ghee and oil in a pan or wok. Fry the carrot cubes. Transfer fried carrots to a plate.

8. Now fry the French beans for 1 – 2 minutes. Beans should be remain green. Remove the fried beans from oil.

9. Fry the cauliflower florets till golden brown and remove from oil.

10. Fry the cashew nuts till golden brown and remove from oil. Fry the raisins. When raisins starts to fluff up immediately remove from oil. You can use the raisins without frying if you want.

11. Add cumin seeds, bay leaves, crushed cardamom, cinnamon and cloves in the same oil ghee mixture. When cumin seeds starts to splutter and green peas and finely chopped green chilli. Sprinkle little salt. Saute till green peas becomes tender. To add onion see notes.

12. Now add rice, fried cashew nuts, raisins and all the fried vegetables. Mix well.

13. Fry for 2 – 3 minutes. Stir gently. Rice should be intact. Add 1/2 teaspoon Bengali garam masala powder, mix well and switch off the heat. Your Bengali style fried rice is ready. Serve hot with kosha chicken, fish kalia, dum aloo, dim kosha, chhanar dalna, mutton curry, chutney or any curry.

Notes

1. You can use sliced onion if you want. Add sliced onion after adding cumin, bay leaves, cardamom, cinnamon and cloves and fry. Add green peas when onion becomes light brown.

2. Add green chilli according to your taste.

If you tried my recipe, you can share your food pictures with me in the social network sites by using hashtag, #batterupwithsujata I would love to see your creations.

I would love to hear from you. Please share your thoughts suggestions in comment.

Please visit my facebook page and hit the like button to get the latest update

Facebook page

Follow on

Twitter

Instagram

Pinterest

Saffron Rice With Pickled Jalapeno And Ginger Julienne

Saffron rice with pickled jalapeno and ginger julienne. A no onion garlic aromatic rice with fried paneer or cottage cheese cubes, saffron or kesar and all the aromatic whole spices. Easy to make and absolutely delicious one pot rice dish. You can enjoy it without any side dish. Add lots of dry fruits of your choice and enjoy.

I used pickled jalapeno because I love the taste but if you want you can use chopped green chilli instead. Or you can use little more pickled jalapeno pieces if you like. It will be a great party dish with spicy curries. You may like some more one pot rice recipes on this blog. Click on the name below for recipe.

1. Mexican green rice

2. Tricolor rice

3. Carrot rice

4. Mexican rice

5. Beetroot rice

6. Mint rice

7. Spanish moulded rice

8. Aloo chutney pulao

9. Korean rice or Korean egg fried rice

10. Corn peas barista fried rice

11. Easy pulao or one pot rice

Sending this post to 266 #Foodiemonday bloghop. This week’s theme is Exotic Saffron suggested by Mayuri Patel who blog at Mayris Jikoni. Mayuri is a very talented blogger. She always amazed us with her different continental, traditional and baked dishes. You will definitely love her different types of bread recipes. I have to try her Onion olive bread, Semolina sesame seed bread and many more. Also check out her different mouthwatering cake recipes.

Long grain basmati rice is best for this recipe. But you can also use any aromatic rice like Gobindobhog rice, Indrayani rice etc. Long grain rice looks good. As I mentioned above if you don’t have pickled jalapeno, use chopped green chilli instead. You can use cauliflower, beans, carrot or any vegetable in this rice. Chop and fry the vegetables before adding to the rice. If you don’t like to use ginger julienne then you can use minced or grated ginger. Serve this delicious and flavorful rice with any spicy curry. I have served it with dim kosha or spicy egg curry. I will share the recipe soon.

Recipe

Basmati rice – 1 cup

Saffron – 1/2 teaspoon

Green peas – 1/2 cup

Pickled Jalapeno – 8 – 10 pieces

Ginger – 1 inch piece, julienned

Paneer or cottage cheese – 1/2 cup, cubed

Cashew nuts – 2 tablespoon

Raisins – 2 tablespoon

Green cardamom – 4

Cloves – 4

Cinnamon – 1 inch piece

Mace or javitri – 2 strands

Star anise – 1

Bay leaf – 1

Cumin seeds – 1 teaspoon

Salt to taste

Sugar – 1/2 to 1 teaspoon or to taste

Turmeric powder – 1/4 + 1/4 teaspoon

Oil – 1 tablespoon

Ghee or clarified butter – 2 tablespoon

Water – 2 & 1/2 cup

Method

1. Rinse the rice well. Soak in sufficient water for 15 minutes. Drain the water and keep aside.

2. Mix saffron with 1/4 cup hot water.

3. Cut the paneer or cottage cheese into small cubes. Marinate with little salt and 1/4 teaspoon turmeric powder.

4. Peel and chop the ginger into thin slices to make julienne.

5. Chop the pickled jalapeno into small pieces.

6. Crush green cardamom, cloves and cinnamon in a mortar pestle.

7. Heat oil in a wok. Fry the cashew nuts. When cashews becomes light brown remove from oil.

8. Now fry the marinated paneer or cottage cheese cubes till brown. Remove the paneer cubes from oil.

9. Add ghee or clarified butter. Add cumin seeds, bay leaf, star anise, mace or javitri, crushed green cardamom, cloves and cinnamon.

10. When cumin seeds starts to splutter add ginger julienne and fry for a minute. If you are using green chilli add it with ginger julienne.

11. Add turmeric powder, pickled jalapenos and green peas. Stir well.

12. Add drained rice, salt, sugar, fried paneer or cottage cheese cubes Stir and saute for 1 – 2 minutes or till the rice coated well with ghee.

13. Add saffron mixed water, fried cashew nuts, raisins and remaining water. Mix well. When water starts to rolling boil, cover and cook on high flame for 15 minutes.

14. Reduce the heat. Stir the rice. Cover and cook again on low heat for 10 minutes or till the rice becomes soft and water absorbed completely. Keep checking in between. If you want more soft rice then you can add 1/4 cup water more and cook for a few minutes more. Fluff the rice gently.

15. Garnish with fried paneer cubes, ginger julienne, saffron, jalapeno and fried cashew nuts. Serve hot with raita or any spicy curry. You can get some curry recipes here.

Notes

1. You can use more dry fruits if you want.

2. If you don’t have pickled jalapeno use 2-3 chopped green chilli.

3. Small pieces of cauliflower, beans or any vegetable can be used with rice. Fry the vegetable pieces before adding in the rice.

4. If you don’t have star anise omit it.

5. You can use minced or grated ginger instead of ginger julienne.

If you tried my recipe, you can share your food pictures with me in the social network sites by using hashtag, #batterupwithsujata I would love to see your creations.

I would love to hear from you. Please share your thoughts and suggestions in comment.

Please visit my facebook page and hit the like button to get the latest update

Facebook page

Follow on

Twitter

Instagram

Pinterest

Crispy Bitter Gourd And Potato Or Aloo Karela / Less Oil Recipe

Crispy bitter gourd and potato or aloo karela. Crispy but cooked with only one teaspoon oil in halogen oven. You can also use your microwave or OTG to bake or grill the karela and potato in the same way. Or use your air fryer to fry with less oil. An easy to make yet delicious no onion garlic bitter gourd recipe.

Bitter gourd has numerous health benefits.

Bitter gourd is a rich source of vitamins and minerals. It contains iron, magnesium, potassium and vitamins like A and C. It contains twice the calcium of spinach and beta-carotene of broccoli. Various anti-oxidants and anti-inflammatory compounds are present in bitter gourd.
It also helps in lowering the bad cholesterol levels, thus reducing the risk of heart disease and stroke. That’s not all. It strengthens the immune system, improves respiratory health, boosts skin health and contains anti-ageing properties. Source

You may like some more bitter gourd recipes on this blog.

1. Bitter gourd dopyaza

2. Gujarati bitter gourd stir fry

3. Bitter gourd with tomato

4. Sukto

And some more recipes using halogen oven.

1. Cauliflower corn butter masala

2. Olive Jalapeno savoury cornbread

3. Greek pizza

4. Beetroot dip

5. Moong dal bhaja pithe

6. Grilled potatoes

7. Piperade with Indian spices

8. Baked egg burger

9. Cooking in halogen oven

This week our 262 #Foodiemonday bloghop theme is Bitter But Good suggested by Sasmita who blog at First Timer Cook. You will definitely love her mouthwatering recipes. I would love to try her Dalgona muffins and also visit her YouTube channel for beautiful and heavenly Layered coffee panna cotta and many more.

Recipe is very easy to make. Slice the potato and bitter gourd and boil with salted water till fork tender. Drain the water completely and marinate with salt and spices. I have used coriander powder, turmeric powder, Kashmiri red chili powder and little garam masala with salt. You can use any spices of your choice. I don’t like bitter gourd dishes hot so used Kashmiri red chilli powder for colour. You can use hot variety red chilli powder or black pepper powder if you like. You can also add amchur or dry mango powder if you want. And use very little oil to spray over marinated potato and bitter gourd before baking. You can use olive oil or any other oil of your choice.

Recipe

Karela or bitter gourd – 1 large

Potato – 1

Salt to taste

Coriander or dhania powder – 1/2 teaspoon

Turmeric powder – 1/4 teaspoon

Kashmiri red chilli powder – 1/2 teaspoon

Garam masala powder – 1/4 teaspoon

Oil – 1 teaspoon

Method

1. Peel and chop the potato into round slices.

2. Discard the both tips and chop the bitter gourd or karela into round slices.

3. Wash well and drain the water.

4. Boil the karela and potato slices with 1 cup water and 1/2 teaspoon salt for 4 minutes or till fork tender. Don’t make mushy. Check with a knife or fork.

5. Drain the water and let it cool down. Marinate karela and potato slices with little salt, coriander powder, turmeric powder, garam masala powder and Kashmiri red chilli powder.

6. Spread the slices on a baking sheet. Spray little oil all over it.

7. Press the speed up button. Set temperature at 200° and set the timer for 5 minutes. Keep an eye if the slices becomes golden brown switch off the oven.

8. Turn the slices upside down and cook again at 200° temperature for 4 minutes or till golden brown. If require cook for a few minutes more.

9. If you are using microwave convection mode or OTG follow the same method. Sprinkle little chaat masala powder before serving if you like. Serve with rice or roti as a side dish.

Notes

1. You can use any spices of your choice.

2. Red chilli powder or black pepper powder can be used instead of Kashmiri red chilli powder.

3. You can use any oven to make this crispy bitter gourd.

4. You can use chaat masala or amchur/ dry mango powder if you like your karela little tangy.

If you tried my recipe, you can share your food pictures with me in the social network sites by using hashtag, #batterupwithsujata I would love to see your creations.

I would love to hear from you. Please share your thoughts and suggestions in comment.

Please visit my facebook page and hit the like button to get the latest update

Facebook page

Follow on

Twitter

Instagram

Pinterest